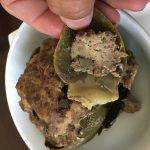
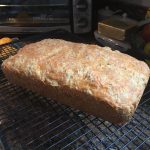
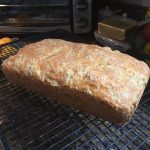
Meat Buns Nebraska style

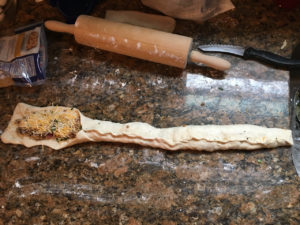
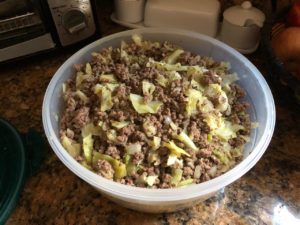
For last week’s Bookclub, I needed a recipe that would be connected to the theme from the book Oh Pioneers by Willa Cather.After searching around a bit – I found several versions of a local version Runza. Similar to other regional “hand-held meat buns”,  such as the spicey one I did in a previous Bookclub. This was version seems to be popular in the books region oNebraskaka with the addition of cabbage to the ground beef and onions. I had some time so I also made a rolled loaf version using pizza dough that mimicked the Cheese Bread recipe I posted about back in November.

Here is my version of the Runza recipe;

Runza

  • Frozen Bread Dough (I used the frozen bread dough loaves from Safeway which comes in a three pack. Each loaf, thawed allowed to raise will make 6-7 buns)
  • 2 pounds ground beef
  • 1 head of cabbage
  • 1 yellow onion
  • garlic salt/minced or whatever you like for garlic ( I use the Sage, Thyme & lemon seasoned salt I make)
  • 2 TBSP butter.

Instructions

Step 1

  • Brown ground beef and drain fat, season with salt and pepper ( you can do this in two pans if you like)
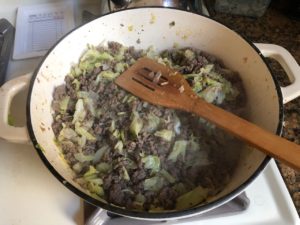
  • Add chopped onion, garlic, butter, and chopped cabbage. Cook until wilted (7-10 min) on med-high. Mix with meat if done separately and let cool.
  • Note: You can also brown meat, season, then set aside and in a second pan sauté cabbage, onion and garlic, season with salt and pepper at each step. Then toss together. 

Step 2

  • Follow package instructions for bread dough (or make your own); Let the dough thaw covered and raise for up to 5 hours or as directed on your dough.
  • Cut and Roll into small sections.
  • Preheat oven to 350

Step 3

When ready to make

  • Flatten each section
  • Add ¼ to ½ cup of the cooled beef mixture to rolled out sections of dough. Fold and seal in half/wrap/shape how you wish but gently compress the air out of each bun.
  • Let sit covered with plastic wrap 20 min. (Or freeze them for later)
  • Prior to baking coat with melted, salted butter, oil or an egg wash. Omit butter topping if you want a crisper bun
  • Bake uncovered middle rack for 30-35 minutes at 350 degrees.

A few hints;

  • Pizza dough works well too.
  • Mix in small cubes of cheddar cheese in the cooled mix for a different variation.
  • Update: if you have leftover stuffing it makes a great addition to a simple soup. Simmer carrots, veggie or chicken stock, a few bay leaves, parsley, a can or two of drained canned beans and pepper for 50 mins.
  • Then add the meat & cabbage stuffing, ( you can also toss in leftover rice or pasta) simmer on med for another 30 min more. Toss in some halved cherry tomatoes. Serve

SaveSave

The Value of Holiday Cheer; Gestures, Thank You’s & Acknowledgments

This is a good time to consider the art of thank-you’s and gestures.

Like it or not, Thanksgiving has passed and we are officially on the close-out of 2017.

Every year about this time I start messages from folks, asking me about our annual Orphans Holiday Party held each year around late December and how will I be managing to pull it off this  year or how do I have all that stuff to prepare for it.

As the summer wraps up, the fall is normally one of my favorite times of the year and the Orphans Holiday Party is one of the highlights of the year to share time with friends.

This year, I seemed to get several inquiries asking me about my thoughts on the customs, gestures, and traditions that go along with being a guest. You know, those commonly held, or historically offered niceties that civil society says is “what polite society” dictates as a way to thank a host.

I started this post as I sat on a flight from DC just before Thanksgiving but got sidetracked catching up till now. So I figured  I would try to jot out some thoughts as I check my “to be answered” folder of questions.

What is the scoop on “Invitation Protocols”?

Frank,   It’s that time of the year when I have started to get invitations to dinners, brunches etc. What do I bring ? Do I need to bring something?  Is there a universal set of gestures I should know?— TK

This is a great question and while I wouldn’t say I am the “arbiter of good taste and manners” all the time –  I have some opinions on what I believe to be common courtesy and reflect a gesture of appreciation for your host. (For the sake of ease when I write “host(s) it is implied as “host or hostess”).

Mostly it’s about three things:

Appreciating the gestures of being invited

Acknowledging the effort and work that goes into that brunch or party

Common Sense understanding that tokens & gestures do matter to some, but doing something needs to not derail the host/hostess’s game plan.

Appreciation

This is key – when you are invited to something – your host(s) has taken the forward thought to plan, design and arrange what they hope will be a memorable time. During the days that lead up even to the smallest luncheon or brunch to the largest open house – tension rises and many last minute “fixes” are in full implantation mode.

Ensuring that your host(s) know how much you appreciated the invite, the time you had, and any special moments that the event made for you. These could include photos, gestures, networking or even a memory made is a great way to appreciate the experience.

3 simple gestures to show your appreciation

Ask: If you know you are going to the store the day of the event. Maybe in the morning (or the day before). Call and ask if you can pick anything up that may have been forgotten. But be prepared to get those supplies back to the host early so that they have time to use them as needed. (Hint: even if you don’t need to go to the store, but you have the free time and willingness to help, the offer to do so is huge)

Offer to stay late to clean up; come the “witching hour” when the bulk of the guest have left, most of us that toss the party, push through on adrenalin alone. So come the end, the energy runs out. Nothing says “appreciation” better than “Frank, We are going to stay and help you clean up; what do you need to be done

Check in after the event; If you aren’t able to attend or have conflicting events, let your host know as soon as possible. then a day after the event, drop the person a call, text or email asking how it went. That lets the host know you valued the invitation and was disappointed at not being able to attend. Who knows you might even get an invite for coffee or dinner to help use up those leftovers.

Acknowledgment

Look I can say how much I love to throw a party – and I do. But being acknowledged for the effort I put is, while it may not look like it’s important, it is.

Those of us that like to entertain and create these moments, feed off the excitement of the planning and staging something that will be memorable. We often take special care to blend in specialties to make everyone feel good. So hearing someone acknowledge the time and effort that goes into it, or noticing the small personal touches go a long way.

For instance, for me, I take pride in creating a menu that includes dishes and options that encompass vegan, gluten-free, dairy-free needs without them feeling like an aside. I use these as a way to “challenges” me to expand my food thinking and try new dishes that I might not generally eat myself.

In fact, some of the results can be stellar, like the gluten-free orange cardamom granola and spinach stuffing I created for a stuffed turkey one year. That recipe has now become a great alternative to my regular “old school” recipe.
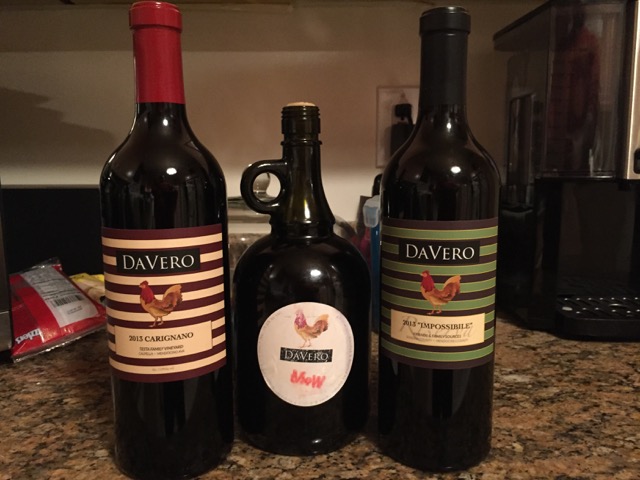
One simple way to show your acknowledgment is to let the host know with a simple gesture says ” you noticed something that made them feel special”. One way to send a small token; this could be something fun, whimsical, or useful and in the theme that the host would enjoy. Feel free to ask for the recipe or the brand and where they found it. We generally love to tell you; once the event is out of the gate. For those of you “less creative types” here are a few ideas that I either send or have enjoyed receiving:

For those of you who know how “anal” I can be, will understand why this Magnetic Dry Erase Weekly Meal Planner 11X17 Whiteboard ($12.99) tickled me: 

Many of us make notes for the planning of the next event and your comments, feedback, and notes are ways we know what to keep or use again so journals such as this Refillable Travel Diary Notepad ($15.99)

Another way to acknowledge the effort is to share your own specialty ideas. If you have special food issues and knowledge of brands, recipes (or even well-loved book cook) and ideas for substitutions. Those I keep handy for the future. A great way to do this is making use of mail order or online services that stock your preferred “finds”. In some cases, you may even find them on Amazon.com.

Common Sense

Tokens and gestures to show your appreciation with a thank you are long-held traditions. They may changes from time to time, perhaps with an updated look or trend – but the basics remain the same.

If you are invited to a small dinner party, brunch or dinner:

Cut and arranged flowers, potted plants are perfect thank you gestures. But if you really want the host(s) to know you are excited or had a good time, have them delivered the morning of the event so that they have time to place them in a spot instead of having to figure out a frantic fix while trying the deal with the last minute preparations. (Hint: you really want the host to love you? Call  a few days before and say you want to send over an arrangement to the table or the fireplace and what colors is the room or theme). Or even better, have something delivered a few days after the event for the host(s) to enjoy a lovely personal note inside.

At the holidays (or any time of the year) if you know the host has a fondness for collecting something; I work hard to custom select something for them. In my case, I have a “story tree” at the holidays where most of the ornaments come from friends & family.  So I often get unique ornaments from places I might not have visited as a thank you or clever people found out I keep a “gift” list on Amazon of stuff that I want (and eventually plan to buy but should someone ask – it’s easier to send them to the list)

A few thoughts for those that haven’t got a clue yet:

Resoprocity is equally as important. 

Even the most gregarious and “party loving” host, doesn’t always want play host.  Offering to have the host over for a dinner to say thank you is perfect. It doesn’t have to be fancy, it’s the fact that you took the time to say thank you and take the night off is what matters. If you don’t cook, then offer to take them to dinner or at minimum, send them a gift certificate to a store with a fun personalized note “saying you are happy to taste any new dishes this inspires“.

Larger events like open houses, parties etc

These are less formal or because of the crowd less likely to need something to be given. But special bottles of wine or alcohol is always a nice touch – but remember to add a personal note – with your name and mention why this beverage is significant. Is it a special year or from a vineyard you love. Is it a hidden wonder etc. I know one of my “go to” gifts this year will be a vodka that has a dedication of funds toward dog adoption. Or try your hand at making something. The last few years I have made and jarred gifts to give to hosts; preserved lemons, pickled vegetables are two that get mentioned a lot. Remember to include the recipe tag and hold long they will keep with them.

What about Potlucks? Or invitations to meals or parties held at a restaurant?

Potlucks play a unique role. If you agree to bring a dish, let the host know early on what you are bringing and ask when do they want it. Nothing puts a host on edge more than during a potluck when someone arrives late with a dish and half the food has already been served. You can always drop your dish offer earlier if you think you will be late.

If you aren’t bringing a dish to a potluck – any of the other ways listed above will work – but letting the host(s) know you would like to offer to help out with clean up is always welcome.
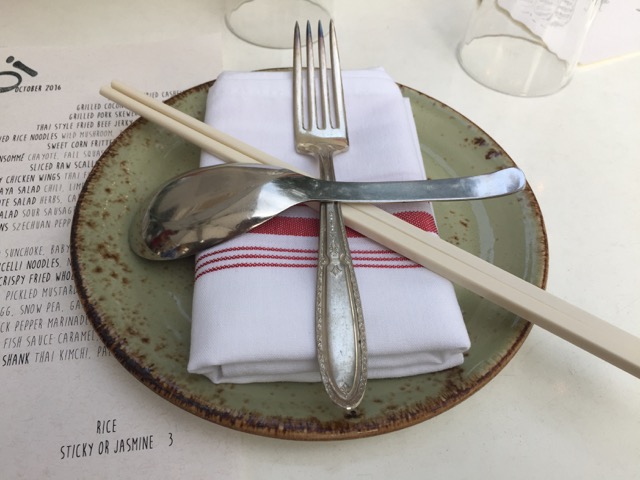
Resturant or venue-based dinner parties: If you are invited to a dinner party held at a restaurant and the host has made it clear that you are guests (i.e. they are covering the costs of the meal) can be tricky. I rarely want to bring in a bottle of something or a gift as I know the hosts then have to figure out a way to get them all home.

So try to find out what the host’s plan is.  For a birthday or anniversary held at a beloved resturant or because of the host(s) lack space at home, then it’s likely they may either have a “no gifts” on the invite or will have a place identified to put cards, gifts, and gestures. Just remember to secure your card well so they don’t get separated. I can’t tell you how many times I have ended up with orphan gifts and gift tags after we get them home.

If it is a more casual setting or annual open house type thing, I would lean towards sending your acknowledgment after the event (use any mentioned above – I personally love waking up to breakfast or brunch baskets) and have it delivered to them at home.

When all is said and done  

Whatever you send or do, it should be significant to the host, serves as a way to show you care, and how you felt special about being included and appreciate the effort.

You can blend all or any of these ideas into one “thank you”. Gifting the host with that special dietary cookbook you love, with a note inside letting the host know much that it meant including their food sensitivities into the party menu and you are wanting to share this cookbook… etc. Those personal touches are the part I like best.

Over the years I have had several “thank you’s” that stand out as memorable to me:

One was to find a case of small batch, specialty tomato sauce delivered as a thank you from two guests who had been to a dinner party at my home. the brand was a favorite they thought I would enjoy being introduced too.

Another was taken right from the “Martha Steward school of entertaining” when the morning after a rather large party, my doorbell rang and I opened it to find a box with all my favorite breakfast foods; bagels, lox, cream cheese, hard boiled eggs, a loaf of poppyseed bread, jam, ground coffee ready to be made and savored.

Another was a gift certificate good for brunch at a restaurant we had spoken about but that I hadn’t gotten a chance to try yet. Included with a thank you card reminding me of our chat about how much they liked the food and they thought I would as well.

The common theme here is personalizing it, make it memorable and do it timely.

I have left the comments open on this post so that others can share ideas as well…

SaveSave

SaveSave

SaveSave

SaveSave
Bite-Cap3: The Final Chapter

Bite-Cap3 … well, it is Halloween, the most notoriously themed holiday for “sequels, prequels, and new adaptations”.

As many of you know or saw on Facebook – Sunday was our monthly book club. This months book was a Werewolf book; Mongrel by Stephen Graham Jones

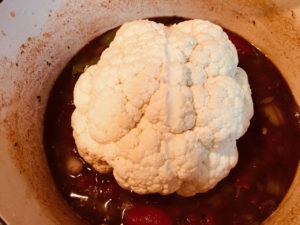
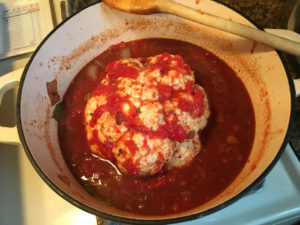
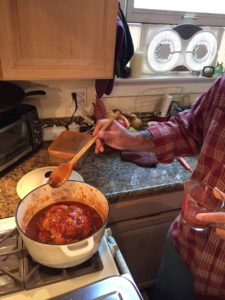
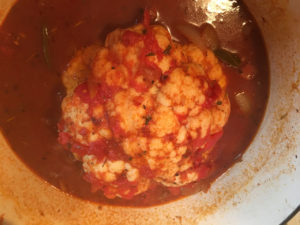
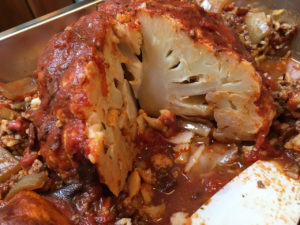
So trying to stay in tune with the book and determine what to make to eat – I recalled a recipe for Braised Cauliflower I had been wanting to try. Which when I remembered, it looked a lot like brains. Which I imagine why when it is photographed it gets special treatment. So that started the menu. With some help from Lidia Bastianich’s cookbook Mastering the Art of Italian Cooking, my variation to her standard recipe for Braised Cauliflower is below. I also checked out several other versions including one at NYT and they all offered options and flavors and cooking technique (oven or stovetop). But I stayed with the style that Lidia’s version offered.

But I couldn’t stop there –

Last week I also caught an episode of Nancy Fuller’s FarmHouse Rules For the  Meaty Intestines – and I thought that would marry well with the brains.

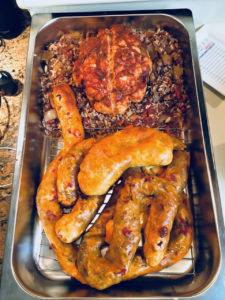
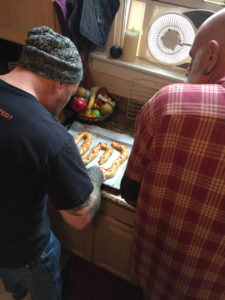
Stuffed Bread intestines – this originated from Nancy Fuller’s FarmHouse Rules shown for Halloween on Meaty Intestines.  But since I wasn’t going to make a slow-cooked pork butt, which is what she used to fil her “Intestines”.  I improvised the stuffing some. (Note: The leftover stuffing is what I mixed with the leftover sauce and onion from the Braised Cauliflower and places around the Brain in the pan)

But the ones I served at Bookclub revised as follows:

Braised Cauliflower Brains

Ingredients

1 teaspoon chopped garlic
2 tablespoons
4-6 ounces chopped Bacon (I use a black pepper thick cute sliced)
1 large onion, large diced
1 large head of cauliflower (keep it whole)
1 can 28 ounces can plum tomatoes (San Marzano work well), plus the amount of one can of water
1 teaspoon salt
1 teaspoon fresh thyme
1/2 teaspoon red pepper flakes
2 teaspoon Worcestershire sauce
3 bay leaves
1/2 teaspoon of dried rosemary
1/4 cup of red wine vinegar (or you can use 1/4 cup red wine)
2 teaspoons Parmagrante paste (omit this if you use wine)


 Instructions

In a Dutch oven over medium heat:

Add oil and bacon, cooking off until almost crispy, then add onions.

As the onions soften, add red pepper flakes. Stirring frequently.

Open and pour the tomatoes into a bowl and hand crush them ( I left some chunks for affect) and pour entire can, along with adding enough water the fill the empty can with water to the pot.

Pour the crushed tomatoes into the pot and then, adding enough water the fill the empty can with water into the pot.

Add Bay Leaves, Thyme, Rosemary, red wine vinegar, Worcestershire sauce and pomegranate paste (You can adapt for personal  taste – if you have red wine handy – swap that out for vinegar and pomegranate paste )

Stir and raise heat to a low simmer, place the head of cauliflower in the center.

Spoon some of the mixture over the head of cauliflower, like you are giving it a bath…

Bring back to a simmer and cover.

Cook for 25 – 35 minutes. It is done when a knife slides in easily.

Covered it will keep warm for a while or turn the heat back on to bring back to temperature when serving.

Serve by slicing or break it up as you please


Stuffed Bread intestines

– this originated from Nancy Fuller’s FarmHouse Rules shown for Halloween on Meaty Intestines.  But since I wasn’t going to make a slow-cooked pork butt, which is what she used to fil her “Intestines”.  I improvised the stuffing some. (Note: The leftover stuffing is what I mixed with the leftover sauce and onion from the Braised Cauliflower and places around the Brain in the pan)

Ingredients

Two (2) 13.8-ounce package pizza dough (I removed them from the container and wrapped in loose plastic wrap prior to using)
1 medium onion -small  dice
2 Jimmy Dean Sausage roles ( or any kind of ground pork will do)
1/2 cup packed fresh cilantro leaves, roughly chopped
3/4 cup shredded cheese ( I used  a mixture of Cheddar and Provolone cheeses)
1/2 teaspoon red pepper flakes
2 large eggs
1 – 2 tablespoons tomato paste
All-purpose flour, for dusting work surface
1 box of long grain rice and almond mix
1 tablespoon of pomegranate seeds (optional)


 Instructions

In a Dutch oven over medium heat

Add oil and cook the pork sausage, break it up as it cooks -but you don’t want is so small that you haven’t any texture.

Add onion, red pepper flakes, salt, and pepper stirring frequently.

When done, remove from heat and add 1 tablespoon of pomegranate seeds (optional)

Mix well and leave to cool uncovered (you can make this mix the day before and then use the mix on the day you need it for.While the meat cools, prepare a box of long grain & almond rice mix but omit the seasoning packet. Once made – mix it into the meat & rice mixture

While the meat cools, prepare the box of long grain & almond rice per manufacturers instructions mix but omit or use less than half the seasoning packet.

Once made – mix it into the meat & rice mixture

On the day you plan to bake the “Intestines” off:

On a lightly floured table, roll out the dough into so you cut it into 3-4 in wide strips however long you want them to be. Note: One thing I did was removed the dough from the tobe container the day before so I could let it breathe a bit and soften to room temperature before rolling.

Lay the meat mixture down the center, add shredded cheese alongside it, and the cilantro.

Now seal the edges, keeping the tube affect. Don’t worry much id they look a little ragged -that helps the effect.

Place on parchment covered sheet pans.

Bake in a preheated 375-degree oven for 25 – 30 min, switching pans 1/2 way through the cooking.

Hints

I especially love the tip from on the recipe – about using a wash of  1 – 2 eggs and 1-2 tablespoon of tomato paste whisked together to make the pre-bake glaze. That is what gave it the “intestinal” color.
Another hint is to use some of the tomato paste and dab it on the precooked bread to give it a “gashed” look.

Afer 5 min cooling, remove and let cool on a rack

Once baked and cooled a bit I laid them out as you saw to create an affect. I also mixed the leftover rice and meat with the sauce to serve it around the “brains” to help soak up the liquids and used a small rack, under the bread, in the serving pan, to keep them semi-dry.


SaveSave

SaveSave

Fire & Brimstone week

Early in the week, I started off with some “mummy wrapped” sausage patties. I found this silly recipe on one of those cooking magazines with a Halloween theme and couldn’t resist making them for Paul’s breakfast.

Midweek, with the fires still high and smoke and smell string, I stayed in as much as possible and tossed in a batch of Banana Bread; one to trade with a pal and one to save for us. For our version, I tried a recipe from my roommate’s grandmom of peanut butter frosting and tucked in a few Trader Joe’s peanut butter cups for fun.

With the rest of a busy week on deck, between some planning for two presentations and a “TED” style talk at Tech Inclusion this week, transitions in my own life and workplace and the dramatic unfolding of the devastation North of San Francisco from fires. I have been stockpiling my posts for tonight.

Anginette’s have been on my mind and I wanted to get a test batch up and out. Especially after a pal summed it up so nice on Friday; about it being time for cookies.  So Friday night I mixed up the batter for a batch of old-school anise #anginettes.  Then as the smoke settled back on Saturday, I gave them a quick 10 min bake to cool before glazing them in several colors and flavors. Pickled Avocados. I am gonna blame Ryan Knight’s mom on this today. Tried hers several weeks ago and was amazed. So put up a jar to Sunday dinner.

On Saturday I tossed up some quick Pickled Avocados. I am gonna blame my friend Ryan’s mom on. I tried hers several weeks ago and was amazed at the taste. So put up a jar to Sunday dinner.

😋 Don’t judge till you have tried them.  Note: it’s a perfect solution when you have several not quite ripe enough to eat and not sure you will get to them later in the week.


Princess Cake meets the bookclub boys with some help from a few friends

For the September Bookclub, we read; Spilled Milk. A story based on the real-life experiences of surviving child abuse, offered challenges for theme food. Especially so as not to also minimize the theme and subject matter.

After some thought, I latched onto a moment in the story where she gets to go shopping and while initially offered a chance at a new doll, she instead opts for a journal. A place to put her feelings and thoughts inside while keeping the outside what others expected of her.

I decided to attempt a retro “Princess Cake”, with a marshmallow fondant, as the dress base for the “pretty outside” covering what the story ultimately illustrates is the more complex and rich inner core. In this case, a cherry–almond nut cake. Ok now shopping for this, I did notice that my bags looked like I had 10-year-old girls at home… but I digress

The recipe I used was an adapted version but you can see a similar one here in the New England Today Blog from Yankee Magazine the only change I made was using almonds and I tend to like dark cherries, so I used the canned version instead of the super sweet maraschino ones they recommend.

As a backup, because every Princess needs a “plan B” I also made a Hot Milk Cake which was from my Mom’s Cookbook, as I had never made this recipe before I wasn’t sure of how it would taste initially. But after some sneaking and testing of the bottom – I found I liked the flavor as well, and while my initial concern was it was underdone – in the end – it had a good texture and could have come out a bit earlier. Since it was already made, it got gussied up this morning to take to our pals “10 year anniversary of meeting” brunch. It also being Castro Street Fair – I figured some pink sugar glitter over a simple milk & sugar glaze with lemon zest would do the job.

In the advent that she didn’t come out, I also knocked out one of my favorite adapted recipes from Martha Stewart for a quick Cheddar Bread. Today’s version had two other kinds of diced cheese and was laced with ground pepper, garlic powder, and herbs to give it a nice savory taste with brunch. topped with some honey-herbed butter – we were packed and ready to walk down to the Castro!


SaveSave

SaveSave

SaveSave

SaveSave

SaveSave

SaveSave

So much for a day off…

So we all love a day off. I know next week is going to be a bear of a week with writing – but I didn’t think today we be this full. It was the annual prep and cook day for Paul’s office picnic tomorrow. Thank goodness for Shadow helping today! (Rumor has it, I’m grill master too tomorrow).

Day “to do”

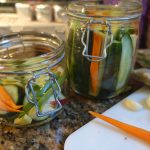
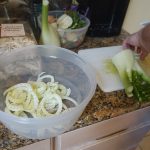
For our “bring” entree, a simple Chicken & Veggie egg bake with a caramelized onion bbq chutney. Then because the vegetables looked so good, some “quick pickled veggies”, a Fennel, Kale and Orange salad and for our  “bake off” entry; while not the more elaborate Chocolate Cherry Bread I mentioned in the past  this is an easier, no knead variation I made earlier in the week, got repurposed into a Bread Pudding with an orange zest cream cheese topping.

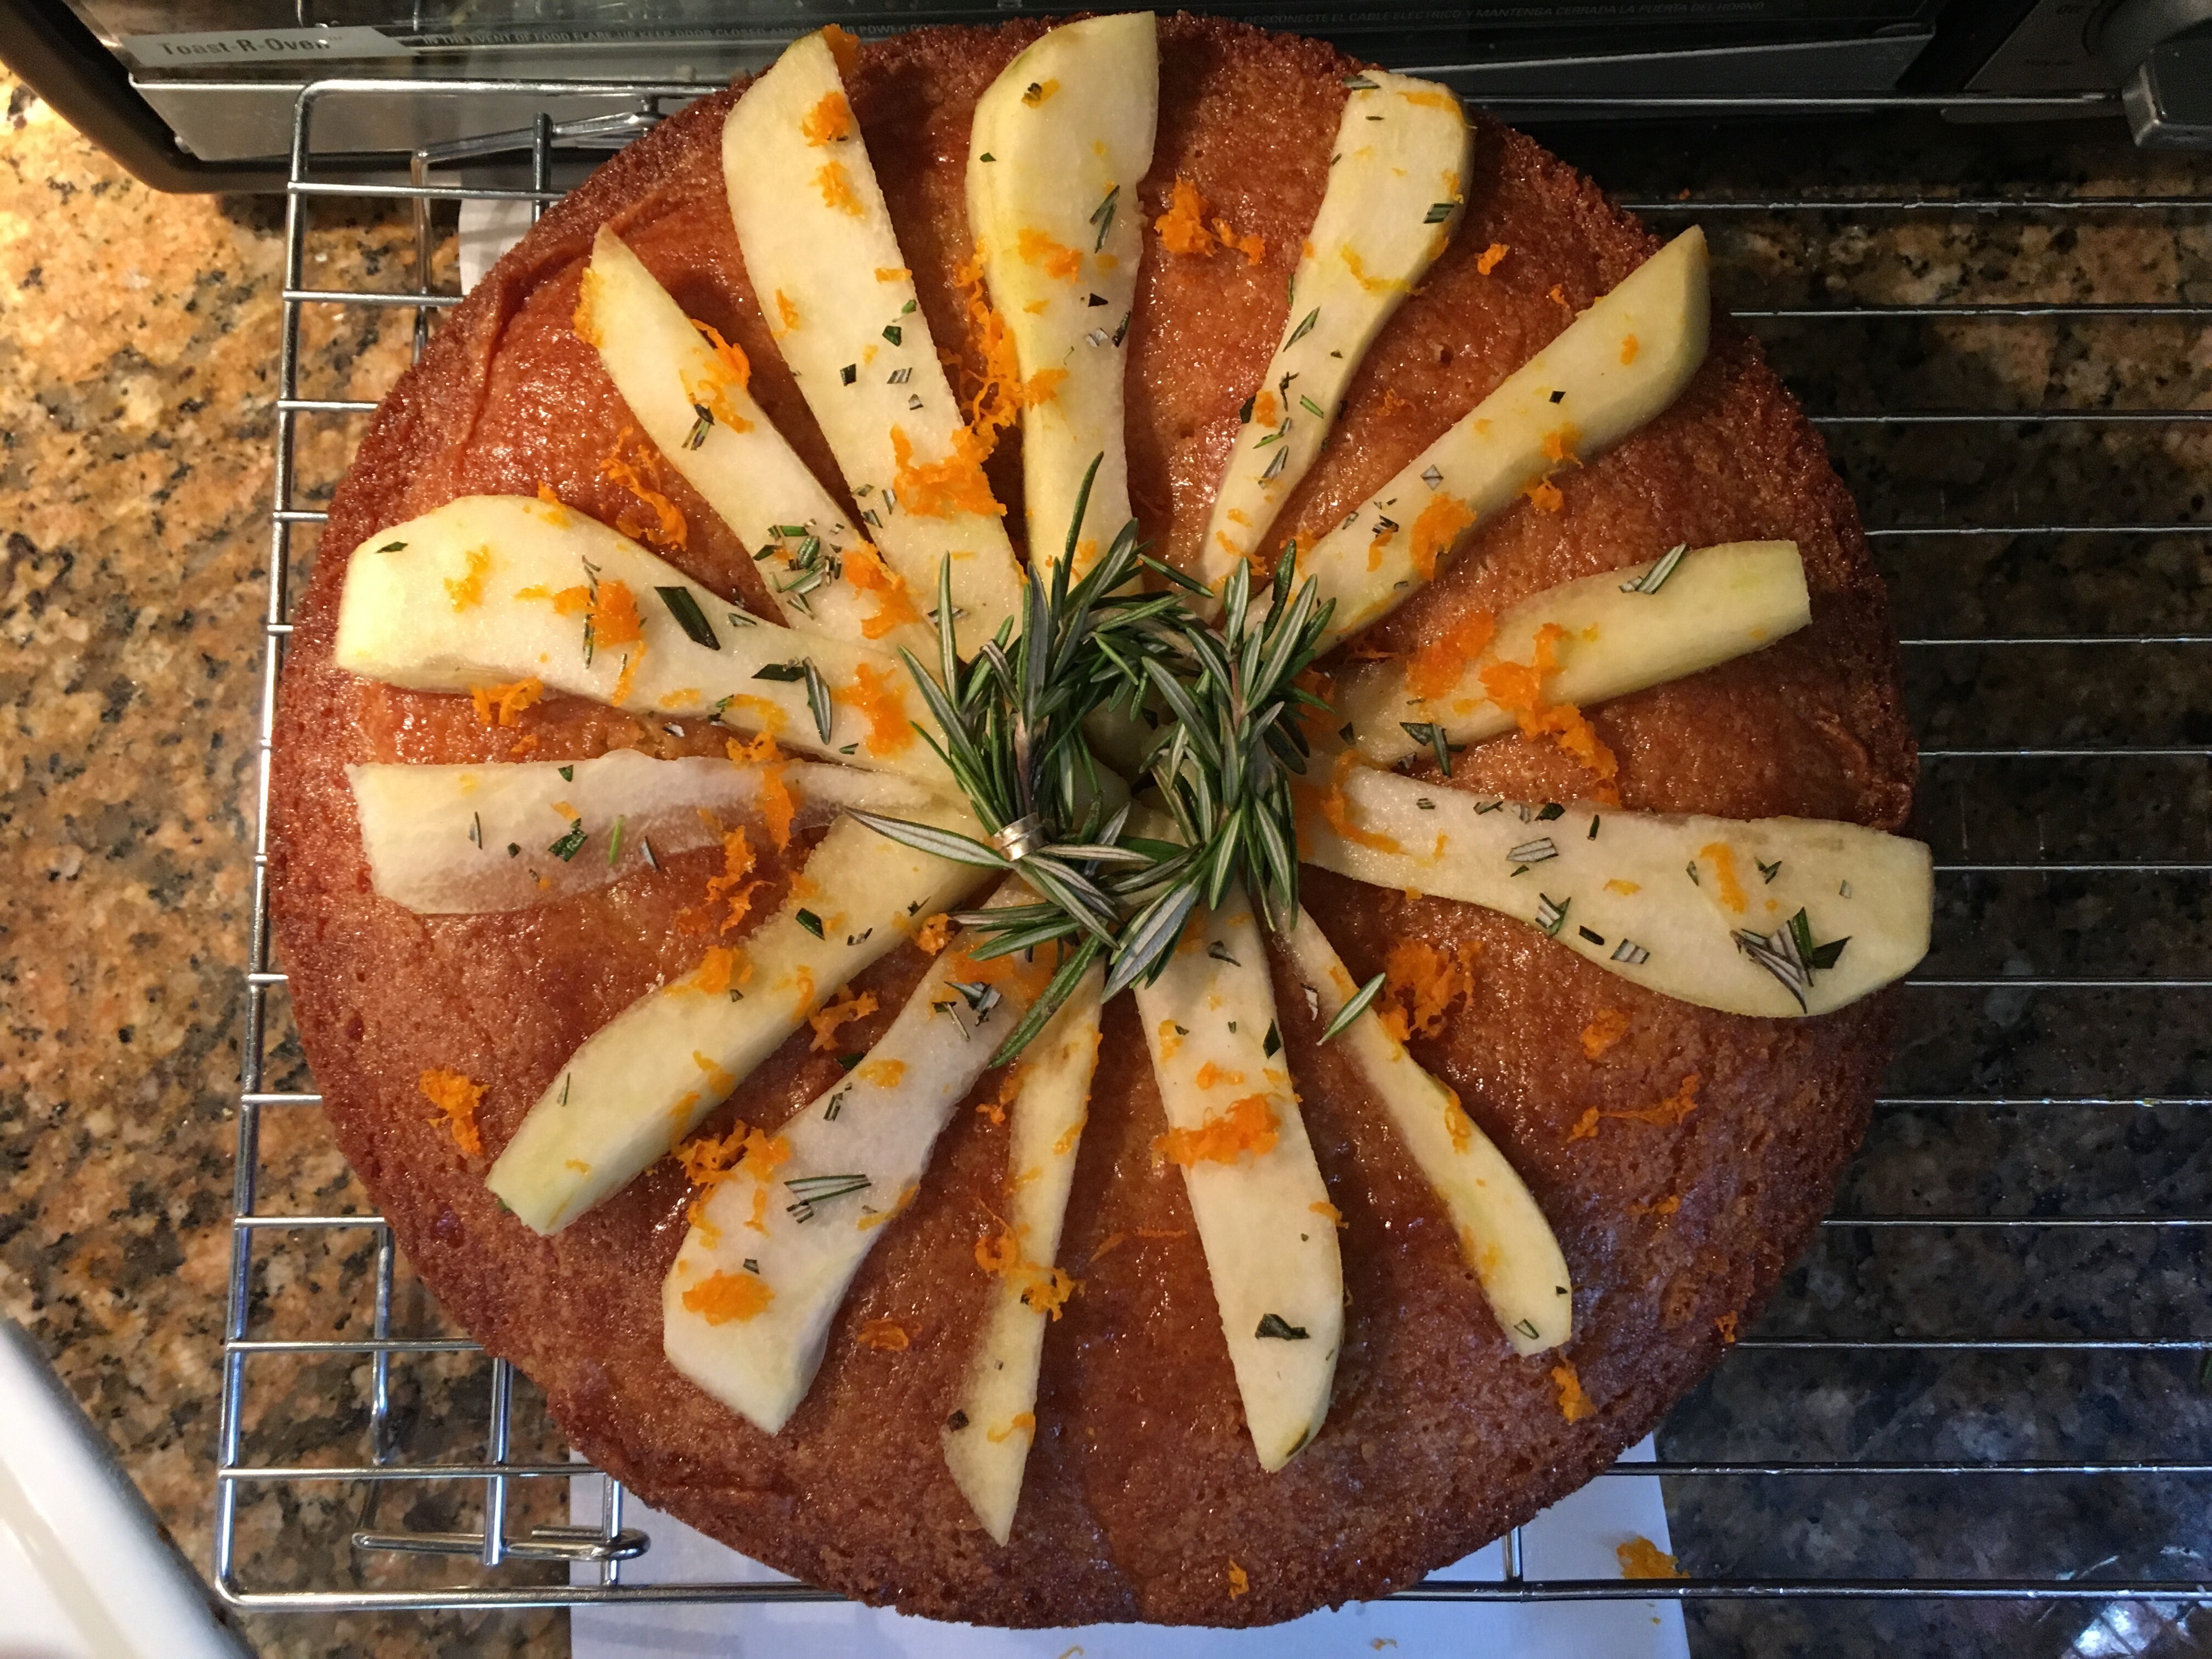
Then we needed to prep a quick Pear Cornmeal Cake with Rosemary Syrup for the other Paul’s birthday picnic that happens right after my Paul’s work one.

SaveSave

SaveSave

SaveSave

SaveSave

SaveSave

SaveSave

SaveSave

SaveSave

SaveSave

SaveSave

SaveSave

Monday Night “No Fry” Fried Egg Pizza

Some nights I just don’t have it in me to want to cook a full out meal. So it becomes one of those “discussions”. Eat out or forage. Luckily Paul likes or rather “loves” his eggs. So thats pretty much an easy fix for him. On the down side, our house we rent, doesnt have the best air flow inthe kitchen – so some cooking smells tend to linger. Especially foods that get fried.

So this is an adapted “fried egg” meal two ways; one straight forward and one nestled on a cornmeal pizza crust ( you can use any premade or even fresh dough as well).

Its really a pretty basic recipe and so easy – I didnt even take a lot of pre-prep images – so you are stuck with just the end results.

No fry, "fried egg pizza"; Crust Optional

A surprisingly easy way to make eggs, especially for those of us who have poor ventilation in the kitchen, but still want that effect of fried eggs. the addtional of a pizza crust, also means no extra toast.

  • 2-3 Eggs (Depends on your preference.)
  • 1/4-1/2 cup Chopped vegetables and meats (This is the perfect dish for leftovers)
  • 1/4-1/2 cup Chopped cheeses (Use what ever you have)
  • 2-3 tsp Grated Parmesan cheese
  • Spray cooking spray (I use either olive oil or regular style)
  • Salt & Pepper to taste
  • Chopped Fresh Herbs (Optional or if on hand)
  • 1/2 tsp Dried or fresh parsley or cilantro
  1. Preheat the oven to 425 degrees. If you have a pizza stone, use it and put it in the oven now to heat

  2. Using a small oven proof skillet (remember the handle will be in the overn so have mitts ready or a silecone handle)

  3. Spray the skillet bottom and sides, liberally with cooking spray (I tend to use the olive oil version, but any will do)

  4. Crack two to three eggs into the cold, sprayed skillet

  5. Gently top with sliced ham, vegetables, cubes of cheese, dried herbs etc. But try to leave the tops of the yolks free.

  6. Sprinkle with grated Parmesan cheese all over, including the yolks.

  7. Add salt & pepper to taste

  8. Move the setting on the oven to broil, high setting.

  9. Place the skillet on center of the top rack.  Cook for 6 to 10 minutes depending on how you like your eggs. At about five (5) minutes, remove the pan and gently tap the side of it against your palm to loosen the eggs from the bottom of the pan.

  10. When the eggs are done and the Parmesan cheese is browned, remove from the oven, slide onto a warm plate.

    Top with Saracha or Tabasco sauce, any fresh herbs and you’re good to go 

How to make the version with a crust;

  1. Use a pre-baked, small personal size pizza  (fresh dough or premade corn meal ones, even bobali’s) place on a pizza stone (or on foil right on the rack) in a preheated oven at 425 for 10 min.

  2. Remove the pizza stone and crust from the oven.  Top with a thin layer of flavored cream cheese spread (I use the cream cheese and chive spread).

  3. Turn on the broiler sitting on the oven to high

  4. Now it plays out the same as above; add assorted sliced/chopped meats vegetables and addtional cheese. Crack an egg or two in the center of the crust (they will shift a bit). Sprinkle with Parmesan cheese. Add salt and pepper to taste.

    Return “pizza” to the oven, on the top rack for 6 – 8 min (or the eggs are to your taste)

    When the eggs are done and the Parmesan cheese lightly browned remove from the oven, slide onto the plate.

    Top with Saracha or Tabasco sauce, any fresh herbs and you’re good to go

Lemons & Artichokes; now that’s a Sunday. 

Dino chillen

Dino “chillen” in the Kitchen. Daddy’s little “hoover”

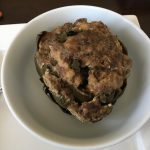
Meat stuffed Artichokes was on the menu last Sunday. While often a family holiday treat growing up. Living in the Bay Area gives me access to them much easier; But mostly this weekend, it was because my pal David and I stopped by some produce stands, on the way back from Santa Cruz and the artichokes looked so good. So went with the basic catch all recipe I use these days. Of course, it also being a warm weekend that meant I had a constant companion in the kitchen to help me cook and clean up the floor. So since it isn’t  my fault the weather shifted. I say so; buck up and stay out of the kitchen while these little babies simmer.

So lots of versions exist online both with and with out stuffing. Many restaurants also offer them grilled with a dip or stuffed with grated cheese and toasted bread crumbs (nice but sorta wimpy to me).

For me  – I always go back to the way we always had them growing up. A mix of ground meat (I like to use a mix of beef and sausage), parsley, the peeled and diced stems of the artichoke stalks (when cooked they get tender), seasoned bread crumbs, grated cheese, red pepper flakes, salt, and pepper, then the rest of the flavors change based on mood or season or whats available. Trim the tops of the choke so it’s flat at the top and clip the tips of the outer leaves. Spread the leaves a bit to make pockets for the meat. Lightly salt & pepper the insides of the leaves  (optional – you can also use any flavored seasoning mix you prefer). Then stuff the meat into as many crooks and crannies as you can and top with more meat. In a large pot, with a few inches of cold water. Place the chokes in and simmer until leaves pull out easily and meat is done. Cooke time is 60 -90 min (depends on size) covered. I included a formal recipe version below. What to eat with them? Well in our hours they were always a sort of add on to a big mean. A combo side and meat dish meet vegetable. But in the summer or warm weather months – it pairs great with a salad. Just have plenty of napkins. They can get messy to eat.

For those of new to artichokes – I can across this little guy showing folks how to do it!


Then for a treat,  later Sunday afternoon and for Monday’s Breakfast was a new variation on boxed lemon poppyseed loaf. This is your standard box mix with a few variations to amp up the flavor profile. Once I get it perfected I will share.

Meat Stuffed Artichokes

This is a variation of a version I grew up eating. In our house, we always stuffed them with a ground meat mixture.

  • 4 Artichokes (They should feel firm and heavy. I tend to like ones that are around the size of a softball over smaller ones.)
  • 1 lb Ground beef (more lean than not.)
  • 1 lb Bulk italian sausage (no casing) (seasoned pork also works well.)
  • 1/2 Grated Parmesan Cheese
  • 1/2 cup Parsley (chopped) (Dried is fine but reduce to 1/4 cup)
  • 1 cup Seasoned bread crumbs
  • 1/2 tsp Garlic powder (Optional)
  • 1 Egg (For use as a binder)
  • Red Pepper flakes (I generally use about a 1/2 teaspoon in the mix and some sprinkled on top at the end)
  • Onions (diced) (Optional)
  • Salt & Pepper to taste
  • Herbs and spices as needed (This part is all about your tastes and pleasures.)
  1. Trim the tops of each artichoke so it is flat at the top and clip the tips of the outer leaves. 

  2. Spread the leaves a bit to make pockets. 

  3. Salt and pepper the insides of the leaves lightly (optional). 

  4. Then stuff the meat mixture into as many crooks and crannies as you can and top with more meat.

  5. In a large pot, with a few inches of cold water. Place the artichokes in, sprinkle with red pepper flakes and salt

  6. Cover and simmer until leaves pull out easily and meat is done approximately 60 – 90 mins. (Some recipes on line combine two cooking methods and steam the artichokes first then stuff and bake.)

  7. To serve; place in a warm, large bowl or plate with a small dish for the used leaves. 

SaveSave

SaveSave

SaveSave

July 4th was our “unday” having worked on Monday..

Even after all these years living here, a July 4th in the Bay, with its fog never really feels right, so we rarely make plans for much unless its a bbq here at the house.

But this year, we made no plans,  since we both were planning to work Monday, and again on Wednesday, I opted for some kitchen time.

First, off it was protein breakfast prep for the next few days with my super simple egg “muffins” (aka no flour) with leftover grilled chicken and veggies from last night.

That will cover us for breakfast for a few days (and they freeze well by the way).
Then having snagged some of my pal Bryan’s left over Irish mashed potatoes from book club, I repurposed them as “Irish potato hash cakes” and topped off with a few cherry tomatoes right from my own plant.

For dinner, I put in to bake a “Cheese Quick Bread” from Martha Stewarts collection. Her recipe for Cheddar Bread is the basis for it and can be found here: http://www.marthastewart.com/1165536/cheddar-bread. My only change was using a combination of types of Cheddars. The recipe is easy and fast to mix up, but with a solid 50 min bake and cool down time it’s a think ahead deal.

But once cooled, the part I like is it can be sliced thin and topped with jam, meat, sliced apples or pears, drizzled with honey or even more cheese. Sliced thicker it can be used as a “dunker” with soups and stews. Or as I found out becomes a great alternative bread option for Italian Panzanella Salad, a traditional salad that used cubes of hard bread with tomatoes and dressing. In this case, I used the leftovers from pickled cucumber & tomato salsa from the other night.
Leftovers for dinner just carries the repurpose theme with a cold chicken & veg salad. The final “re-purpose ”  was adding fresh corn and tomatoes to go with the grilled tri-tip on Tuesday. While Mr. Dino gets ready for the fireworks.


SaveSaveSaveSave

Not much sun that weekend- but plenty of lemon’s can fix that

The Test

Last week with some help from our pals next door, I had a bunch of lemon’s to experiment with. So tied out a few recipes for lemon cake. It was also a chance to try out my new silicone bundt pan. The big guess was using a honey-pear compound butter I had left over from earlier in the week, instead of simple plain butter. Overall the flavor was a win – I think that’s the difference between using these lemons is that they are mild and sweet – so need to remember to mix with more thicker skin tart varieties. I remember having the same experience with them making preserved lemons. So while the taste was good the pan itself is so-so. I got good color but the center cone doesn’t carry enough heat to make the inner ring cook through. I will try it again next week with the Blueberry cake I make on a regular basis and see if the same thing happens. I also need to check the capacity – as I think it is actually not a 10-cup pan. A quick search of my posts will show you that it’s going to pop up more.

The Recipe

This recipe continues to be a favorite one – as I have now adopted as my “goto” for bringing it to events and meetings. This original recipe comes from King Arthur Flour’s website.  Also, take the time to read the comments below the recipe. I found great tip including that the batter works equally as good in regular and mini loaf pans!

A few cooking notes

  • it’s a huge batter so make sure you have the right size bundt pan or fill it 3/4 and pour the rest into a loaf and bake along with it. 
  • Don’t be afraid to overdo the first glaze!!!
  • I like to mix traditional thicker skinned lemonsMeyer’syer’s, but any combination will do
  • Use a good confectioner’s sugar – since its the base of the glazes. You want it to be good quality.
  • For the final thick glaze, make sure the cake is cooled and practice – you want a thick glaze that will slowly drip but also leave a nice thick layer on the cake.


SaveSave