Bacon, Onion, Cheese, and Walnut Bisquick Muffins


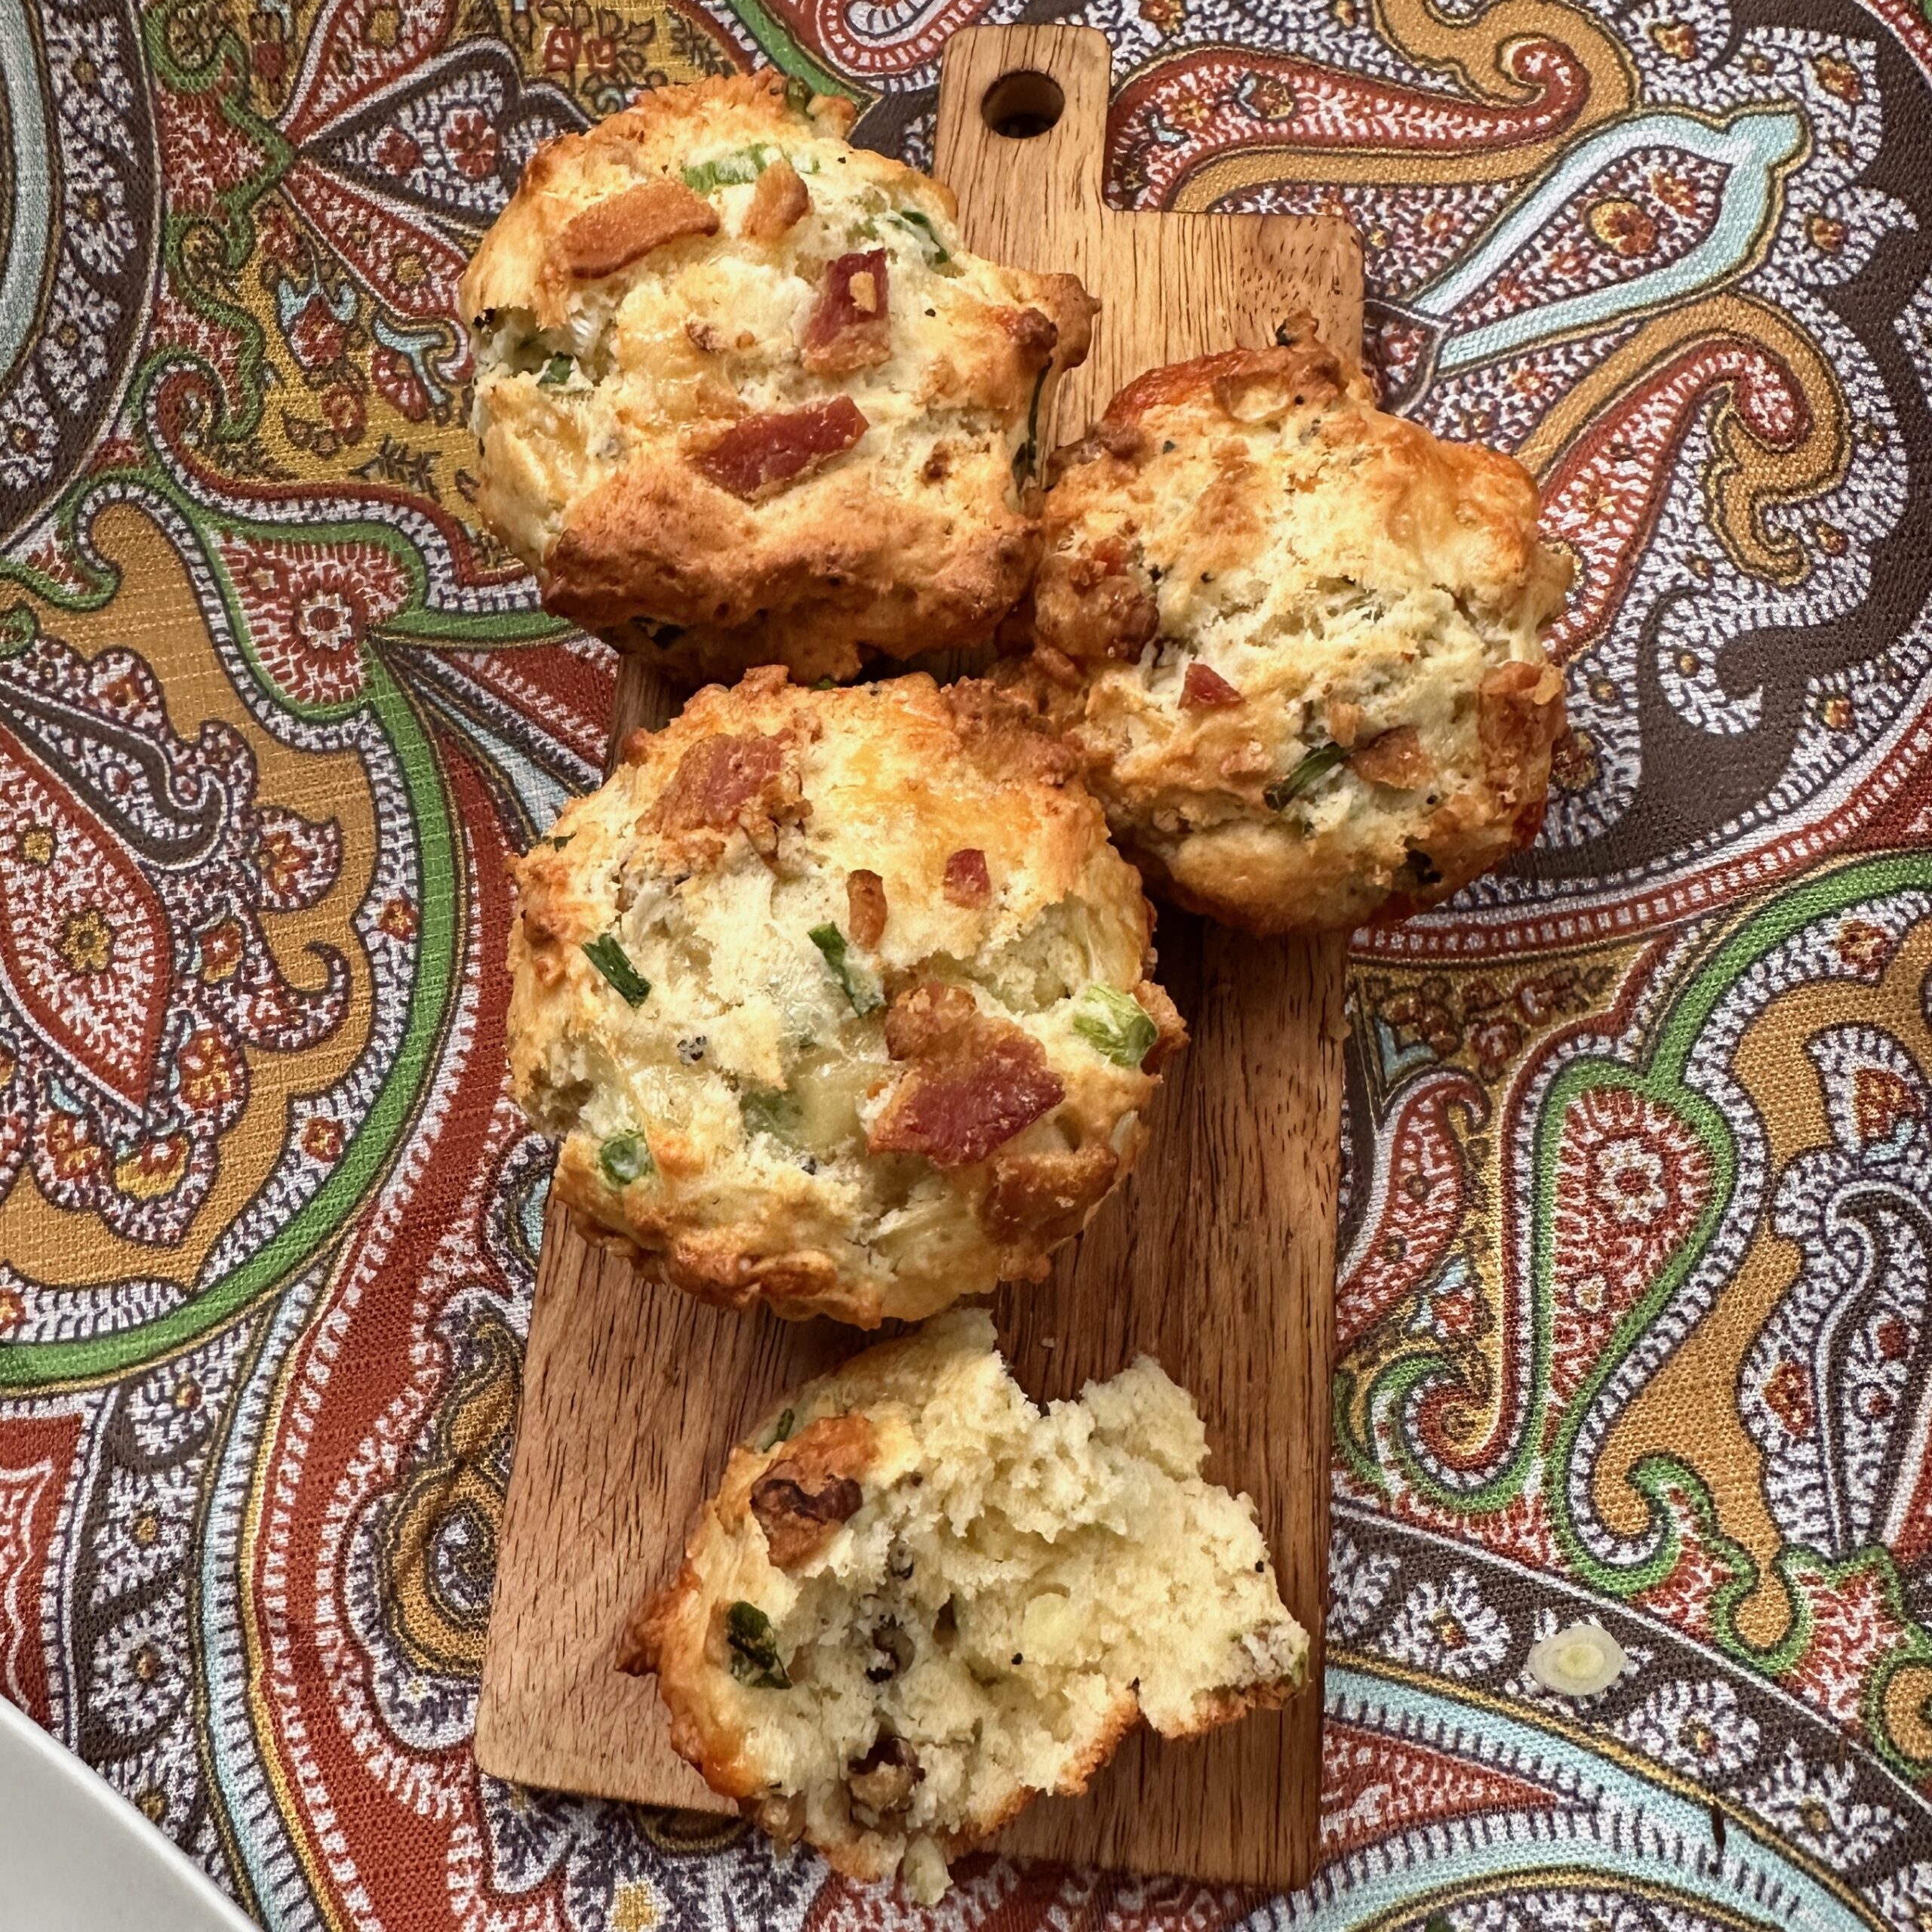
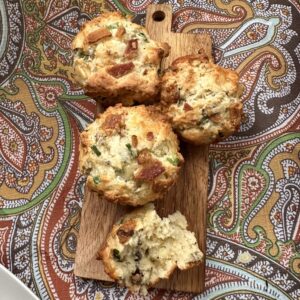
Savory Muffin Goodness

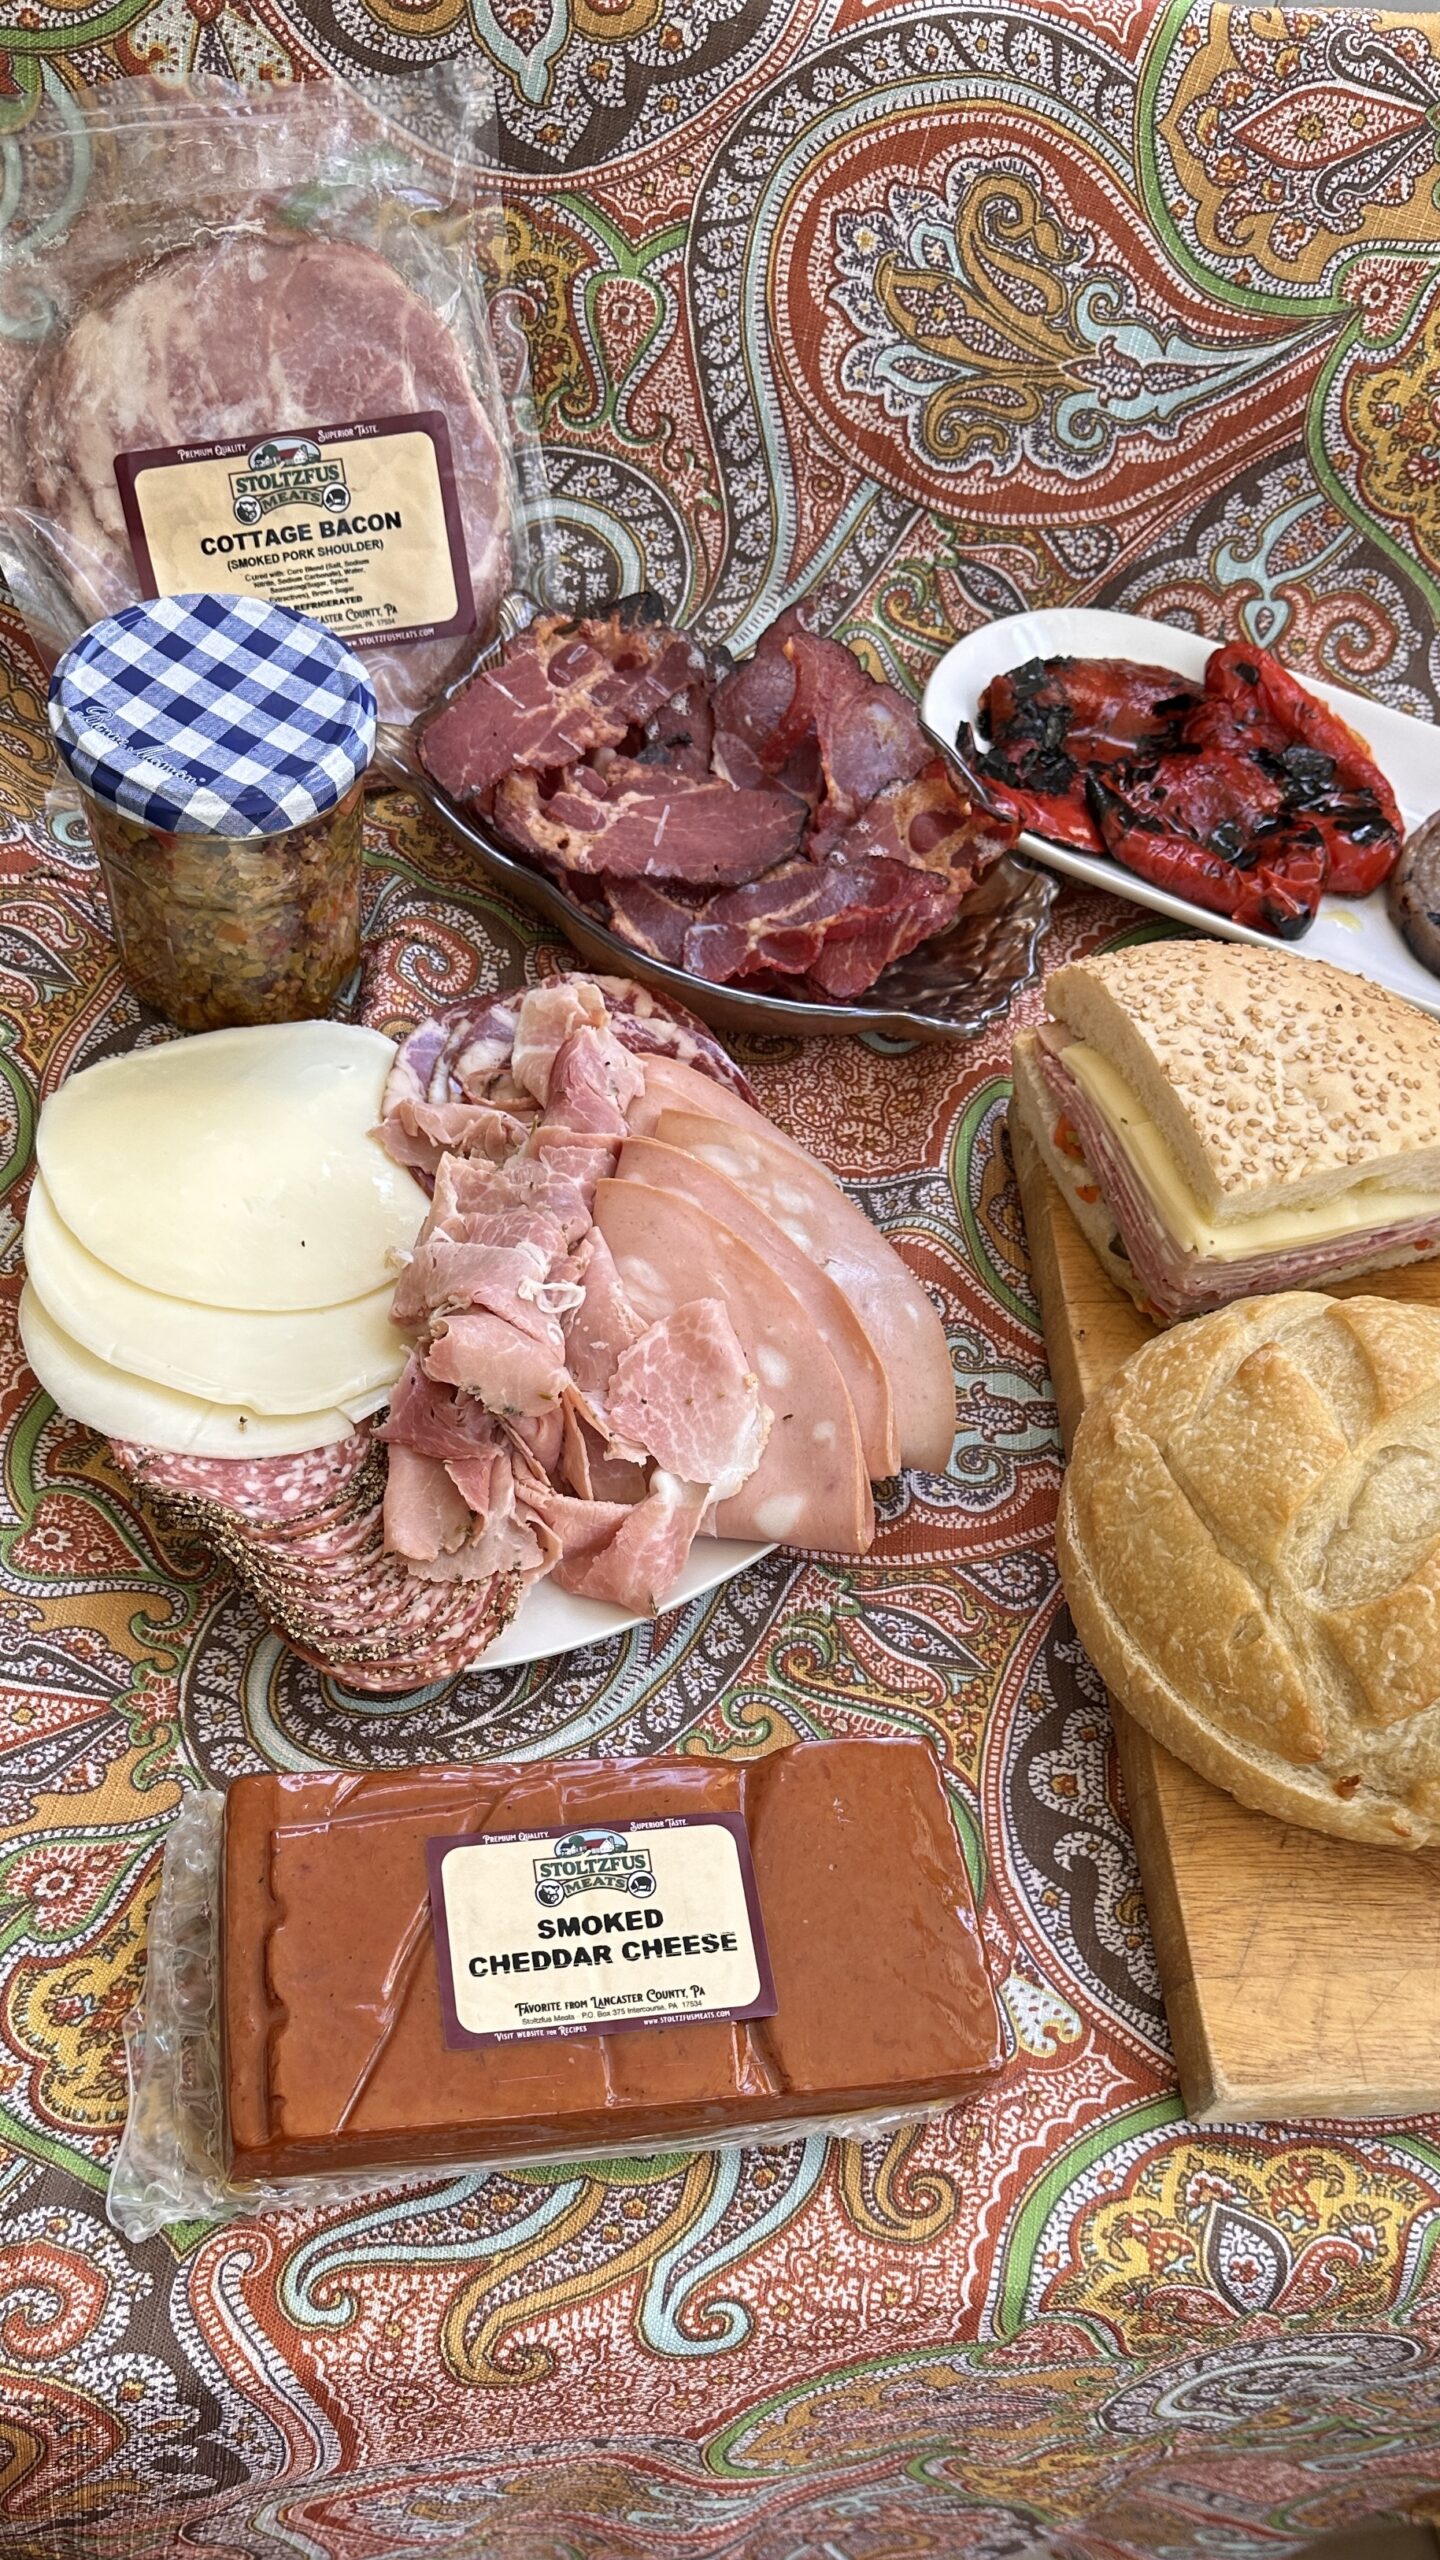
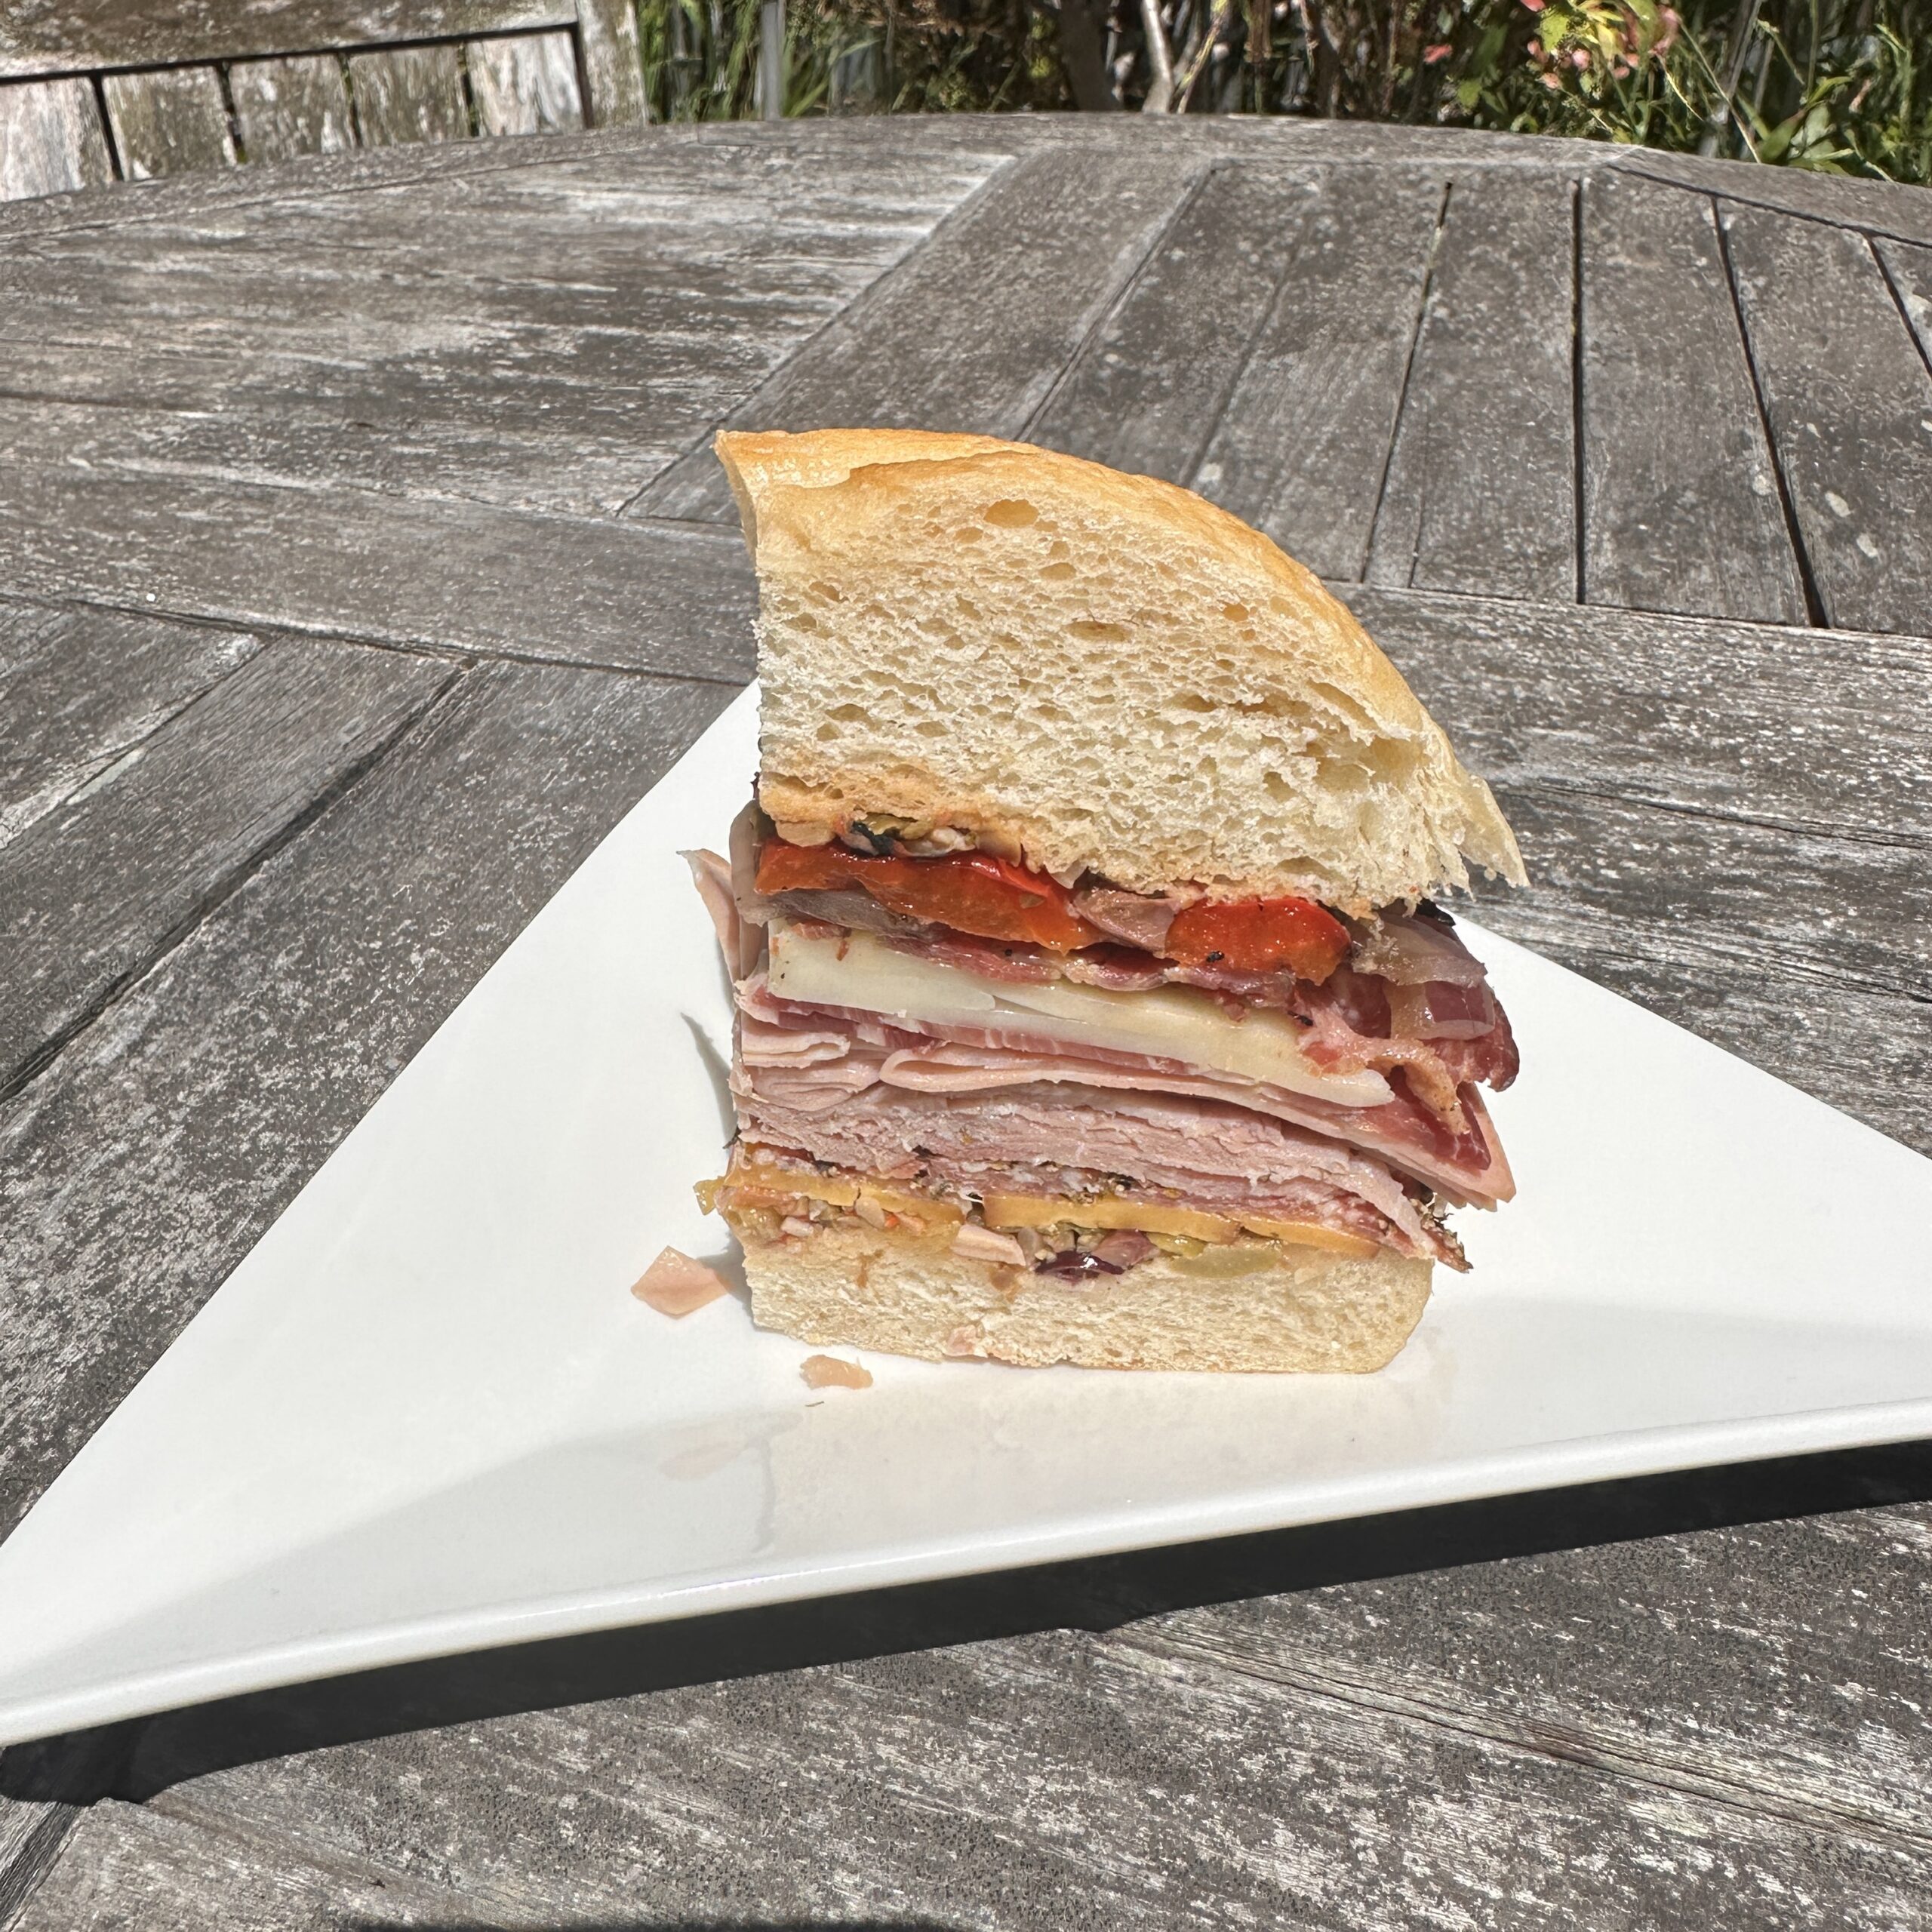
There is something about savory muffins that I love. These Bacon, Onion, Cheese, and Walnut Bisquick Muffins are perfect for dipping in soups or gravy, or smeared with butter or honey. This combination of flavors is a old favorite, I often see in scones. But I was excited to try it in a muffin and make use of some of the last of the Cottage Bacon that arrived from PA based Stolztfus Meats. Check out my Smoked Hog Muffuletta Sandwich recipe I posted recently using the Cottage Bacon and Smoked Cheddar Cheese from Stolztfus Meats as well

You can make muffins from scratch easy enough as in this vintage recipe from Best of the Best from New England: Selected Recipes from the Favorite Cookbooks of Rhode Island, Connecticut, Massachusetts, Vermont, New Hampshire.  Or cheat a bit as I did and use Bisquick

In either case, take advantage of the basic recipe and get creative to make it your own.

Ingriedients

  • 1¾ cups flour

  • ⅓ cup corn oil ( or bacon fat melted or combined)

  • ¼ cup sugar

  • 1 cup of green onion, coarsely chopped (aprx 8-10)

  • 2 teaspoons baking powder (omit if using Bisquick)

  • ½ cup shredded Cheddar cheese

  • 1 beaten egg

  • ¾ cup milk

  • ½ cup chopped walnuts

  • ½ cup chopped bacon

  • 1/4 tsp Salt (optional)

Directions

  1. Preheat oven to 400°.

  2. In a large mixing bowl stir together the flour, sugar, (salt and seasonings, if using) and baking powder. Make a well in the center.

  3. Combine egg, milk, and oil(s).

  4. Add egg mixture all at once to flour mixture; stir just until moistened.

  5. Fold in onions, cheese, (bacon if using) and walnuts until just combined.

  6. Grease or line muffin cups and fill approximately ⅔ full.

  7. Bake at 400° for 20-25 minutes or until golden.

Makes 12 muffins.

Adapted from:

Best of the Best from New England: Selected Recipes from the Favorite Cookbooks of Rhode Island, Connecticut, Massachusetts, Vermont, New Hampshire, Plastic Comb – August 1, 1994

Think about following me on Tiktok under my new food & recipe focused account @KitchenBearSF  or check out my Frank_MentorSF account for shits & giggles. 

Where to Go for Authentic Latin American Seafood

Latin America has been renowned for its stunning cultural diversity, profound heritage and exquisite cuisine. Therefore it is no surprise that seafood dishes are particularly common in many Latin American countries due to their extensive coastlines and a wide variety of edible fish species. In this article, we will explore three hotspots for getting an authentic taste of the region’s seafood delicacies – Costa Rica, Mexico, and Peru!

Costa Rica

Costa Rica is a stunning Central American country that offers an abundance of seafood delicacies, thanks to its unique location between the Pacific and Caribbean seas. Here you can savor many delectable dishes such as ceviche – raw fish marinated in lime juice – or grilled seafood specialties cooked with fresh catches from the day. From Quepos to Puerto Viejo, explore this paradise’s vivid coastal towns offering a myriad of seafood eateries! For a unique experience, try the traditional Costa Rican dish of sopa de mariscos, a hearty seafood soup made with coconut milk and vegetables.

Mexico

Mexico is a premier destination for extraordinary Latin American seafood cuisine. With succulent shrimp cocktails, delectable fish tacos and more, Mexican seafood dishes are celebrated across the world for their vibrant flavors and fresh ingredients. You’ll often find some of the best Mexican food near the coast in towns and resorts like Puerto Vallarta and Cancun. In Baja California, you can try the local specialty of fish tacos, made with battered and fried fish, shredded cabbage, and a variety of sauces. For a more upscale experience, head to Mexico City and try the seafood platters at high-end restaurants like Contramar or Pujol.

Peru

Peru, located in South America, is becoming an increasingly coveted destination for foodies around the world. The country’s coastal cuisine has gained a stellar reputation and is particularly renowned for its seafood dishes stemming from the abundant fish and shellfish that swims in the Pacific Ocean. A fan favorite dish of Peruvian cuisine? Ceviche: fresh raw fish marinated to perfection with lime juice before being served alongside onions, chili peppers, and sweet potato! Other popular seafood dishes include arroz con mariscos, a rice dish with mixed seafood, and chupe de camarones, a creamy shrimp soup. Lima, the capital city, is known for its excellent seafood restaurants, including La Mar and Pescados Capitales.

Latin America is a paradise for seafood fans! From Costa Rica and Mexico to Peru, there are endless options for delightful meals like ceviche, fish tacos or shrimp stews. Dining on the local cuisine can be an exciting way to explore this vibrant region’s distinct cultures and flavors – it will surely tantalize your taste buds in fresh new ways!

Check out this article on how to get a better grasp of a country’s culture!

Pastel Azteca Enchilada Casserole

I remember Tricia making this recipe for Pastel Azteca (Enchilada Casserole / Mexican Lasagna) live and it’s one I have made a few time since. I bet if you follow her account @SketchyChef on tiktok – you might be catching her do it again one day!

Ingredients

  • 3 Roma tomatoes, cut in halves

  • 1 medium onion, cut in half

  • 1 clove garlic

  • 2 dried ancho chilies

  • 1 dried Cascabel chile

  • 2 pounds boneless chicken breast, cooked and shredded

  • 16 Corn Tortillas

  • Vegetable Oil (for frying)

  • Queso Fresco

  • 1 cup Mexican Crema or Sour Cream

  • 1 cup shredded Manchego cheese (or your favorite blend)

Directions

  1. Cook the boneless, skinless chicken breasts. Once the chicken is done, shred the chicken and set aside.

  2. To prepare the sauce, place the tomato halves, the onion, garlic, and dried chilies in a medium saucepan.  Cover with water and bring to a boil over medium high heat.  Remove from heat and let cool to room temperature.  Remove the seeds and stems from the chilies.  Puree the tomatoes, onion, garlic, chilies and 1 cup of the cooking water until smooth.  Pour the sauce into a medium saucepan or bowl; season with salt.

  3. Ladle enough sauce into a 9-inch square baking dish to cover the bottom; set aside.

  4. Heat about 1/2 cup of vegetable oil in a medium skillet over medium-high heat.  Fry the corn tortillas, one at a time, for about 30 seconds per side.  Transfer the tortillas to a heatproof plate until you’ve finished frying all of the tortillas.

  5. Arrange 4 of the fried corn tortillas in the bottom of the baking dish.  (The tortillas will overlap slightly.)  Ladle an additional 1/2 cup of the sauce on top of the tortillas, making sure the sauce makes it all the way to the edge, adding more sauce if necessary

  6. Top with shredded chicken, crumbled queso fresco and a couple of dollops of sour cream.

  7. Repeat for 2 additional layers, topping the third layer with the last of the fried tortillas.  Top the tortillas with more sauce, crumbled queso fresco, and shredded manchego cheese.

  8. Bake in a preheated oven at 350F for 30 to 40 minutes until the cheese has melted and starts to turn a light golden brown.

Catch Tricia on TikTok as @SketchyChef and she’s also part of the collaborative group  @TheFoodieNetwork . You can also see all of her shared recipes here

Smoked Hog Muffuletta Sandwich

Having just returned from New Orleans (yes, I carried back with me a well wrapped version of the local Muffuletta sandwich) and saw that my new pals at Stoltzfus Meats sent me some new treats to sample. This included some of the Cottage Bacon ( which I had never tried before but is now my new favorite child), Smoked Cheddar Cheese and a package of its branded Canadian Bacon. So you know what that meant; I was making up my own version of the Muffuletta that was amped up in flavor and smoke.

A bit of history on the Muffuletta Sandwich

According to many online sources – the muffuletta bread has origins in Sicily with the sandwich version showing up as early as 1906 in  New Orleans, Louisiana. Common belief is that the sandwich was created by delicatessen owner Salvatore Lupo, a Sicilian immigrant. But others had paid claim to that as well..

The traditional-style muffuletta sandwich consists a sesame seeded “muffuletta bowl shaped soft loaf” split horizontally, filled with layers of marinated diced olive salad, and cured meats commonly eaten in Italian households at the time including salami, ham, Swiss or mozzarella and provolone cheeses, and mortadella.

The diced olive salad consists of olives combined with quick or jarred pickled celery, cauliflower and carrot. Most of these can be usually found in a jar of giardiniera, seasoned with oregano and garlic, covered in olive oil, and allowed to combine for at least 24 hours. In fact for my version I used my own recipe for  Sherrys Garden Giardiniera” base with several kinds of cured, jarred minced olives to enhance the taste. My giardiniera also includes serrano peppers, radishes and okra. You can find my version on the FoodtokTV site here or on here on Bitetheroad.

The recipe below gives you a full version, but you can use the recipe above for “Sherrys Garden Giardiniera” and amp it up with olives like I did. Note: You can often find jarred Olive Salad in the pickle section of the grocery stores and on Amazon.

Think about following me on Tiktok under my new food & recipe focused account @KitchenBearSF

Ingredients
  • 3/4 cup pitted mixed oil-packed olives
  • 1/2 cup giardiniera (Italian-style pickled vegetable salad or make you own Sherrys Garden Giardiniera)
  • 1 large roasted red peppers ( yes you can use jarred ones)
  • 1 tablespoon capers (optional)
  • 3 tablespoons extra-virgin olive oil
  • 1 tablespoon red wine vinegar
  • 1 large muffuletta-style roll (Since I couldn’t find them locally, I used a sourdough roll)
  • 1/3 pound thinly sliced sweet soppressata
  • 1/3 pound thinly sliced mortadella
  • 1/3 pound thinly sliced capicola
  • 1/3 pound thinly sliced provolone cheese
  • 1/3 pound of Smoked Cheddar Cheese
  • 1/3 pound of cooked Cottage Bacon
Directions
  1. Combine olives, giardiniera, capers in a food processor and pulse to a small mince. For a chunkier version, dice by hand with a sharp knife.
  2. Transfer to a bowl. Add olive oil and vinegar and stir to combine. For best results, let you olive salad rest overnight before continuing
  3. Split the muffuletta roll in half and spread each cut surface generously with olive salad, with the liquids!
  4. Add alternating layers of meats and cheeses, in the middle add the layer of roasted red pepper.
  5. Close sandwiches and press down gently press to compress.
  6. Wrap tightly in paper or plastic and let rest for 1 hour  – 2 hours before serving.

You can make this a day before and leave wrapped then slice. This is a perfect party or picnic food as it is best room temperature so can be removed from the refrigerator to come to room temp before eating.

Ricotta Dip Topping

Ricotta Dip Topping is the perfect topping for a Date Nut Bread, cake or grilled peaches  


Ingredients

  • 8 ounces cream cheese softened to room temperature
  • 8 ounces (full or part-skim ) ricotta strained at room temperature
  • 2 tablespoons honey
  • 1/2 teaspoon of a sweet peach or orange jam
  • Pinch kosher salt
  • 1/2 cup dried apricot halves finely diced
  • 1/4 cup shelled roasted pistachios, chopped
  • Base of for the topping: Crackers, Pyhllo sheets, Pound cake, grilled fruit etc

Preparations

  1. In a medium mixing bowl, blend together the cream cheese, ricotta, honey, jam and salt until smooth.
  2. Taste and add additional salt or honey as desired.
  3. Gently stir in the apricots.
  4. Transfer to a serving dish of using as a dip and  sprinkle with pistachios and drizzle with remaining 1 tablespoon honey.
  5. or Smooth on to your prepared Phyllo bases or my favorote way spread on Date-Nut Breads
  6. Serve immediately or refrigerate until ready to serve.

Notes

As a topping the options are endless. This is great on grilled peaches and other fruits as much as a topping for toast, pound cakes or as an addition to a Cheese and fruit course

When the American South meets an Italian American for a pickled vegetable Giardiniera Salad


I was working with a new version of this classic pickled salad I affectionately call “Sherry’s Special Giardiniera Salad” in honor of Sherry Skinner‘s birthday and decided to rework it with some different vegetables, including a southern, classic okra.

The Giardiniera (pronounced jar-din-AIR-a) salad is a common side dish that Italians and Italian Americans often have sitting ready for snacking and as a side, much like it’s American cousin, the pickle. It can often be found in the stores, in the jarred vegetable section, but it’s such an easy dish to make and it’s perfect when you have an abundance of vegetables that do well with the bite of herbs, spices and vinegar.

This version is not heat processes so it’s only good up to a week, if it lasts that long. (There are many recipe that will allow you to heat process these to keep them longer and make them shelf stable.)

Ingredients

Part 1 -the Veg

  • 4 to 8 Serrano chiles, seeds removed and thinly sliced or leave hole for less zing (Quick tip- use a fat straw to remove the seeds and ribs easily)

  • 1 Red  Bell Peppers, cut into 1/2-inch pieces

  • 2 Celery ribs, cut into 1/2-inch pieces

  • 2 Carrots, cut into 1/2-inch pieces

  • 1/2- 1 small head Cauliflower, cut into small florets

  • 2 cloves Garlic, minced

  • 1 Fennel bulb ( medium)

  • 1/2 lb Okra

  • 1/2 Onion Red or sweet, sliced thin

  • 1/3 cup kosher salt

Part 2 – Seasoning Mix

  • 1 tablespoon dried Oregano

  • 1 teaspoon crushed Red Pepper flakes

  • 1/2 teaspoon Celery seeds

  • 6-8 whole black Peppercorns

  • 1 teaspoon Mustard seeds

  • 1 teaspoon Fennel Seed

Part 3 – Marinade

  • 1-2 Bay Leaves

  • 1 cup white Vinegar

  • 1 cup Olive Oil

    Notes:

    • If your celery or fennel has leaves on them, reserve the leaves in a damp paper towel in an open plastic zip bag over night and include in the part 2 step.

      Optional add ins include sliced green or black olives, hot cherry peppers, small green tomatoes, whole ginger.

Directions:

Step 1

  1. Clean, peel and chop your vegetable to your preference.

  2. Combine the chiles, red peppers, onion, celery, carrots, okra, fennel, cucumbers and cauliflower in a large ceramic or glass bowl.

  3. Add the salt gently mix well into vegetable mixture.

  4. Add enough water to cover the vegetables.

  5. Cover the bowl and refrigerate for about 12 hours or overnight.

Part 2

  1. Drain and rinse the vegetables under cold running water to remove the salt. Set aside to drain in a strainer.

  2. In a small bowl, add the remaining ingredients and blend (garlic, oregano, red pepper flakes, assorted seeds, peppercorns, etc.).

  3. Add some of the seasoning to the bottom of a clean dry jar

  4. Add the drained vegetables being careful not to break up the vegetables (Note: you can also do this in an large bowl and using your hands – use gloves if you hands are sensitive to peppers and garlic and then add to the jar)

  5. Pour the vinegar and oil in.

  6. Tuck in 1 -2 Bay leaves, leftover celery leaves and any fennel fronds.

  7. Add additional vinegar to cover the mixture.

  8. Refrigerate for 2 to 3 days before serving.

  9. Stir the mixture or gently rotate the jar once or twice during that time.

When it’s ready to be eaten, remove the jar from the refrigerator about 30 mins prior. Plate and serve as a snack plate or topping on a salad or grilled meats.

Note: The same mixture could be diced up, with olives, drained and added to cold cut sandwiches, similar to the classic muffaletta  italian sandwich invented in New Orleans with cured meats (ham and salami), provolone cheese, olive dressing and the best local breads.

Date Nut & Dried Cherry Choc Chip Bread

Dried fruit and  nut breads, were a popular standard in the part of New England where I grew up. This version is full of dates, dried cherries and chunks of chocolate. It’s a great alternative to traditional Banana or Pumpkin bread. Paired with sharp cream cheese spread or my Ricotta Cheese Dip Topping this will take you from breakfast to before bedtime snack

Ingredients

  • 3 cups dried and chopped dates & dried cherries ( dried cranberries work too)
  • 2 tsp baking soda
  • 1 1/2 cup boiling water
  • 2 eggs separated
  • 1/2 salt
  • 1 – 1 1/2 vanilla
  • 3 cups flour
  • 3/4 cup chocolate chips ( bittersweet or dark choc)
  • 1 1/2 cup sugar
  • 1 tbsp melted butter ( or shortening)
  • 1 cup walnuts chopped
  • Cinnamon or pumpkin pie spice optional

Preparation

Step 1

  • Mix chopped dates and cherry with the  baking soda, pour boiling water on, and let sit until cool
  • When cool strain the liquid from the date (BUT reserve the liquid ) and cherry mixture.
  • Pre-heat oven to 325

Step 2

  • Separate eggs
  • Mix egg yolks, sugar, salt, butter and vanilla.
  • Next Add flour and date and cherry liquid. Alternating until both are used up ( Usually I do this in fourths)
  • Add in the date-cherry mixture and any remaining liquid, nuts, and choc chips until combine

Step 3

  • Beat eggs whites to soft peaks and fold into the batter until just incorporated

Pour into 2 loaf pans or 4 -5 mini loaf pans

Top with Turbinado Sugar if you want more crunch on the top

Bake 325, 60 – 80 min middle rack until a toothpick comes out dry

Roasted Broccolini with Peanut Sauce

Roasted Broccolini with Peanut Sauce

One cold and rainy day on the @Foodtoktv channel: “Rainy Day Comfort Lunch” Live, I knew I needed something spicy and with a vegetable – so I went to a dish I made back in November, Roasted Broccolini with Peanut Sauce. This dish is inspired by Molly Yeh’s version. Along with it, I made my Bacon, Green onion, Cheddar and Walnut Muffins and Muscles, Potatoes and Bacon is perfect.

Ingredients

  • 2 bunches broccolini

  • 2 tablespoons bacon fat ( or you can use olive oil)

  • 3 tablespoons peanut butter

  • 3 tablespoons soy sauce

  • 2 tablespoons honey

  • 1 tablespoon sesame oil

  • 2 cloves garlic, minced (optional)

  • Pinch crushed red pepper

  • 2 tablespoons crushed peanuts

  • ¼ cup chopped roasted red pepper (drained)

  • Sriracha, for serving

  • 1/4 cup fresh cilantro, roughly chopped

  • Lime wedges, for serving

 Directions:

  1. Preheat the oven to 400 degrees F (or electric skillet to 250 degrees).

  2. For the oven:

    1. Lay out the broccolini on a baking sheet and drizzle with the olive oil.

  3. For the Electric Skillet

    1. Add the bacon fat or olive oil. Add the broccolini to a cold skillet

    2. heat to 250 and cover.

  4. Roast until tender and beginning to brown, about 15 – 20 minutes. Rotate as needed

  5. Meanwhile, add peanut butter, soy sauce, honey, sesame oil, garlic and crushed red pepper to a small bowl and whisk to combine. Add lime juice and lime zest to thin.

  6. Transfer the broccolini to a serving platter and drizzle with the sauce.

  7. Top with the roasted red pepper, crushed peanuts, sriracha and cilantro.

  8. Add an extra drizzle of sesame oil

  9. Serve with lime wedges.


This is one of the dishes  I made previously on @foodtoktv live. You can see that live on the @Foodtoktv Youtube channel

Follow me on Tiktok under @KitchenBearSF (in addition to my original profile Frank_Mentorsf) as work up to the 1k needed followers to start going live cooking again

Bacon, Onion, Cheese, Walnut Muffins

Bacon, Onion, Cheese and Walnut Muffins

There is something about savory muffins that I love.

These Bacon, Onion, Cheese, and Walnut Muffins are perfect for dipping in soups or gravy, or smeared with butter or honey I did on my @Foodtoktv’s “Rainy Day Comfort Lunch” live .

This combination is a old favorite, I often see it in scones. But was excited to try in a muffin version, from this vintage recipe out of the  Best of the Best from New England: Selected Recipes from the Favorite Cookbooks of Rhode Island, Connecticut, Massachusetts, Vermont, New Hampshire. Take advantage of its basic recipe and get creative to make it your own.

Ingridients

  • 1¾ cups flour

  • ⅓ cup corn oil ( or bacon fat melted or combined)

  • ¼ cup sugar

  • 1 cup of green onion, coarsely chopped (aprx 8-10)

  • 2 teaspoons baking powder

  • ½ cup shredded Cheddar cheese

  • 1 beaten egg

  • ¾ cup milk

  • ½ cup chopped walnuts

  • ½ cup chopped bacon

  • 1/4 tsp Salt (optional)

  • Optional extras; if you want to make these more robust, add 1/4 tsp of garlic powder, and/or Everything But The Bagel seasoning or your favorite dried herbs. Start with 1/4 tsp and add to your tastes. You can also consider switching out the cheddar for pepper jack.

Directions

  1. Preheat oven to 400°.

  2. In a large mixing bowl stir together the flour, sugar, (salt and seasonings, if using) and baking powder. Make a well in the center.

  3. Combine egg, milk, and oil(s).

  4. Add egg mixture all at once to flour mixture; stir just until moistened.

  5. Fold in onions, cheese, (bacon if using) and walnuts until just combined.

  6. Grease or line muffin cups and fill approximately ⅔ full.

  7. Bake at 400° for 20-25 minutes or until golden.

Makes 12 muffins.

Adapted from:

Best of the Best from New England: Selected Recipes from the Favorite Cookbooks of Rhode Island, Connecticut, Massachusetts, Vermont, New Hampshire, Plastic Comb – August 1, 1994


This is one of the dishes  I made previously on @foodtoktv live. You can see that live on the @Foodtoktv Youtube channel

Follow me on Tiktok under @KitchenBearSF (in addition to my original profile Frank_Mentorsf) as work up to the 1k needed followers to start going live cooking again