Harvest Squash Salad
Harvest Squash Salad

This delicious fall and winter squash salad takes two of my favorites; butternut and acorn, and pairs them with bacon, pomegranates, cranberry goat cheese, dates, pecans, arugula greens, basil and a spiced cumin-date dressing. Back in my days on the old format of Foodtoktv I went live to shared and older version.  Since then, I have made a few revisions to amp it up further.

It’s hearty enough to be a meal on its own over arugula but it’s also  a wonderful harvest side dish. You can easily adapt this and use your favorite squash, take it vegan or meat free as you prefer.

Ingredients

  • 1 small butternut squash, peeled, seeded, and cubed
  • 1 small butternut acorn, peeled, seeded, and cubed
  • ½ to 1 teaspoon extra-virgin olive oil
  • ¼ teaspoon freeze dried or fresh herbs
  • 4 slices of pre-cooked bacon (optional)
  • ¼ teaspoon ground cumin
  • ¼ teaspoon ground coriander
  • ¼ teaspoon cinnamon
  • ¼ teaspoon cayenne, less if sensitive to spice
  • 6 cups loose-packed spring mix greens (optional)
  • 1 diced sweet red or green pepper
  • 1/2 cup diced onion
  • 2 ounces goat cheese, torn into smaller pieces
  • 6 Medjool dates, pitted and diced (2 for the dressing and 4 to top the salad)
  • ¼ cup pomegranate seeds
  • ¼ cup pistachios or pecans, crushed and toasted
  • sea salt and freshly ground black pepper
  • Red pepper flakes
  • Fresh Basil

Cider Date Dressing (makes extra)

  • 5 tablespoons extra-virgin olive oil
  • 2 tablespoons apple cider vinegar
  • 1 tablespoon fresh lemon juice
  • 2 of the 6 Medjool dates, pitted
  • ½ garlic clove (optional-dried is fine)
  • ⅛ teaspoon ground cumin
  • sea salt
  • black pepper, to taste
  • 3 to 5 tablespoons water, as needed to blend

Instructions

  1. Preheat the oven to 425°F and line a large baking sheet with parchment paper.
  2. Place the squash cubes, chopped bacon, diced pepper and onions on the sheet and drizzle with olive oil and pinches of sea salt and pepper and red pepper flakes to taste.
  3. Toss to coat and spread evenly on the baking sheet.
  4. Roast for 30 to 35 minutes, or until tender and browned around the edges.
  5. In a small bowl, stir together the cumin, coriander, cinnamon, herbs and cayenne. Set aside.

Make the Cider Date Dressing:

  1. In a blender, combine olive oil, vinegar, lemon juice, 2 dates, garlic (optional- powder is fine), cumin, salt, pepper, and 3 tablespoons of water.
  2. Add 1 to 2 more tablespoons of water as needed to blend.
  3. Add more vinegar or lemon to taste
  4. You want this to be just thick enough to coat the warm veg.
  5. Remove the butternut squash from the oven, scrap and add to a bowl
  6. Add the remaining 4 chopped dates
  7. While warm, toss with the spice mixture.

Serving as a side dish:

  1. Drizzle 1/3-1/4 of the dressing and gently toss
  2. Top with pomegranates, fresh basil, goat cheese and nuts. (Check out my gluten free and carb friendly recipe for homemade granola and use that as a crunchy spiced garnish)
  3. Add another drizzle of the dressing
  4. Serve warm to room temp.

Serving as a salad

  1. Layer the arugula on a platter or plate and top with some of the roasted squash.
  2. Drizzle with ⅓ of the dressing,
  3. add the goat cheese, dates, basil, pomegranates, and nuts.
  4. Drizzle with more dressing as desired and serve on the side.  Add a spritz of lemon
  5. Hint: warm the dressing up a bit.

Serve immediately.
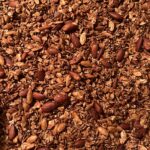
Low carb, high fiber, oat and nut homemade granola

When Paul asked me to start shifting away from processed foods, and refined sugars and add more plant-based meals into our diet to help with his recently diagnosed sugar issues. I took to the challenge of trying new recipes and creating others that would appeal to me and him. This recipe for a homemade granola is one of them I found. Based on a version by Nigella Lawson, I amped up the flavors a bit for our tastes. My next version is to go for a savory version.

INGREDIENTS

Makes: enough to fill 6 cup jar or air-tight container. It should keep for a good few months if it lasts that long which it won’t. It’s oddly addictive.

  • 3 cups quick-cooking oats  (not instant)
  • 2-3 heaping teaspoons ground ginger
  • 3 heaping teaspoons ground cinnamon
  • 1 teaspoon kosher salt
  • ¾ cup natural skin-on almonds
  • ½ cup sunflower seeds
  • ½ cup pumpkin seeds
  • ⅓ cup brown flaxseed
  • ½ cup sliced almonds (optionally here you can add a different nut of your preference)
  • 3 tablespoons sesame seeds
  • 3 Tablespoons of chia seeds
  • ½ cup extra virgin olive oil (I also will use coconut or walnut oil)
  • ½ cup maple syrup. (I use keto syrup from Birch Benders brand)

You can use other nuts or spices as is your preference or what you have on hand as well (for instance clove, nutmeg, cardamon, pecans, walnuts, flaked coconut etc

Making it

You will need a large baking/cookie sheet pan with an edge. 

  1. Preheat the oven to 300 degrees and line your baking sheet with baking parchment.
  2. In a large bowl, toss together the oats, spices and salt.
  3. Add in the nuts and seeds, and mix well again.
  4. In a measuring cup, combine the oil and maple syrup, then pour the mixture into the oats, nuts and seeds and, with a fork, mix to combine. 
  5. Pour onto a parchment-lined baking sheet pan, and move it around so that it covers the tray evenly. You may want to split this into two pans depending on the size of yours.
  6. Place it in the oven, on the center rack, and bake for 30 minutes and then, stir the granola to mix and toast the underside as well. Place it back in the oven for another 30 minutes. 
  7. When done, remove from the oven and let the pan sit on a wire rack until the granola’s cold.
  8. Once cool you can add dried fruit (optional – you do not want to cook the dried fruit with the nuts and seeds as they will get too hard)

I even used this as a base for a dairy free, sugar-free oatmeal, sugar-free chocolate chip cookies the other days to rave reviews from Paul


Sweet and Savory Cherry Tomato Jam

Jimmy’s Hideaway Version

I’m a fan of blending savory and sweet notes in dishes.  and when visiting restaurants I often select dishes based on the potential combination of textures and flavors.  I came across this dish for a vegetarian Tofu Napoleon at Jimmy’s Hideaway in Provincetown, One of my favorite places to eat. The Jimmy’s version is a layered dish is gluten free with layers of marinated & grilled  Asparagus, Crimini Mushrooms, Gruyere Cheese Topped with Roasted Tomato Basil Pesto. It’s a huge portion and tasted as good the next day!

My version!

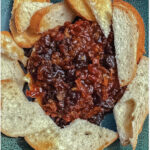
Now when I take a something and decide I want to recreate it – I will often amp it up a bit and in this case the idea of marrying it with some kind of compote or jam struck a chord. So I dug into my recipes and “re-lived” this version for Savory Sweet Cherry Tomato “Jam”. On my version I also swapped out the gruyere and added a layer of seared brie and  polenta along with the grilled vegetables.


Savory Sweet Cherry Tomato “Jam”

Ingredients

  • 1 ½ -2 pounds cherry tomatoes, quartered
  • 1/2 medium thin  sliced red onion
  • 1/4 cup sugar (or sugar substitute)
  • 3 tablespoons apple cider vinegar
  • 1/4 cut diced dates or dried cherries (optional)
  • 1/4 cup water
  • 4 cloves garlic peeled and left whole
  • 1 -2 tsp crushed red pepper flakes
  • 1-2 teaspoons Herbs De Provence (you can substitute crushed rosemary or thyme)
  • 1 teaspoon salt
  • Black pepper
  • Olive oil or Bacon fat

Instructions

  • To a cold saucepan add some olive oil or bacon fat
  • Add the red pepper flakes, sliced onions and turn on medium heat and saute 3 min
  • Add the tomatoes, sugar, apple cider vinegar, water, garlic and herbs, salt and pepper ( if using the dried fruit add it here too).
  • Bring  to a simmer.
  • Cover and reduce heat to low. The mixture will be very liquidy for about 10-15 minutes, but stir occasionally
  • Continue simmering the jam, stirring every few minutes,  until it has reduced down to a thick, slightly sticky, and sweet consistency.  depending on your pan this could take 20 – 40 minutes
  • Once it resembles a chunky loose jam. Remove the garlic. Taste.
  • Add any more herbs, salt or pepper. You can also add some honey if you want it more sweet. (Remember as this cools the flavor will be more muted so you want to plan for this)
  • Allow the mixture to cool before storing it in an airtight container in the fridge for up to 1 week.

CURRIED CAULIFLOWER SOUP

My take on a plant-based Curried Cauliflower soup

Paul recently became alarmed over some labs and asked if we could incorporate more vegan and plant-based recipes while we worked to get weight down.

Last year he had ordered the How Not To Die Book and the companion Cookbook. So it was a perfect chance to try one of the recipes.

I changed up the recipe a bit but overall its very similar to the original. The author creates his own savory spice seasoning blend used in several of the books recipes and I’m a fan of that alone! But make it the day prior as it needs a day to meld the flavors. I’ve included them both below.

Ingredients

  • 4 cups Vegetable Broth
  • 1 red onion, chopped
  • 1 garlic clove, minced
  • 1½ teaspoons grated fresh ginger
  • 1½ tablespoons curry powder (start with 1 tablespoon- you can add more later depending on how warm you like it)
  • 2 teaspoons date sugar syrup
  • 1 teaspoon Savory Spice Blend (see below)
  • 1 head cauliflower, trimmed and coarsely chopped
  • 2 teaspoons lemon zest. Reserve the juice for the end –  (original version used a blended peeled lemon but it wasn’t worth the effort in my opinion)

For garnish

  • 1 plum tomato, finely chopped, for garnish or
  • 1 medium diced apple

Directions

  1. In a large pot, heat 1 cup of the broth over medium-high heat.
  2. Add the onion and cook until softened, about 5 minutes.
  3. Add the juice of 1/2 lemon
  4. Purée the soup in a food processor or with an immersion blender, working in batches if necessary.
  5. Stir in the lemon zest
  6. taste and adjust; more curry? Add some now, more lemon juice? Or other seasonings as desired.
  7. Ladle into bowls and serve hot, garnished with chopped tomato or apples. Sprinkle fresh herbs or additional nutritional yeast.

If it is too “spiced” add a dollop of greek yogurt or dairy free sour cream to help balance the heat.


“How Not To Die” Savory Spice Blend

MAKES: ABOUT ½ cup for your cabinet

Great replacement for salt!

  • 2 tablespoons nutritional yeast*
  • 1 tablespoon onion powder
  • 1 tablespoon dried parsley
  • 1 tablespoon dried basil
  • 2 teaspoons dried thyme
  • 2 teaspoons garlic powder
  • 2 teaspoons dry mustard (mustard powder)
  • 2 teaspoons paprika
  • ½ teaspoon ground turmeric
  • ½ teaspoon celery seeds

Combine all the ingredients in a spice grinder or blender to mix well and pulverize the dried herbs and spices. Transfer the blend to a shaker bottle or jar with a tight-fitting lid. Store in a cool, dry place.


Adapted From: How Not to Die CookbookHow Not to Die Cookbook

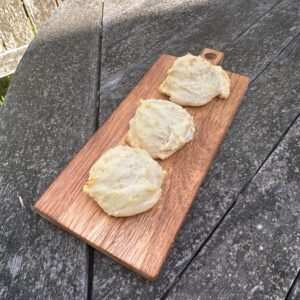
Ricotta Glazed Cookies

This cookie is very similar to one I loved growing up in an Italian -American household called Anginettes, but different. The base of this recipe for Ricotta Glazed Cookies is as the title implies, based on Ricotta Cheese. It fit perfect for this week’s spring fresh live as it’s easy to adjust the glaze colors for any time of year and is a quick bake time and pairs great with the Tomato, Bacon & Cheese Shortcake I made during an old TIKTOK live

Ricotta Glazed Cookies 

Ingredients:

Cookie batter

  • One cup of unsalted butter or margarine or 1/2 and 1/2)

  • 2 cups of sugar

  • 16 ounces of ricotta cheese

  • 3 tsp of vanilla extract

  • 1 teaspoon of lemon extract

  • 1 teaspoon of salt

  • 1 teaspoon of baking soda**

  • 4 cups of flour

  • Zest of one lemon

For the glaze

  • Confectioners Sugar

  • Lemon juice or milk

  • almond extract

  • anise extract

  • A few drops of gel food coloring will bring these seasonal

Directions:

  1. Using an electric mixer combine butter sugar and ricotta cheese

  2. Combine lemon zest, extract and vanilla extract with the cheese mix

  3. In a separate bowl combine baking powder flour and salt

  4. Add flour to the cheese mixture, mix until just combined

  5. It should be thick enough that you can make walnut size balls if it’s too loose add some more flour

  6. Scoop and roll onto your sheet pan

  7. Bake on parchment lined pants, in the oven 8 to 10 minutes

  8. When done, remove from the oven and let rest a few minutes in the pan, then place on a rack to cool

    Prepare a glaze;

    Blend confectioners sugar, lemon juice or milk, a pinch of salt.

    Optional for the glaze could be several drops of almond extract or anise extract.

    Combined until the consistency of a glaze you prefer, dip cookies upside down into the glaze then place right side up on the rack to drip dry

** When I made these on the live I left out teh baking soda and found I liked them that way.. will have to try it with next time


This is another of those handwritten treasures I found in an old recipe box while thrifting.

Tomato, Bacon and Cheese Shortcake

Yes. thats rights. I said it; Tomato, Bacon and Cheese Shortcake.

A savory take on a spring and summer classic. As many of you know I came across a early 60’s Bisquick cookbook (note: it’s been around since the 30’s) and have been having fun adapting some of the recipes. This particular one was in the book, but I add a few extras to bring it forward without damaging the classic feel.  I’ve  “super sized” it with a piece of fried chicken breast.

Bisquick was a staple for many of us growing up as a baking mix that allowed the home cook to come up with biscuit/cake/muffin products quickly, not needing to have leaveners etc. There are lots of recipes out there that can provide you with instructions to make your own version or you can still buy it commercially. In fact you can buy a variety of versions of it these days. In my house growing up it was a staple for pancakes waffles muffins occasionally it would get added to a cake. Enjoy!

Note – this isn’t an “everyday” treat.. but it sure is fun on a cheat day

Tomato, Bacon and Cheese Shortcake

Ingredients:

  • 4-6 Shortcakes or Biscuits

  • 6-12 slices of Bacon

  • 3 large or 5 medium ripen tomatoes

  • Cheese Sauce

    • ¼ cup butter or margarine

    • ¼ cup Bisquick

    • ½ tsp. salt

    • ¼ tsp. pepper

    • ¼ tsp. dried mustard, if desired

    • 2 cups milk

    • 2 cups grated sharp cheese

    • 3-4 minced chives or scallions

Directions:

  1. Make 6 individual Shortcakes or drop biscuits using your favorite recipe

  2. Broil bacon, remove to paper towel to drain

  3. Make the cheese sauce while shortcakes are baking

    1. Melt butter over low heat.

    2. Blend in Bisquick and seasonings.

    3. Cook over low heat, stirring until smooth and bubbly.

    4. Take off heat. Stir in milk.

    5. Add back to heat, bring to boil; boil 1 min., stirring constantly.

    6. Stir in cheese until melted

Assemble

  1. Slice ripe, medium-sized tomatoes.*

  2. Split and butter ( or mayonnaise) both the top and bottom of the shortcakes.

  3. Place 1-2 tomato slices on the bottom layer of the shortcake

  4. Sprinkle with salt and pepper to taste. Layer on 1-2 bacon slices

  5. Spoon the cheese sauce over the bacon and tomato. Be generous! It should drip down over the bottom shortcake.

  6. Sprinkle with minced scallions

  7. Add the top shortcake or biscuit

Note: You can also substitute mayonnaise for butter on the shortcake or biscuit under the tomato layer.  This also works with adding other proteins like leftover ham or fried chicken pieces

*the original recipe wanted peeled and sliced tomatoes, I no longer peel them. 

Recipe adapted from the 1964 The Bisquick Cookbook Recipes from Betty Crocker in answer to your requests

Smoked Ham Hock Cheese Herbed Pasta

Recently our pals over at Stoltzfus Meats sent me a new box  of meats and part of the box included a smoked ham hock. You may recall I used the Cottage Bacon from  Stoltzfus Meats  when I did my Smoked Hog Muffuletta.

So what to do with Ham Hocks?

I don’t cook with them often and when I do use them it’s usually like many people do. I put them in greens, lentils or beans.I wanted to come up with a recipe that was a little different and given it was a warm spell – not a soup. After a little researching in the vintage book collection,  I came up with a variation I have to say it was pretty good.

Smoked Ham Hock Cheese Herbed Pasta

What you will need:

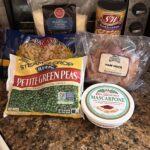
  • 2 smoked pork hocks
  • 1 large bunch of flat-leaf parsley, roughly chopped
  • 1 cup Parmesan, grated
  • freshly ground black pepper
  • 2 tbsp good olive oil
  • 8 tbsp mascarpone ( more or less to your taste and texture)
  • 1 package of linguine or any pasta of your choosing.
  • 2 cup peas

Feel free to experiment – capers, other seasonal herbs,  vegetables, even garbanzo brands could be included.

Making It

  1. Place the hocks in a large pan, cover with cold water and bring to a boil. Reduce the heat, cover and simmer for 1 hour. 
  2. Remove from the heat and leave until cool enough to handle.
  3. Reserve about a cup of the stock. (you can  freeze the rest for the fall when its time to make split pea or lentil soups
  4. Remove the ham hocks from the broth, then peel off the skin and discard along with any excess fat. 
  5. Pick off all the meat and roughly shred/chop.
  6. In a medium bowl, mix 3/4 of the chopped parsley, parmesan cheese, black and red pepper flakes, olive oil, mascarpone cheese, apple/lemon mixture, 1/2 lemon zest and reserved stock. Mix well. Thin with the remaining lemon juice. Thicken with more mascarpone or grated cheese
  7. Fold in the ham hock pieces
  8. You want this to be a thicken “grace”texture. Remember when you mix it into the pasta it will loosen some with the heat.
  9. Bring a large pan of water to a boil and cook the pasta according to the packet’s instructions (dont overcook the pasta). 
  10. Drain pasta (reserve 1 cup of the pasta water), returning the past to the hot pan,  toss with the ham mixture. Add reserved pasta water if needed to loosen. 
  11. Garnish with the remaining parsley and lemon zest and few thin slices of apple
  12. Serve warm.But I will say it reheat well too!

If adding other components like beans or veggies – sauté them off with pepper, garlic and olive out while the ham hocks simmer and let cool then mix into at step #6

If you aren’t into a lot of cheese – I also made it with just the grated cheese and it was just as good! Made a great side dish

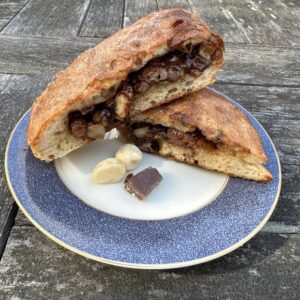
Chocolate Macadamia Nut Slices

This dessert is the perfect example of divine simplicity.

You can use a either homemade pizza dough, or a store-bought pizza dough as your base. There are multiple recipe versions online, including the original version I saw for “Pain de Quatre Heures” from Jacques Pepin (He has it in his Heart and Soul Cookbook) where he used hazelnuts. As somebody allergic to hazelnuts and cashews, it seemed that a perfect solution for me, was to swap them out for one of my favorite nuts; macadamia.

Since I make savory Calzones and Stromboli‘s all the time it wasn’t a huge leap for me to do a sweet version. So no matter what you call it; a sweet calzone or a sweet sandwich, either way it’s going to be a sweet ending!

Chocolate and Macadamia Nut Slice

Ingredients

  • 1 lb pizza dough

  • 2 cups diced chocolate

  • 1-1/2 cups rough chop macadamia nuts

  • 1/2 stick of melted butter

  • Castor Sugar or Turbinado Sugar

To Make

  1. Remove the dough from the refrigerator and its packaging lay out on a plate. Cover with a little bit of vegetable spray, vegetable oil or olive oil, cover with a piece of plastic loosely and a towel and put in a warm place for a few hours. (this will make the deal much easier to work with and so that you don’t have to roll it out if you don’t want to.)

  2. Preheat your oven to 425°

  3. Take a cookie sheet, flip it upside down and cover it with a piece of parchment paper or foil

  4. Spread your dough into a rectangle well, lay on the parchment paper.

  5. Cover the top half of the long side of the rectangle with the chocolate

  6. Then add the nuts spread on top

  7. Using the parchment paper as a support, flip the other piece of the dough over and seal the edges well

  8. Lightly coat the top of the dough with a bit of the butter (you’ll use the rest of it when it’s done ) makes three small cuts on the top for steam to escape

  9. Bake for 18 to 20 minutes until dark golden brown

  10. Remove from the oven and place immediately on a rock in order to keep the bottom crispy.

  11. Brush on melted butter and a sprinkling of the sugar

  12. Let cool 10 minutes before cutting.

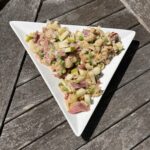
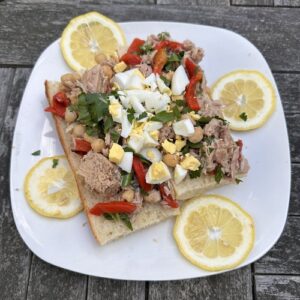
Dad’s Saturday Shelter Tuna Salad

This was a simple lunch my Dad used to make me on Saturdays when I would go into work with him At the New Haven Animal Shelter. He was the Director at the local Animal Shelter and I would spend weekends helping out. My Dad’s Saturday Shelter Tuna Salad is an Italian/Mediterranean inspired salad, based on the tuna packed in olive oil (instead of water), herbs and the sharpness of red wine vinegar instead of the traditional mayonnaise based tuna salad. This goes great on warm crusty breads or topped over greens even some warm from the oven Walnut, Bacon & Cheese Muffins

Dad’s Saturday Shelter Tuna Salad

Ingredients

  • 3 Cans Tuna in olive oil, drain (reserve the oil is optional)

  • 3 green onions, sliced

  • 1 tablespoon chopped fresh Parsley

  • 1/4-1/2 tsp Dried Italian seasoning

  • Fresh or dried herbs of your choice

  • Salt

  • Pepper

  • Crushed Red Pepper

  • 1/4-1/2 cup Red wine vinegar

  • 1 – 12 oz can Garbanzo Beans drained

  • 1/2 cup diced Roasted Red Peppers (drained if jarred)

  • 1 lemon

  • Washed and dried Arugula

  • 1-2 hard boiled egg, peeled and diced

  • Hard crust style bread; italian, sourdough or rustic loaf

Optional: Fresh sliced fennel, sliced green olives, capers, chopped celery

Make It

  1. Open and strain the tuna into a bowl. Lightly flake with a fork.

  2. Dice the white and green parts of the green onions and sprinkle on top of the tuna (reserve 1/2 tsp for garnish)

  3. Open, strain and rinse in cool water the garbanzo beans and add to the bowl (cannellini beans also work)

  4. Add the diced (drained) red pepper, parsley, fresh/dried herbs of your choice, black pepper, salt and red pepper flakes.

  5. Add the red wine vinegar

  6. Slice the lemon in half. Make thin slices from 1/2 the lemon and juice the other 1/2 of lemon and add into the salad.

  7. Gently mix the salad to incorporate all the ingredients.

** Chill if not being used right away This can be made up to several hours or overnight up to this step. 

When ready to serve

  1. Taste for salt.

  2. If you like it less sharp, add a drizzle of good olive oil, more sharp? More lemon juice

  3. Make a bed of arugula on a plate

  4. Add a two slices of bread on the greens, drizzle the bread with Olive Oil

  5. Scoop the salad on bread

  6. Garnish with fresh parsley, reserved green onions and diced hard boiled eggs (optional; capers or dice up some of my Sherry’s Garden Pickles) and lay lemon slices along side.

Alternatives way to serve this:

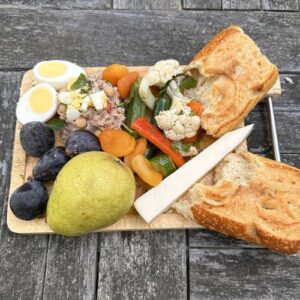
Serve on its own or on greens, with a hunk of crusty rustic bread on the side, a chunk of asiago, ricotta insalda or pecorino romano cheese, some dried or fresh fruits figs, pears, apricots

Toasted Coconut Shrimp Dip

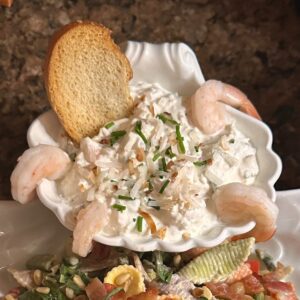
Back when I was still collaborating with @Foodtoktv and went live for them, I did a Spring Fresh Pasta & Vegetables, loosely based on Pasta Primavera. After a minor issue with boiling the pasta ( don’t ask) it finally all came together to rave reviews.

I paired it  with this  Toasted Coconut Shrimp Dip from the same period in the 70’s. Since there reaction previously to my vintage Clam Dip Crostini was such a huge hit. This version is adapted from Mrs Larry Simon’s version shared in the “WHAT’S COOKIN’? In Cleveland Ohio”  circa 1973

Toasted Coconut Shrimp Dip

Ingredients

  • 1 cup sour cream
  • 1 tsp. curry powder
  • 2 green onions, finely chopped
  • 1/2 cup shredded coconut, toasted (Chopping optional)
  • 1/4 1b. cooked shrimp, chopped
  • 1/4 tsp. salt
  • 1/8 tsp red pepper flakes
  • Dash lemon juice
  • Black Pepper to taste


Preparation

  1. Mix all ingredients and chill several hours.
  2. Serve with chips or crackers.
  3. Makes about 1 to 1 1/2 cups.