The Power of Home Crafted Vanilla2.0

For You More Creative Types, Make Your Own Vanilla2.0

Yup – that’s right. Well, I goofed this week – I had intended to let had my guest post from Anna go live first, but some of you might have gotten a sneak preview of this one when the “now” feature got clicked. In either case, you can read Anna’s post  “Know Your Extracts: Sniffing out the Best Vanilla for Your Baking” once it goes live late this week, then perhaps you will be inspired to go on to the next step and try making your own version of Vanilla2.0

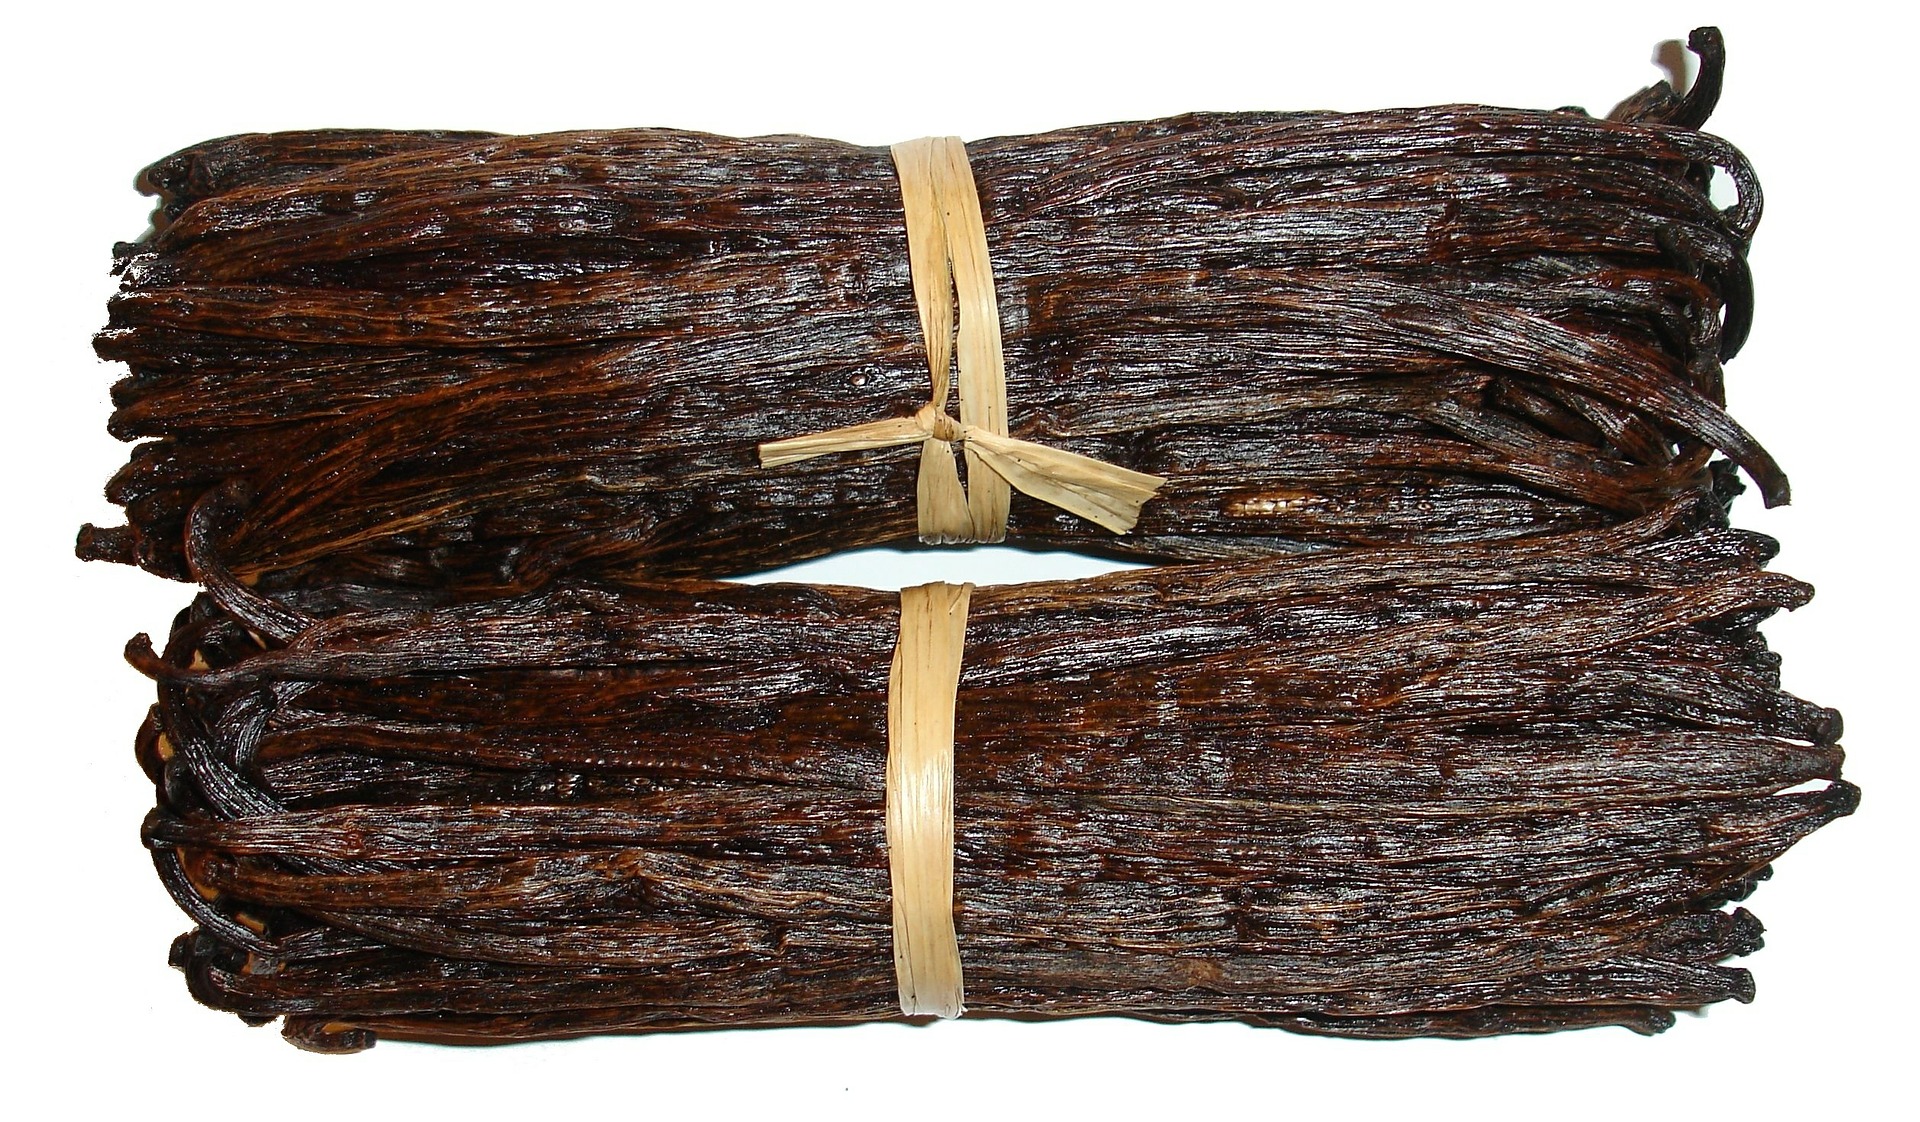
Vanilla is one of those elements in baking that you either love or don’t. Somewhat like using good quality Tumeric is in cooking. I got started on this road myself after watching some of the baking shows on TV that were using Vanilla Bean Paste which I hadn’t seen before. After visiting the blog Superfoodly.com which had posted a December piece “The Scandal Between Vanilla Bean Paste vs. Vanilla Extract” .and served as a good place to start (I didn’t necessarily agree with everything – they shared some great content on the post).  I started following links, speaking with other folks who do more baking and came across the whole movement of making your own Vanilla Extract.

Several great recipes are available online for making your own home inspired version of vanilla extract. But to make a good quality one, you need time and the right beans. It isn’t something you want to rush. In fact, if you get them started now. They will make great Holiday gifts this season.

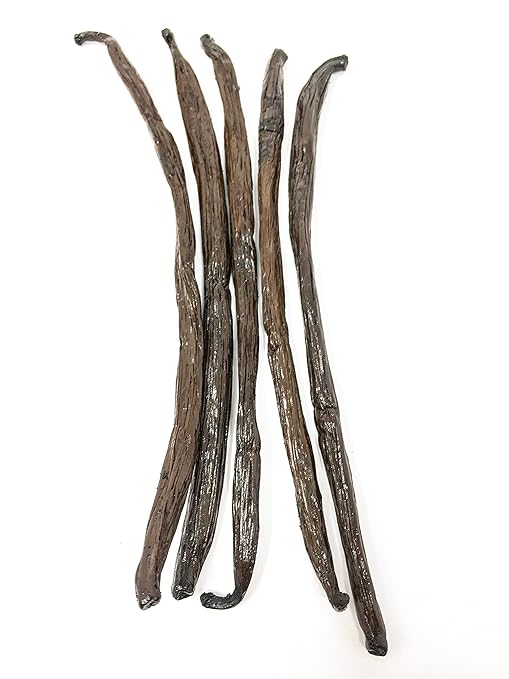
Choosing which beans you want to use also takes some research. Areas to take note of include the grade of bean, the type of bean, the age of them and the source ( they can be expensive) and what liquid you intend to use to extract the flavor (a variety of options exist based on flavor or non-alcohol needs).

My next plan

I will be starting a batch in April in fact with ” Tahitian Grade B beans but I also like the Madagascar Bourbon Vanilla Beans (Vanilla Planifolia so may make some comparison batches. A few of the online sites that offer recipes for making your own, including purchasing recommendations include: 

Once you get ready to start making your own here are a few things you will need to have on hand.

If you are like me and tend to be more creative, plan early:

  • You will need the beans; that means deciding on the grade of the bean and the ration of beans to the liquid mix; I saw lots of variations on this from 1 whole vanilla bean for every 2 liquid ounces of alcohol. I think to keep it simple I may start with a 1:1 ratio as in 1 bean to each ounce of liquid (then depending on the jar size might top off)
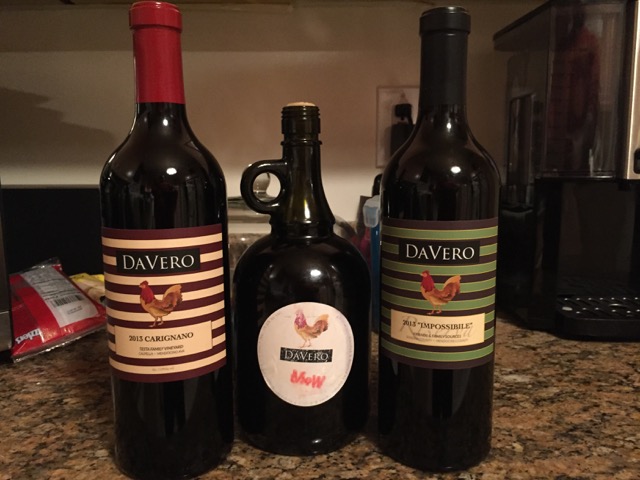
  • Extracting liquid; lots of options for this the most common include Bourbon, Rum, Brandy, and Vodka. The key factor is the liquid has to be greater than 70% proof
  • Bottles/Jars; You will need to decide if you are making a large batch then decant into smaller ones or just go right to the smaller ones. I think I will be hitting the swap and flea markets for vintage and unusual decanters to use as gifts. One common theme I heard was to avoid clear jars (or keep stored in a dark place) and my preference to stay away from plastics. As a back up I found 4 ounce Amber jars on Amazon that I may order to have on hand for “extra” last minute needs.
  • Labels: start thinking what size you will need and how you plan to label them if you are gifting them

Note: this post has some affiliate links to Amazon

SaveSave

SaveSave

SaveSave

SaveSaveSaveSave

Know Your Extracts: Sniffing out the Best Vanilla for Your Baking

Vanilla extract; the first thing I check on my baking supply list.

So we have another great guest post this week on the power of vanilla from my pal Anna who also wrote the “5 Ways to Taste the Mediterranean Without Actually Going” post. I love sharing BiteTheRoad with folks who want to write and talk about the various passions they have so was grateful she was willing to do this one. Ok, and truth be told it’s one of my favorite flavoring tools! Thanks again Anna!


Know Your Extracts: Sniffing out the Best Vanilla for Your Baking

It’s a question that seems as old as baking itself — chocolate or vanilla?

These two are the most popular cake flavors out there, and making a good chocolate or vanilla cake is critical to any baker’s repertoire. But we’re not here to argue. Whether as a flavor enhancer or the star of the show, vanilla tastes good, smells good, and has been used in all kinds of sweets for hundreds of years.

But did you know that not all vanilla is created equal? While it’s likely not shocking to learn that there are different forms of vanilla you can buy, it might be more surprising to know that some are better than others for certain contexts. This, as well as the overall quality of what you use, can have dramatic effects on what comes out of your oven.

High Quality Vanilla vs Low Quality

Know Your Extracts: Sniffing out the Best Vanilla for Your Baking

In general, “high quality” and “low quality” designations for vanilla are related to the origin and purity of the flavor, as well as alcohol content.

Imitation vanilla, on the other hand, is often made using lab-created vanillin (the flavoring compound found in vanilla). Generally, this vanillin is made as a byproduct of other forms of manufacturing, such as while processing wood pulp. While that might sound concerning, it is still perfectly safe to consume, though typically has a slightly less pronounced vanilla flavor and less alcohol content.

Pure vanilla extract is exactly what it says on the label; pure vanilla extracted from vanilla pods and processed into a liquid by boiling it with ethanol and water. Additionally, it is required by law to contain at least 35% alcohol content and 100 grams of vanilla beans per liter.

Natural vanilla is taken directly from vanilla beans and has the least amount of alcohol at roughly 3% per bottle. It generally has the most pronounced and “pure” vanilla flavor of the three liquids.

Vanilla paste is a compromise between liquid vanilla and straight vanilla beans. It is made from vanilla extract, adding sugar and thickening agents for texture. Most brands also add small quantities of ground vanilla beans to achieve the desired speckling.

Vanilla beans are considered the ultimate for vanilla in flavoring and baked goods. These are the real deal, no alcohol or additives in sight. Just a long dark pod filled with tiny caviar-like “beans” ready to add to any recipe.

When to Use Each Kind of Vanilla

Know Your Extracts: Sniffing out the Best Vanilla for Your Baking

While instinct may say to use vanilla beans for everything, this would not actually be the best use of resources. Imitation is, of course, the cheapest and most affordable, but the more pure and better quality the vanilla, the more it costs:

(Prices based on Cook’s Bulk and Wholesale Vanilla)

  • Non-alcoholic vanilla — $12
  • Pure vanilla extract — $13
  • Vanilla bean paste — $25
  • Vanilla bean pods (3) — $15

Aside from price restrictions and personal preference (for example, imitation vanilla may have a less robust flavor/aroma than vanilla bean pods), any form of vanilla can be used for any type of baking.

That being said, most bakers (and especially social media food personalities) prefer vanilla bean paste and pods for the telltale speckling that they leave in the finished product. This only works for light-colored, vanilla-centric baked goods, however. If you wish to use a high-quality vanilla in a darker product, save some money and use a good vanilla extract.

For bakers who object to using alcoholic vanilla in recipes that don’t involve heat (frostings, creams, sodas, etc.), non-alcoholic vanilla or vanilla bean pods are optimal.

Love vanilla? Try these vanil-licious recipes from Bite The Road:


Be sure to read the next BiteTheRoad.com post on other creative Vanilla ideas later this week


SaveSaveSaveSave

SaveSave

SaveSave

SaveSave

SaveSave

SaveSave

SaveSave

SaveSave

5 Ways to Taste the Mediterranean Without Actually Going

5 Ways to Taste the Mediterranean Without Actually Going

Mediterranean cuisine covers many different countries in the Mediterranean basin. Every region has different influencing flavors in its food, however, there are core flavors that can be tasted throughout the Mediterranean region as a whole. Southern Europe features deep flavors such as the tomato-based flavors of southern Italy or the tangy and savory flavors of Greece with the use of bold cheeses and softening yogurt. In a country such as Morocco, the food is heavily seasoned in perfect blends for full rich flavor.

While some countries may use more or less than others, here are five great ingredients that will bring the Mediterranean into any dish:

Balsamic Vinegar

Balsamic vinegar comes from Italy, traditionally made from aged grape must. It has a rich flavor, much more complex than the typical wine vinegar, with hints of sweetness. Balsamic vinegar is not meant to be cooked and is often used as a topper for fresh fruit and grilled meat or fish. Many different types of Balsamic vinegar now exist locally and internationally which is a point of debate in many circles as to what is “real” Balsamic Vinegar. Bon Appetite Magazine does a good job of helping you sort through the various kinds in a 2017 article here.

Olive Oil

Olive oil is used frequently in Mediterranean food because of its abundance in the region. Olive oil is used in cooking but because of its bold flavor, it is often used as a condiment base for dipping bread. Luckily living in the Bay Area I have access to many types of artisanal olive oils including one of my favorites from the DaVero farm and vineyards

Lemon

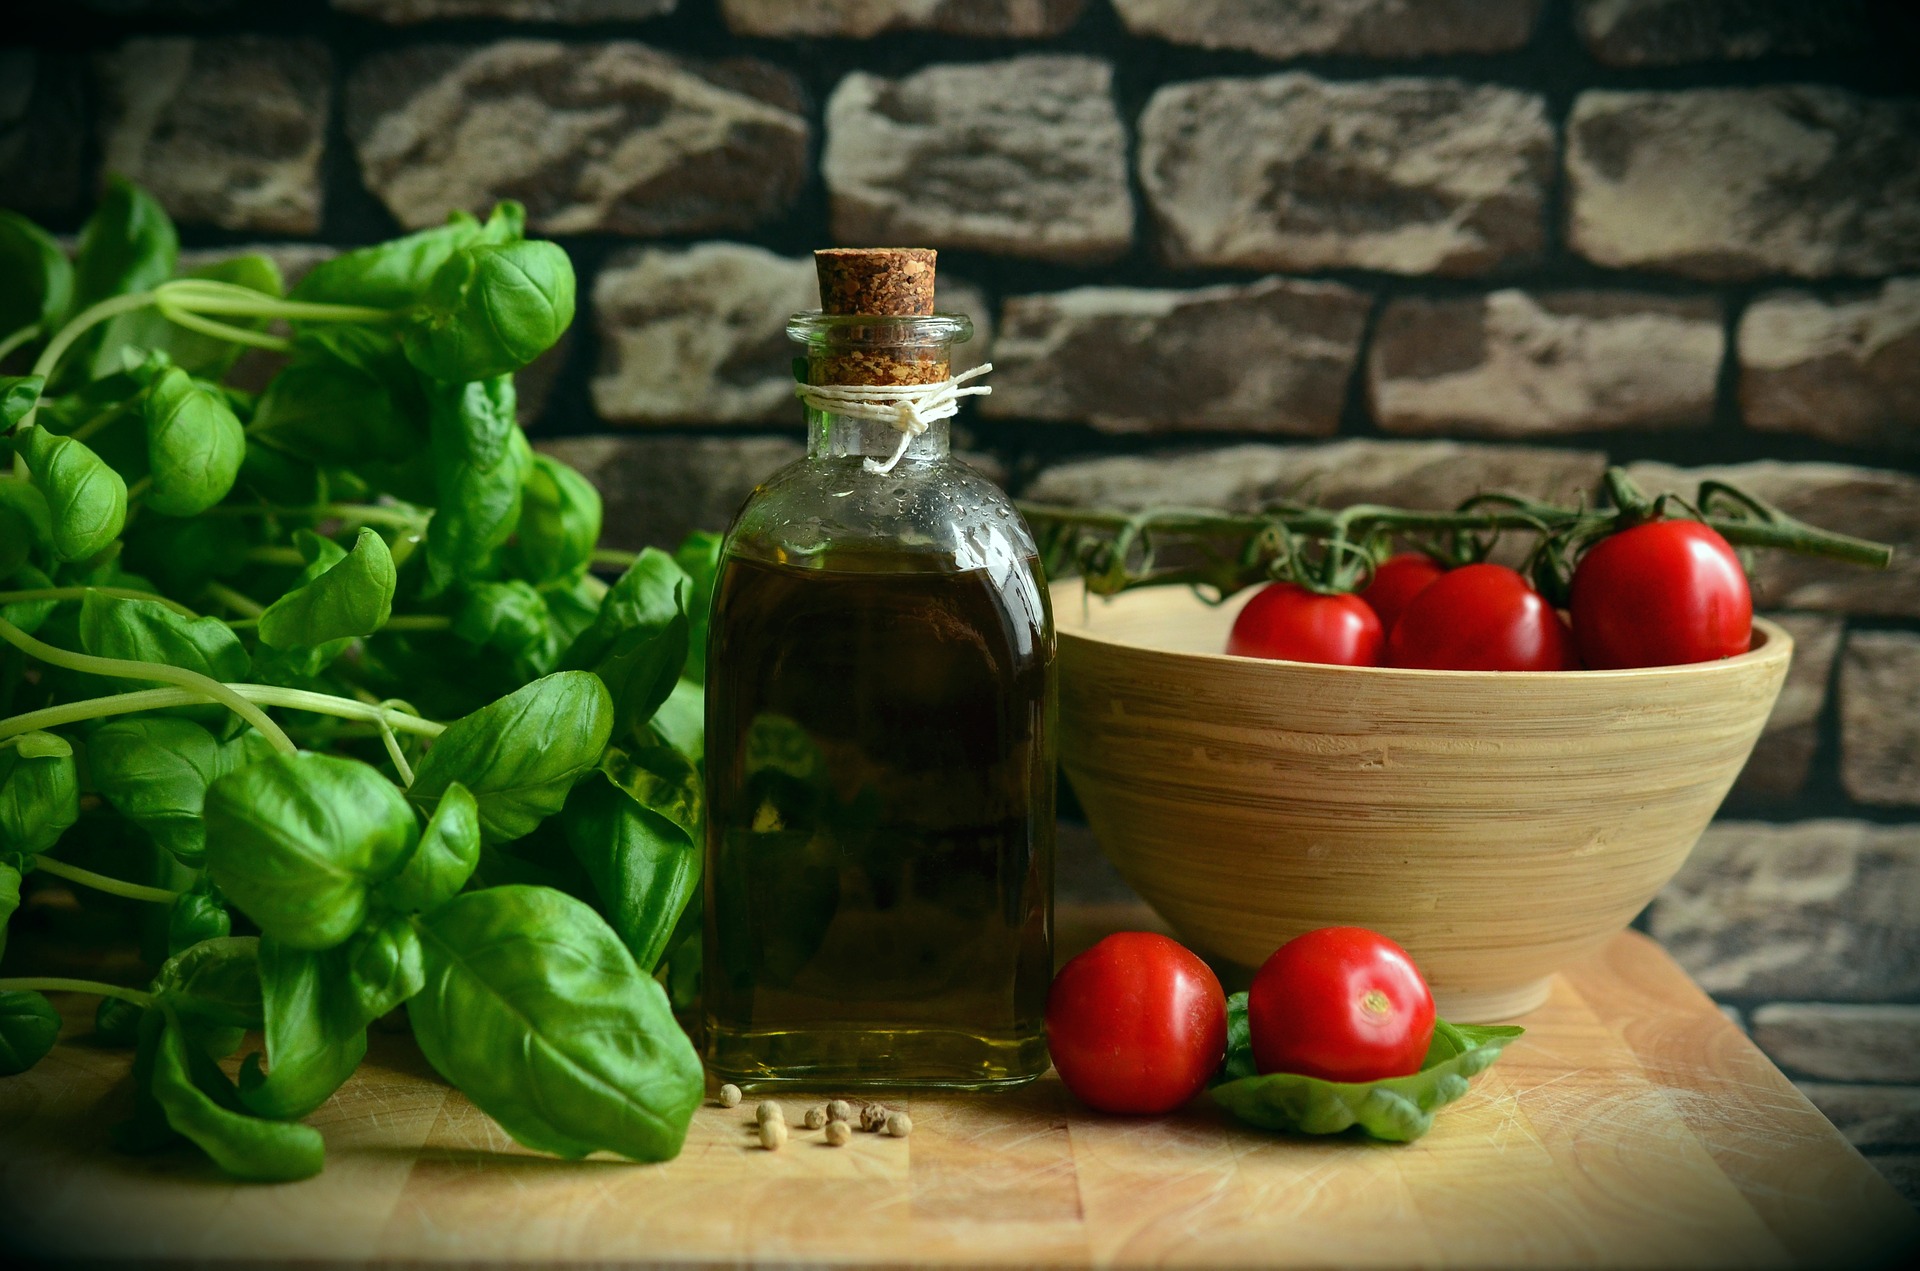
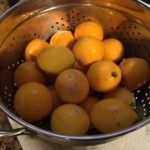
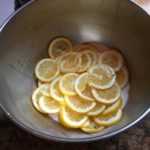
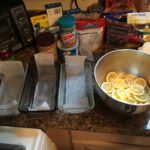
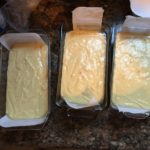
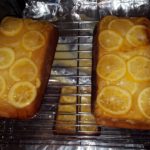
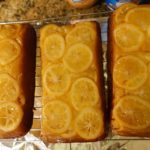
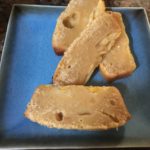
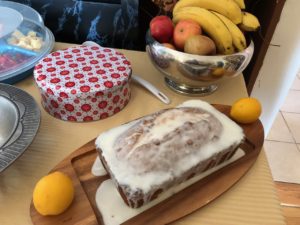
Lemon is a flavor that can be found throughout Mediterranean cooking and is often found alongside garlic, cumin, coriander, oregano, and parsley. Lemon is a much-appreciated ingredient because of the compatibility of its citrus tones with common Mediterranean dishes like fish.When you can get freshly picked lemons use them! Two of my recent favorite recipes include ways to preserve them and a “rocken” lemon cake recipe from King Arthur Flour that I think is hands down one of the best Lemon Bundt cakes I have ever had. Best part it translates into two loaf pans nicely as well.

Mediterranean Oregano

Oregano is best known for its uses in Italian cooking, but what not many people know is that there is a difference between Mediterranean oregano and Mexican oregano. Mediterranean oregano features a softer, sweeter, and more minty flavor than its Mexican counterpart, and is used in a variety of Mediterranean spice mixes, from Italian seasoning to Zataar seasoning

Tomatoes

Tomatoes are powerful in almost every Mediterranean region’s cooking. It is a flavorful crop that can be kept and presented in many way, tomato paste, tomato purée, etc. It holds a very sultry flavor that can be sweetened or more rustic. A flavor that goes well with pasta, rice, meat, seafood, vegetables and so forth — making it very versatile.

Try It: Savory Yellow Rice with Chicken

Rice:

  • 11/2 cups Basmati rice
  • ½ tsp turmeric
  • ¼ tsp cumin
  • 2 Tbsp butter
  • 21/2 cups chicken broth

Chicken:

  • 4 boneless and skinless chicken thighs cubed (1.3 lbs)
  • ½ tsp turmeric
  • 11/3 tsp cumin
  • 1/3 tsp coriander
  • 1/3 tsp ground cloves
  • ½ tsp paprika
  • 1/3 tsp curry powder
  • 4 garlic cloves minced
  • 11/3 tbsp lemon
  • ½ cup Greek yogurt
  • Sea salt and pepper
  • 21/2 tbsp olive oil
  • Medium onion sliced

Rice directions:

Melt the butter and add the turmeric and cumin. Stir just until fragrant, about a minute. Add the rice, make sure it is well coated and toast in the seasoning for about 4 minutes. Add chicken broth, bring to a boil and then let it simmer for 15 minutes.

Chicken directions:

Mix all the spices along with generous amounts of salt and pepper and 1 tbsp olive oil. Doing this in a bag will make working in the yogurt easier. After it is mixed thoroughly, add the chicken and onions and let sit overnight. Heat the remaining 1.5 tbsp of olive oil, add the chicken until cooked and serve with the yellow rice and tzatziki sauce.


Craving more Mediterranean flavor? Try these from the BitetheRoad archives:

SaveSaveSaveSave

SaveSave

SaveSave

Packing the weekend with Holiday Fun

Packing the weekend with Holiday Fun & Treats

With the gift of unexpected tickets to see the San Francisco Gay Men’s Chorus SFGMC Elfstravaganza concert last night from our friends Paul & Ryan –  after a day of baking some treats for my Pauls office fundraiser on Monday and a trial run of an older Lemon cake recipe I had found a few weeks back. Dinner at Rocco’s then heading over to the SFGMC Concert at the Nourse was a perfect way to end the night. The Lemon “bread or cake” or jelly toast as its post was called on the blog I found it on was flavorful but super dense when we cut into it this morning – so either it needed more time to cook or a few more modifications to make it work. I also think it needed some sharpness so would mix the lemon varieties in a future batch (but.. umm yeah that didn’t stop me from eating it. I am thinking maybe convert the rest into a bread pudding. The Marbled M&M mini’s worked into the Biscotti is always a favorite!
As usual, dinner at Rocco’s Cafe down on Folsom Street is always good. FYI you crab lovers – get on Rocco’s email list to get the announcement for when it’s winning crab Chioppino will be back on the menu during Christmas week.

Packing more in as “The Men Sing On”

Nothing took the message home stronger of the power of the enduring voice of these men has had, than the simple two number reminder held by conductor Tim Seelig. Season 40 is ready to hit the bricks with the 40TH ANNIVERSARY; CRESCENDO GALA SATURDAY, FEBRUARY 24, 2018 .
 
This is the power that a unified voice has. Kudos to an outstanding year gentlemen and the successful Southern States tour. Not to mention some of the very exciting updates that Tim Seelig shared which you can find out more of from visiting the #SFGMC facebook page or website (http://www.sfgmc.org/welcome)
 
I took more shots – but have left them with Paul to whip up some editing magic on them. In the meantime… a few snaps from the show. Ff course, it wouldn’t be a proper #SFGMC concert without a political comment or two and a few special guests you might spot.

You still have a chance to see the men sing during its “Home for the Holidays” Castro show

Sunday, December 24, 2017   5:00 PM, 7:00 PM & 9:00 PM
Castro Theatre – San Francisco

Every year, the San Francisco Gay Men’s Chorus comes together on Christmas Eve to celebrate the holiday season with three not-to-be-missed concerts at the historic Castro Theatre! This year is the 28th Annual iteration of “Home for the Holidays,” and we have quite a few tricks up our holiday sweater sleeves. These shows always sell out, so be sure to buy your tickets early.

Packing Even more

Next up this week is to try to knock out a few more treats and perhaps a remake of the lemon bread.. perhaps… but first its some Chocolate blossom cookies!

Looking for some food inspired things to do?

December isn’t just about the gifts. It’s also a great time to get out and sample whats happening around you.

I try to post local happenings on the BiteTheRoad Event Page or you can visit SF.FunCheap.com for lots of other ideas.

You can also send me your event and I will add them as I can.

Here is a series I am especially fond of:

This waterfront market, run by the Center for Urban Education about Sustainable Agriculture (CUESA), has over 100 food, fruit, and vegetable vendors on Saturdays and the entire Bay as its beautiful backdrop.

The Ferry Plaza Farmers Market operates year-round from 8 am to 2 pm.

On most Saturdays, free cooking demos take place in the CUESA Classroom (under the white tents in front of the Ferry Building) and are free to the public, with recipes and samples for all.

Check out whats coming up

About CUESA

8 AM to 2 PM, YEAR ROUND, RAIN OR SHINE

With more than 100 vendors, it serves as the largest market surrounding the Ferry Building every Saturday, offering a wide variety of high-quality local produce, food craft products, and breakfast and lunch options.

Enjoy free educational programs by visiting the CUESA Classroom for Market to Table Demos by local chefs, and stopping by CUESA’s Food Shed education tent to deepen your understanding of sustainable food systems.

Another of our Thursday Night-Out’s last night

Another of our Thursday Night-Outs last night

We  continued on our food theme started in October with Night-Outs to the Exploratorium for After Dark, a cookbook night at Omnivore Books, to hear Cenk Sonmezoy, the mastermind and home-schooled blogger behind the food blog Cafe Fernando introduce his new cookbook; The Artful Baker: Extraordinary Desserts From an Obsessive Home Baker as part of my “Bite-Cap“, and seeing 177 Milk Street Author and Food Personality Christopher Kimball, who was in town talking about his second season of Milk Street TV.

This week’s agenda included

But tonight, for our Night-Out we went back to basics with Kimball’s former colleagues, at a special live programming from KQED, hosted by the Bay Areas very own Leslie Sbrocco of Check Please Bay Area for an evening of stories, tips and socializing with cohosts Bridget Lancaster and Julia Collin Davison of  Cook’s Country & Americas Test Kitchen

While I know they have been on tour promoting the newest cookbook due out soon and the new season – it’s nice to see they have developed a fresh and casual style that fits them and doesn’t have them try to fit the former shows, recipe. These two funny, straightforward ladies, really bring “home”, the meaning of home access food. I was amazed at the time and detial, as they explained the intense amount of effort, ethics and time that goes into the recipes and shows. An even more special treat as I recently had attempted one of Cooks Country recipes for Spicy Cheese Bread to great success. I know Paul enjoyed it as well, as he whispers in my ear after hearing it mentioned, that I need to add the Curried Butternut Soup with Cilantro Yogurt to the next menu

Not having been to one of the KQED events before, I was pleasantly surprised at how much fun it was. The KQED space itself was great and being in the studio added its own charm. But what made it a super nice evening, was how approachable and friendly all of these television personalities were. The post-show social, snacking and wine testing was quite the mid-week treat.

Good Swag!

Of course, taking home some great swag didn’t make for a bad night either with copies of Cook’s Country Eats Local, and Pistachio Oil from the folks at La Tourangelle

These three could be trouble

And for those of you inspired foodies

Check Please Bay Area is taking applications for season 13 now. So get those applications in!

More on that can be found at http://ww2.kqed.org/checkplease/apply/

SaveSave

A Sunday morning treat at Le Marais

Planning and Brunch at Le Marais

A busy week of late, as I prepared for a trip to Alexandria, VA for a week of meetings. Including one of which is a workshop, I am hosting as part of my other world. But knowing that, on Sunday I took Dino for a morning walk and I even managed to get Paul up to go with a promise of brunch. We had heard a lot about the new Le Marais Bakery that made moved in on 18th & Sanchez. But hadn’t had a chance to sample it. It has been some time since I was last in France, so anytime I can enjoy some of the flavors I look forward to it. When we saw seating outside – we grabbed it for sure.

A menu I look forward to sampling more of

I really like the Le Marias  “Board” menu which lets you choose from a variety of options. This is perfect for me as I am not normally an omelet person. After waiting for an unusually long time,  a server came over to check on us and I think realized we hadn’t even been offered coffee. Once they fixed that and took our menu, we were pleasantly surprised when another server came by with an offer of two curtesy pastries to apologize for the delay.

Not being one to say no to the temptation of the baked kind, I went with the savory scone of the day and Paul grabbed the almond croissant. So just to stop you from wondering if you should? YES! You should. They were great. The scone was the right balance of cheese, dense and savory with chunks of ham. While the croissant was crisp, rich and layers of the almond filling but not so much it was like paste inside as some other spots tend to do.

We both opted to order from the Board Menu, my going for a smoked salmon and lox theme and Paul with a more traditional egg, avocado one. From a quality perspective  – I was very pleased.  While paying for the check, I went up to the counter and purchased a few other take homes and again was pleasantly surprised when the house tossed in an extra croissant for the trouble.

It is service like this, that will make me a customer on a routine basis. I don’t need extras on every visit – but I do appreciate places that put the effort out to recognize when”service had a moment” with a gesture. Overall a great showing at Le Marias Bakery in the Castro.


Le Marias Bakery http://www.lemaraisbakery.com

On Facebook: https://www.facebook.com/LeMaraisBakery and Twitter and Instagram as @LeMaraisBakery

Bite-Cap3: The Final Chapter

Bite-Cap3 … well, it is Halloween, the most notoriously themed holiday for “sequels, prequels, and new adaptations”.

As many of you know or saw on Facebook – Sunday was our monthly book club. This months book was a Werewolf book; Mongrel by Stephen Graham Jones

So trying to stay in tune with the book and determine what to make to eat – I recalled a recipe for Braised Cauliflower I had been wanting to try. Which when I remembered, it looked a lot like brains. Which I imagine why when it is photographed it gets special treatment. So that started the menu. With some help from Lidia Bastianich’s cookbook Mastering the Art of Italian Cooking, my variation to her standard recipe for Braised Cauliflower is below. I also checked out several other versions including one at NYT and they all offered options and flavors and cooking technique (oven or stovetop). But I stayed with the style that Lidia’s version offered.

But I couldn’t stop there –

Last week I also caught an episode of Nancy Fuller’s FarmHouse Rules For the  Meaty Intestines – and I thought that would marry well with the brains.

Stuffed Bread intestines – this originated from Nancy Fuller’s FarmHouse Rules shown for Halloween on Meaty Intestines.  But since I wasn’t going to make a slow-cooked pork butt, which is what she used to fil her “Intestines”.  I improvised the stuffing some. (Note: The leftover stuffing is what I mixed with the leftover sauce and onion from the Braised Cauliflower and places around the Brain in the pan)

But the ones I served at Bookclub revised as follows:

Braised Cauliflower Brains

Ingredients

1 teaspoon chopped garlic
2 tablespoons
4-6 ounces chopped Bacon (I use a black pepper thick cute sliced)
1 large onion, large diced
1 large head of cauliflower (keep it whole)
1 can 28 ounces can plum tomatoes (San Marzano work well), plus the amount of one can of water
1 teaspoon salt
1 teaspoon fresh thyme
1/2 teaspoon red pepper flakes
2 teaspoon Worcestershire sauce
3 bay leaves
1/2 teaspoon of dried rosemary
1/4 cup of red wine vinegar (or you can use 1/4 cup red wine)
2 teaspoons Parmagrante paste (omit this if you use wine)


 Instructions

In a Dutch oven over medium heat:

Add oil and bacon, cooking off until almost crispy, then add onions.

As the onions soften, add red pepper flakes. Stirring frequently.

Open and pour the tomatoes into a bowl and hand crush them ( I left some chunks for affect) and pour entire can, along with adding enough water the fill the empty can with water to the pot.

Pour the crushed tomatoes into the pot and then, adding enough water the fill the empty can with water into the pot.

Add Bay Leaves, Thyme, Rosemary, red wine vinegar, Worcestershire sauce and pomegranate paste (You can adapt for personal  taste – if you have red wine handy – swap that out for vinegar and pomegranate paste )

Stir and raise heat to a low simmer, place the head of cauliflower in the center.

Spoon some of the mixture over the head of cauliflower, like you are giving it a bath…

Bring back to a simmer and cover.

Cook for 25 – 35 minutes. It is done when a knife slides in easily.

Covered it will keep warm for a while or turn the heat back on to bring back to temperature when serving.

Serve by slicing or break it up as you please


Stuffed Bread intestines

– this originated from Nancy Fuller’s FarmHouse Rules shown for Halloween on Meaty Intestines.  But since I wasn’t going to make a slow-cooked pork butt, which is what she used to fil her “Intestines”.  I improvised the stuffing some. (Note: The leftover stuffing is what I mixed with the leftover sauce and onion from the Braised Cauliflower and places around the Brain in the pan)

Ingredients

Two (2) 13.8-ounce package pizza dough (I removed them from the container and wrapped in loose plastic wrap prior to using)
1 medium onion -small  dice
2 Jimmy Dean Sausage roles ( or any kind of ground pork will do)
1/2 cup packed fresh cilantro leaves, roughly chopped
3/4 cup shredded cheese ( I used  a mixture of Cheddar and Provolone cheeses)
1/2 teaspoon red pepper flakes
2 large eggs
1 – 2 tablespoons tomato paste
All-purpose flour, for dusting work surface
1 box of long grain rice and almond mix
1 tablespoon of pomegranate seeds (optional)


 Instructions

In a Dutch oven over medium heat

Add oil and cook the pork sausage, break it up as it cooks -but you don’t want is so small that you haven’t any texture.

Add onion, red pepper flakes, salt, and pepper stirring frequently.

When done, remove from heat and add 1 tablespoon of pomegranate seeds (optional)

Mix well and leave to cool uncovered (you can make this mix the day before and then use the mix on the day you need it for.While the meat cools, prepare a box of long grain & almond rice mix but omit the seasoning packet. Once made – mix it into the meat & rice mixture

While the meat cools, prepare the box of long grain & almond rice per manufacturers instructions mix but omit or use less than half the seasoning packet.

Once made – mix it into the meat & rice mixture

On the day you plan to bake the “Intestines” off:

On a lightly floured table, roll out the dough into so you cut it into 3-4 in wide strips however long you want them to be. Note: One thing I did was removed the dough from the tobe container the day before so I could let it breathe a bit and soften to room temperature before rolling.

Lay the meat mixture down the center, add shredded cheese alongside it, and the cilantro.

Now seal the edges, keeping the tube affect. Don’t worry much id they look a little ragged -that helps the effect.

Place on parchment covered sheet pans.

Bake in a preheated 375-degree oven for 25 – 30 min, switching pans 1/2 way through the cooking.

Hints

I especially love the tip from on the recipe – about using a wash of  1 – 2 eggs and 1-2 tablespoon of tomato paste whisked together to make the pre-bake glaze. That is what gave it the “intestinal” color.
Another hint is to use some of the tomato paste and dab it on the precooked bread to give it a “gashed” look.

Afer 5 min cooling, remove and let cool on a rack

Once baked and cooled a bit I laid them out as you saw to create an affect. I also mixed the leftover rice and meat with the sauce to serve it around the “brains” to help soak up the liquids and used a small rack, under the bread, in the serving pan, to keep them semi-dry.


SaveSave

SaveSave

Bite-Cap — get it, a Recap my BiteTheRoad week.

What a week!

From the launch of the #FoodMemories17 Guest series early in the week,  some follow up at my TechInclusion “TED” Style talk on Mentorship and LGBT at SF Armory building, getting a chance to listen to blogger and cookbook writer Cenk from www.CafeFernando.com talk about his newest cookbook “The Artful Baker”, dinner at some fun spots around town, a 5.4 mile local urban hike, an educational trip to the Academy of Sciences for a “Nightlife” event , a look back with a chocolate chip pie and wrapped it all up today with some killer themed food for the monthly book club (but that gets it own entry later this week). It’s no wonder I will be ready for bed early.  So here is a quick visual Bite-Cap…

Bite-Cap: 1 Food Memories; Telling Our Story

I had wanted to add a new feature to BiteTheRoad decided to use a more “crowdsourced” approach with a new guest feature called ‘Food Memories Stories Told. The overall idea was to offer a larger scope of unique stories through the common experience of food and eating and invite others to help grow it. (You can also read my initial post about Food Memories here.)

Yes, everyone is welcome to participate. From the novice to more experienced blogger, the home cook to the professional.  Each guest storyteller will share personal themes of food-related memories, recipes, moments of healing, love, transitions, and reflection and post them during the next few months. We will use the hashtag #FoodMemories2017 and all guest posts will be featured on the BiteTheRoad website and on its companion Facebook page Facebook.com/Bitetheroad. I will also share it out via my twitter account @FVStrona,  the BitetheRoad Tumblr and  Instagram pages and of course, I encourage you to share your post to your networks. Our first guest feature went live with Travis’s 81-layer Biscuits.

Bite-Cap: 2 Talking about Mentoring LGBTs in Tech at TechInclusion

I did a 10 min “TED” Style talk and used storytelling as a way to share about the importance of mentorships and mentors for the LGBT person in Tech. It was a great afternoon with so many very cool people present, that it would have been as nice to attend and not speak. I had forgotten how I enjoy the process of planning using the storytelling technique and coaching through humor. It was fun to be back in the San Francisco Armory in this other role, even it I always enjoyed it from my regular one. As a venue – they do a great job with hosting programs. One of the folks snapped a picture of me in motion and I dressed it up a bit and shared about my social media hubs as well. You can check out my post on Monday afternoon of the MentorSF.com/Engage blog to read more and see some of the slides.

Bite-Cap 3: Omnivore Books and The Artful Baker: Extraordinary Desserts From an Obsessive Home Baker

Omnivore Books, (Omnivore Books has a Facebook page as well) here the Bay Area, often hosts book and author events. My pal Brad suggested we check it out last week, and I am so glad we did. This months offer was the newest cookbook from Cenk Sonmezoy, the mastermind and home-schooled blogger behind the food blog Cafe Fernando. With cookbook author and blogger for www.EatTheLove.com, Irvin Lin serving as local Interviewer  – Cenk did some great storytelling behind his masterful cookbook and the powerful images he took himself in addition to the recipes he wrote. If I hadn’t already purchased my copy, I would have put this on my Christmas list. Its a classic trilogy of storytelling, recipe sharing and visual enticements.  The Artful Baker: Extraordinary Desserts From an Obsessive Home Baker is available at Omnivore or on Amazon.

Of course , hile I have finished reading the Artful Baker (Yes, I read them cover to cover like a novel), I did get inspired to pop out an old school Chocolate Chip Cookie “practice” pie. “Practice” as in it’s a recipe I hadn’t tried and it’s that time of the year when I start working on the menu for the Holiday Orphans party in December..

Bite-Cap 4: The weekend wasn’t all about food….

I did manage to get a 5.4 mile urban hike in on Saturday. This trail was a new one for me, but it has been part of Pauls exercise path previously, so it gave me a chance to explore parts of Glen Park that I hadn’t seen before. But I think poor Dino’s little legs might not have been as happy with the walk! I think other than the obvious – it’s what you don’t expect to see that always catches my eye.

SaveSaveSaveSaveSaveSaveSaveSave

SaveSaveSaveSave

SaveSave

SaveSave

SaveSave

It’s apple time but not just plain apple but “Candied Apple” time!

It’s apple time but not just apple but “Candied Apple” time!

One of my favorite times of the year is the September – November period. I always liked the ending of summer and the start of the fall. The leaves changing, the colors, the smells, the slight coolness in the breeze. One of the few things I miss not living in the east coast any longer is a certain smell in the air that comes from just the right combination of rain, new growth, mulch, warmth, and dampness. Every so often I will catch a quick moment of it here in San Francisco first thing in the fall morning.

But with the cool weather comes apples.. lots and lots of apples. OK – you bakers can make all the pies and cakes you want. But my favorite way to enjoy apples is smothered in caramel, chocolate, and some extras. Yes, that’s right. It’s candied apple season and not just any apples – it’s the time of the year the little hybrid Lady Apple is at its best. This combination packs the tartness of a crab apple and the sweet of a granny smith in a 3-bite snack. I was looking for other images and found these it promoted me to re-post the how to on them for folks.

ok so this isn’t rocket science here folks:

All you need apples, caramel, chocolate, sticks, wax or parchment paper, plastic wrap and some extras like nuts, sprinkles etc.

Check out the grocery stores. It used to be, you could only find these at places like Whole Foods. But now I can find them pretty much anywhere starting September. But they have a short season and to be honest can be expensive so plan accordingly.

Wash and dry the apples. I leave the stems on – but some folks like to remove them. While they dry – start the next steps:

Depending on the kind of caramel and chocolate you use, you will need to prep them. For the caramel, I use a large box I get from either Amazon or Smart & Final, but in a pinch, you can buy regular packaged caramel squares and unwrap them individually. (that just takes too  much time). In either scenario cut the caramel into 2-3 in cubes and toss in a microwave safe bowl. Something with a handle as the melted caramel will be super hot. Set it aside.

Then do the same with your melting chocolate. Milk or dark – it’s all your preference. Sometimes I get mine at Safeway and use the packages melting chocolate, other times I head over to Marin or Berkeley to the Cake and Candy supply store for bags of it. I also melt mine in the microwave, so no fussing with extra pans.

Now lay out an assembly line.

Clean & dry Apples => Candy Sticks => Hot pad for Carmel => Hot pad for Chocolate => Bowl for toppings => Sheet pan covered in parchment or wax paper


Now stick the little suckers, stem side up.

Next, put your caramel in the microwave to melt in 40 sec intervals. Stirring in between. DON”T over heat it. Also, DON’t let any moisture and water get in it. Use a dry spoon to stir. You want it like liquid molten bubbling lava, and almost as hot!

Now in small batches, working quickly, dip, rotate in the hot caramel and twirl off the excess in the hot caramel. (This is why I use a deeper bowl for this part) and place on the covered sheet pan. Once they set up a few minutes. Check for shape – the caramel will be soft enough to smooth and shape if you get a few irregular bumps. Keep in mind – when it cools it will get stiff. All you need to do is pop it back in the microwave and reheat.


Now you do the same with the chocolate – put your chocolate in the microwave to melt in 20 sec intervals. Stirring in between. DON”T over heat it. Also, DON’t let any moisture and water get in the chocolate. Use a dry spoon to stir.

After you twirl off the excess chocolate this is the time to roll it in any toppings and then place back on the sheet pan to set.


If you feel the chocolate is cooling off or you are running low – just add more and/or reheat it.

Once they are dry to the touch, you can wrap them in the plastic wrap or buy the small food gift bags from the store. Close with a simple tie and you are ready. They don’t need to be kept super cold – but keep them out of direct sun.