
I wrote about on “the battle rages on” which is actually yet its own adapted recipe from Valerie Bertinelli’s Helen’s Black Pepper Biscotti . Th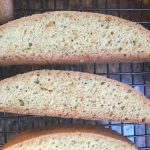 e original recipe uses walnuts, which isn’t on of my favorite nuts – so often omit it.
Black Pepper, Vanilla & Orange peel Biscotti
I wrote about on “the battle rages on” which is actually yet its own adapted recipe Valerie Bertinelli’s Helen’s Black Pepper Biscotti.
- 2 3/4 cups all-purpose flour
- 1/2 tsp baking soda
- 1/2 tsp baking powder
- 1 tbsp freshly ground black pepper (I use a mix of fine ground and course grind for taste and texture, To give these a visual pop – you can ground peppercorns that are other colors over the traditional black))
- 1 pinch Kosher Salt
- 1 stick (1 stick) unsalted butter, softened
- 1 cup Sugar
- 3 large Eggs (At room temperature)
- 2 teaspoons grated orange zest (I tend to get the organic ones or ones I pick from my pals garden- depending on size of orange this may be 1- 2 oranges)
- 1 Lemon zest
- 1 1/2 tsp Vanilla Extract
- 1/4 tsp Almond Extract
-
Sift together the flour, baking soda and baking powder in a medium bowl. Stir in the pepper and salt. Set aside.
-
In the bowl of a stand mixer fitted with the paddle attachment, beat the butter on high speed until pale and light, have the patience to let it do it’s work – it could take several minutes.
-
Add the sugar and beat until light and fluffy, about 7 minutes. Reduce the speed to low and add the eggs one at a time, beating well after each addition.
-
Add the orange and lemon zest, vanilla and almond extract .
-
With the mixer on low, slowly pour in the flour mixture, and then the walnuts. Mix a few minutes till the dough texture is formed into a sticky mix
-
If using nuts, add them now (You can also do this by hand and fold them in then work the dough by hand till smooth).
-
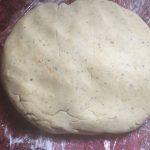
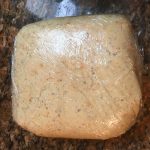
Pour the dough out on to a lightly floured plastic wrap covered surface or clean counter top. Gently knead the dough to shape with your hands to form a thick round ball shape. The dough is super easy to handle at this piont. Cover the dough with plastic wrap and refrigerate for 30 minutes. (For this batch I omitted nuts).
-
Preheat the oven to 350 degrees F.
-
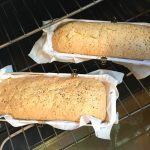
Line two metal ice cube trays with parchment paper and clip in place (or go old school and line 2 baking sheets with parchment paper (nonstick silicone liners also work).
-
Remove the dough from the refrigerator, unwrap and divide the dough in half, and shape each piece into a 12-inch log, about 2 inches across and 1 inch tall. (Note you can make these as wide or thick as you like – I find because of the texture and taste of these, I tend to like a finished bake that is about 3 inch long and 1.5 inch high you may have to play with it a few times). But they don’t need to be prefect. In fact any uniform shape will work.
-
Bake until the logs are cooked through and lightly browned on the bottom, about between 30 – 35 minutes, depending on your oven and pans. The humidity will also play a role check as you bake. Watch them the last 5- 10 minutes as this could differ based on your pan and stove temp.
-
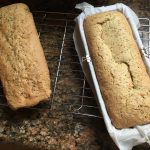
Let the logs cool for about 5-7 minutes on the baking sheets (leave the oven on), then transfer them carefully to racks (remove the parchment paper) to cool 10-15 minutes more.
-
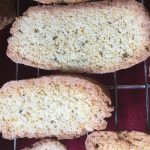
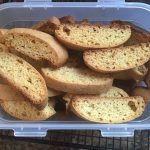
Using a serrated knife, slice each log either on the diagonal (to give you a fancy shape) or straight across into 3/4-inch-thick slices. Arrange the slices cut-side down on the baking sheets and return to the oven until well toasted, 10 to 15 minutes more, I general flip mine over about half way to get even color.
-
Note: These biscotti have a great golden color to them which will darker to as you “second bake”. If you want to keep them less brown; adjust time or instead of laying them on the cut sides, leave the standing cooked side down.

-
Transfer the biscotti to cooling racks to cool completely. The longer they bake the harder they become. Note: they will continue to harden as they cool. Store in tins or air tight containers.