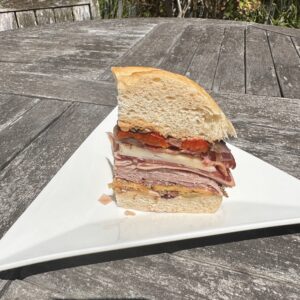
Smoked Hog Muffuletta Sandwich

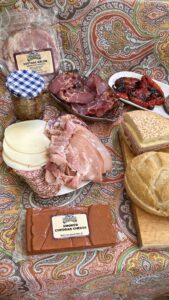
Having just returned from New Orleans (yes, I carried back with me a well wrapped version of the local Muffuletta sandwich) and saw that my new pals at Stoltzfus Meats sent me some new treats to sample. This included some of the Cottage Bacon ( which I had never tried before but is now my new favorite child), Smoked Cheddar Cheese and a package of its branded Canadian Bacon. So you know what that meant; I was making up my own version of the Muffuletta that was amped up in flavor and smoke.

A bit of history on the Muffuletta Sandwich

According to many online sources – the muffuletta bread has origins in Sicily with the sandwich version showing up as early as 1906 in  New Orleans, Louisiana. Common belief is that the sandwich was created by delicatessen owner Salvatore Lupo, a Sicilian immigrant. But others had paid claim to that as well..

The traditional-style muffuletta sandwich consists a sesame seeded “muffuletta bowl shaped soft loaf” split horizontally, filled with layers of marinated diced olive salad, and cured meats commonly eaten in Italian households at the time including salami, ham, Swiss or mozzarella and provolone cheeses, and mortadella.

The diced olive salad consists of olives combined with quick or jarred pickled celery, cauliflower and carrot. Most of these can be usually found in a jar of giardiniera, seasoned with oregano and garlic, covered in olive oil, and allowed to combine for at least 24 hours. In fact for my version I used my own recipe for  Sherrys Garden Giardiniera” base with several kinds of cured, jarred minced olives to enhance the taste. My giardiniera also includes serrano peppers, radishes and okra. You can find my version on the FoodtokTV site here or on here on Bitetheroad.

The recipe below gives you a full version, but you can use the recipe above for “Sherrys Garden Giardiniera” and amp it up with olives like I did. Note: You can often find jarred Olive Salad in the pickle section of the grocery stores and on Amazon.

Think about following me on Tiktok under my new food & recipe focused account @KitchenBearSF

Ingredients
  • 3/4 cup pitted mixed oil-packed olives
  • 1/2 cup giardiniera (Italian-style pickled vegetable salad or make you own Sherrys Garden Giardiniera)
  • 1 large roasted red peppers ( yes you can use jarred ones)
  • 1 tablespoon capers (optional)
  • 3 tablespoons extra-virgin olive oil
  • 1 tablespoon red wine vinegar
  • 1 large muffuletta-style roll (Since I couldn’t find them locally, I used a sourdough roll)
  • 1/3 pound thinly sliced sweet soppressata
  • 1/3 pound thinly sliced mortadella
  • 1/3 pound thinly sliced capicola
  • 1/3 pound thinly sliced provolone cheese
  • 1/3 pound of Smoked Cheddar Cheese
  • 1/3 pound of cooked Cottage Bacon
Directions
  1. Combine olives, giardiniera, capers in a food processor and pulse to a small mince. For a chunkier version, dice by hand with a sharp knife.
  2. Transfer to a bowl. Add olive oil and vinegar and stir to combine. For best results, let you olive salad rest overnight before continuing
  3. Split the muffuletta roll in half and spread each cut surface generously with olive salad, with the liquids!
  4. Add alternating layers of meats and cheeses, in the middle add the layer of roasted red pepper.
  5. Close sandwiches and press down gently press to compress.
  6. Wrap tightly in paper or plastic and let rest for 1 hour  – 2 hours before serving.

You can make this a day before and leave wrapped then slice. This is a perfect party or picnic food as it is best room temperature so can be removed from the refrigerator to come to room temp before eating.
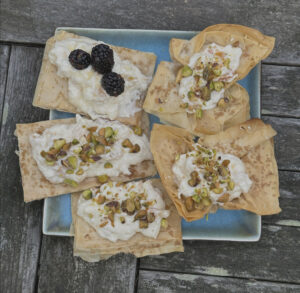
Ricotta Dip Topping

Ricotta Dip Topping is the perfect topping for a Date Nut Bread, cake or grilled peaches  


Ingredients

  • 8 ounces cream cheese softened to room temperature
  • 8 ounces (full or part-skim ) ricotta strained at room temperature
  • 2 tablespoons honey
  • 1/2 teaspoon of a sweet peach or orange jam
  • Pinch kosher salt
  • 1/2 cup dried apricot halves finely diced
  • 1/4 cup shelled roasted pistachios, chopped
  • Base of for the topping: Crackers, Pyhllo sheets, Pound cake, grilled fruit etc

Preparations

  1. In a medium mixing bowl, blend together the cream cheese, ricotta, honey, jam and salt until smooth.
  2. Taste and add additional salt or honey as desired.
  3. Gently stir in the apricots.
  4. Transfer to a serving dish of using as a dip and  sprinkle with pistachios and drizzle with remaining 1 tablespoon honey.
  5. or Smooth on to your prepared Phyllo bases or my favorote way spread on Date-Nut Breads
  6. Serve immediately or refrigerate until ready to serve.

Notes

As a topping the options are endless. This is great on grilled peaches and other fruits as much as a topping for toast, pound cakes or as an addition to a Cheese and fruit course

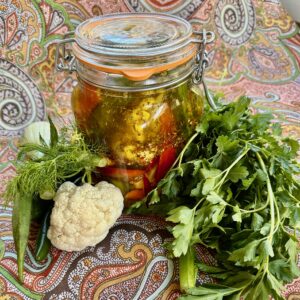
When the American South meets an Italian American for a pickled vegetable Giardiniera Salad


I was working with a new version of this classic pickled salad I affectionately call “Sherry’s Special Giardiniera Salad” in honor of Sherry Skinner‘s birthday and decided to rework it with some different vegetables, including a southern, classic okra.

The Giardiniera (pronounced jar-din-AIR-a) salad is a common side dish that Italians and Italian Americans often have sitting ready for snacking and as a side, much like it’s American cousin, the pickle. It can often be found in the stores, in the jarred vegetable section, but it’s such an easy dish to make and it’s perfect when you have an abundance of vegetables that do well with the bite of herbs, spices and vinegar.

This version is not heat processes so it’s only good up to a week, if it lasts that long. (There are many recipe that will allow you to heat process these to keep them longer and make them shelf stable.)

Ingredients

Part 1 -the Veg

  • 4 to 8 Serrano chiles, seeds removed and thinly sliced or leave hole for less zing (Quick tip- use a fat straw to remove the seeds and ribs easily)

  • 1 Red  Bell Peppers, cut into 1/2-inch pieces

  • 2 Celery ribs, cut into 1/2-inch pieces

  • 2 Carrots, cut into 1/2-inch pieces

  • 1/2- 1 small head Cauliflower, cut into small florets

  • 2 cloves Garlic, minced

  • 1 Fennel bulb ( medium)

  • 1/2 lb Okra

  • 1/2 Onion Red or sweet, sliced thin

  • 1/3 cup kosher salt

Part 2 – Seasoning Mix

  • 1 tablespoon dried Oregano

  • 1 teaspoon crushed Red Pepper flakes

  • 1/2 teaspoon Celery seeds

  • 6-8 whole black Peppercorns

  • 1 teaspoon Mustard seeds

  • 1 teaspoon Fennel Seed

Part 3 – Marinade

  • 1-2 Bay Leaves

  • 1 cup white Vinegar

  • 1 cup Olive Oil

    Notes:

    • If your celery or fennel has leaves on them, reserve the leaves in a damp paper towel in an open plastic zip bag over night and include in the part 2 step.

      Optional add ins include sliced green or black olives, hot cherry peppers, small green tomatoes, whole ginger.

Directions:

Step 1

  1. Clean, peel and chop your vegetable to your preference.

  2. Combine the chiles, red peppers, onion, celery, carrots, okra, fennel, cucumbers and cauliflower in a large ceramic or glass bowl.

  3. Add the salt gently mix well into vegetable mixture.

  4. Add enough water to cover the vegetables.

  5. Cover the bowl and refrigerate for about 12 hours or overnight.

Part 2

  1. Drain and rinse the vegetables under cold running water to remove the salt. Set aside to drain in a strainer.

  2. In a small bowl, add the remaining ingredients and blend (garlic, oregano, red pepper flakes, assorted seeds, peppercorns, etc.).

  3. Add some of the seasoning to the bottom of a clean dry jar

  4. Add the drained vegetables being careful not to break up the vegetables (Note: you can also do this in an large bowl and using your hands – use gloves if you hands are sensitive to peppers and garlic and then add to the jar)

  5. Pour the vinegar and oil in.

  6. Tuck in 1 -2 Bay leaves, leftover celery leaves and any fennel fronds.

  7. Add additional vinegar to cover the mixture.

  8. Refrigerate for 2 to 3 days before serving.

  9. Stir the mixture or gently rotate the jar once or twice during that time.

When it’s ready to be eaten, remove the jar from the refrigerator about 30 mins prior. Plate and serve as a snack plate or topping on a salad or grilled meats.

Note: The same mixture could be diced up, with olives, drained and added to cold cut sandwiches, similar to the classic muffaletta  italian sandwich invented in New Orleans with cured meats (ham and salami), provolone cheese, olive dressing and the best local breads.

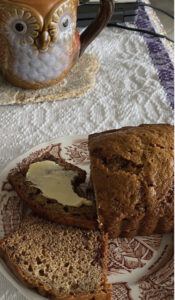
Date Nut & Dried Cherry Choc Chip Bread

Dried fruit and  nut breads, were a popular standard in the part of New England where I grew up. This version is full of dates, dried cherries and chunks of chocolate. It’s a great alternative to traditional Banana or Pumpkin bread. Paired with sharp cream cheese spread or my Ricotta Cheese Dip Topping this will take you from breakfast to before bedtime snack

Ingredients

  • 3 cups dried and chopped dates & dried cherries ( dried cranberries work too)
  • 2 tsp baking soda
  • 1 1/2 cup boiling water
  • 2 eggs separated
  • 1/2 salt
  • 1 – 1 1/2 vanilla
  • 3 cups flour
  • 3/4 cup chocolate chips ( bittersweet or dark choc)
  • 1 1/2 cup sugar
  • 1 tbsp melted butter ( or shortening)
  • 1 cup walnuts chopped
  • Cinnamon or pumpkin pie spice optional

Preparation

Step 1

  • Mix chopped dates and cherry with the  baking soda, pour boiling water on, and let sit until cool
  • When cool strain the liquid from the date (BUT reserve the liquid ) and cherry mixture.
  • Pre-heat oven to 325

Step 2

  • Separate eggs
  • Mix egg yolks, sugar, salt, butter and vanilla.
  • Next Add flour and date and cherry liquid. Alternating until both are used up ( Usually I do this in fourths)
  • Add in the date-cherry mixture and any remaining liquid, nuts, and choc chips until combine

Step 3

  • Beat eggs whites to soft peaks and fold into the batter until just incorporated

Pour into 2 loaf pans or 4 -5 mini loaf pans

Top with Turbinado Sugar if you want more crunch on the top

Bake 325, 60 – 80 min middle rack until a toothpick comes out dry

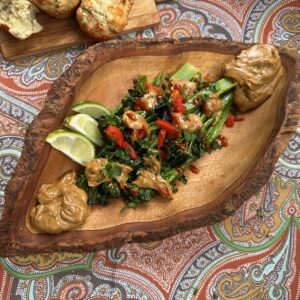
Roasted Broccolini with Peanut Sauce

Roasted Broccolini with Peanut Sauce

One cold and rainy day on the @Foodtoktv channel: “Rainy Day Comfort Lunch” Live, I knew I needed something spicy and with a vegetable – so I went to a dish I made back in November, Roasted Broccolini with Peanut Sauce. This dish is inspired by Molly Yeh’s version. Along with it, I made my Bacon, Green onion, Cheddar and Walnut Muffins and Muscles, Potatoes and Bacon is perfect.

Ingredients

  • 2 bunches broccolini

  • 2 tablespoons bacon fat ( or you can use olive oil)

  • 3 tablespoons peanut butter

  • 3 tablespoons soy sauce

  • 2 tablespoons honey

  • 1 tablespoon sesame oil

  • 2 cloves garlic, minced (optional)

  • Pinch crushed red pepper

  • 2 tablespoons crushed peanuts

  • ¼ cup chopped roasted red pepper (drained)

  • Sriracha, for serving

  • 1/4 cup fresh cilantro, roughly chopped

  • Lime wedges, for serving

 Directions:

  1. Preheat the oven to 400 degrees F (or electric skillet to 250 degrees).

  2. For the oven:

    1. Lay out the broccolini on a baking sheet and drizzle with the olive oil.

  3. For the Electric Skillet

    1. Add the bacon fat or olive oil. Add the broccolini to a cold skillet

    2. heat to 250 and cover.

  4. Roast until tender and beginning to brown, about 15 – 20 minutes. Rotate as needed

  5. Meanwhile, add peanut butter, soy sauce, honey, sesame oil, garlic and crushed red pepper to a small bowl and whisk to combine. Add lime juice and lime zest to thin.

  6. Transfer the broccolini to a serving platter and drizzle with the sauce.

  7. Top with the roasted red pepper, crushed peanuts, sriracha and cilantro.

  8. Add an extra drizzle of sesame oil

  9. Serve with lime wedges.


This is one of the dishes  I made previously on @foodtoktv live. You can see that live on the @Foodtoktv Youtube channel

Follow me on Tiktok under @KitchenBearSF (in addition to my original profile Frank_Mentorsf) as work up to the 1k needed followers to start going live cooking again

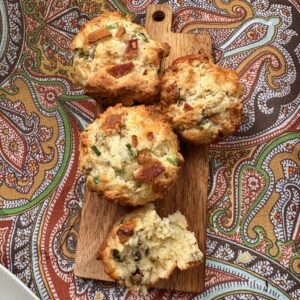
Bacon, Onion, Cheese, Walnut Muffins

Bacon, Onion, Cheese and Walnut Muffins

There is something about savory muffins that I love.

These Bacon, Onion, Cheese, and Walnut Muffins are perfect for dipping in soups or gravy, or smeared with butter or honey I did on my @Foodtoktv’s “Rainy Day Comfort Lunch” live .

This combination is a old favorite, I often see it in scones. But was excited to try in a muffin version, from this vintage recipe out of the  Best of the Best from New England: Selected Recipes from the Favorite Cookbooks of Rhode Island, Connecticut, Massachusetts, Vermont, New Hampshire. Take advantage of its basic recipe and get creative to make it your own.

Ingridients

  • 1¾ cups flour

  • ⅓ cup corn oil ( or bacon fat melted or combined)

  • ¼ cup sugar

  • 1 cup of green onion, coarsely chopped (aprx 8-10)

  • 2 teaspoons baking powder

  • ½ cup shredded Cheddar cheese

  • 1 beaten egg

  • ¾ cup milk

  • ½ cup chopped walnuts

  • ½ cup chopped bacon

  • 1/4 tsp Salt (optional)

  • Optional extras; if you want to make these more robust, add 1/4 tsp of garlic powder, and/or Everything But The Bagel seasoning or your favorite dried herbs. Start with 1/4 tsp and add to your tastes. You can also consider switching out the cheddar for pepper jack.

Directions

  1. Preheat oven to 400°.

  2. In a large mixing bowl stir together the flour, sugar, (salt and seasonings, if using) and baking powder. Make a well in the center.

  3. Combine egg, milk, and oil(s).

  4. Add egg mixture all at once to flour mixture; stir just until moistened.

  5. Fold in onions, cheese, (bacon if using) and walnuts until just combined.

  6. Grease or line muffin cups and fill approximately ⅔ full.

  7. Bake at 400° for 20-25 minutes or until golden.

Makes 12 muffins.

Adapted from:

Best of the Best from New England: Selected Recipes from the Favorite Cookbooks of Rhode Island, Connecticut, Massachusetts, Vermont, New Hampshire, Plastic Comb – August 1, 1994


This is one of the dishes  I made previously on @foodtoktv live. You can see that live on the @Foodtoktv Youtube channel

Follow me on Tiktok under @KitchenBearSF (in addition to my original profile Frank_Mentorsf) as work up to the 1k needed followers to start going live cooking again

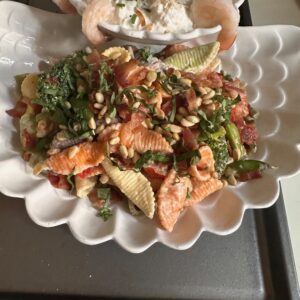
Spring Fresh Pasta & Vegetables

My version for a Spring Fresh Pasta & Vegetables is loosely based on some versions also known as Pasta Primavera. Either way you cut it; it all comes down to a simple pairing of pasta, cheese, cream and seasonal vegetables and herbs. Fresh is key here – but dried herbs and even some frozen veg will work. In this case I am using frozen peas since I couldn’t get them fresh yet here.

  • Ingredients

    • 1/2 pound sugar snap peas, stems trimmed

    • ½ pound asparagus, ends snapped

    • 1 cup of broccoli florets

    • 1 cup halved grape or cherry tomatoes

    • ¼ cup thinly sliced spring onion, white part only (or use shallot)

    • 2 garlic cloves, finely chopped

    • ½ teaspoon fine sea salt, more as needed

    • 2 tablespoons unsalted butter

    • Black pepper, more as needed

    • 12 ounces your preferred pasta

    • ⅔ cup grated Parmigiano-Reggiano, at room temperature

    • 1/2 cup dairy (your choice; crème fraîche or whole milk Greek yogurt, thick sour cream or marscapone cream) at room temperature

    • 3 tablespoons finely chopped parsley, thyme, and and/or other fresh herbs in season

    • zest and juice of one lemon

    • 1 tablespoon  herbs de province

    • Red Pepper flakes to taste

    • Fresh Basil for garnish

    • Optional: ¾ cup fresh English peas

    • Optional garnishes: Toasted Pine Nuts, chopped bacon bits

    Preparation:

    1. Bring a large pot of heavily salted water to a boil over medium-high heat.

    2. Prep all the vegetables; halve tomatoes and snap peas, wash and rough chop amperages, onions, etc into 1/4 in pieces

    3. Chop your Herbs

    4. Melt butter in a large skillet over medium-high heat.

    5. Add snap peas, asparagus, broccoli and onions/shallots, peas (if fresh)

    6. Cook until vegetables are barely tender 3 minutes.

    7. Add red pepper flakes (to taste), garlic and cook 1 minute more.

    8. If using frozen peas add them now

    9. Season with salt and pepper; set aside.

    10. Drop pasta into boiling water and cook according to the instructions

    11. Drain well and transfer pasta to a large bowl. Reserve 1 cup of the pasta liquid. DO NOT RINSE THE PASTA

    12. Immediately toss pasta with warm vegetables,

    13. Add the Parmigiano-Reggiano, your selected dairy creams, lemon juice and herbs, tomatoes lemon zest

    14. Season generously with salt and pepper, more red pepper flakes if needed.

    15. Plate and top with bacon bits and lightly toasted pine nuts and fresh basil

This is one of the dishes  I made previously on @foodtoktv live. You can see that live on the @Foodtoktv Youtube channel

Follow me tiktok under @KitchenBearSF (in addition to my original profile Frank_Mentorsf) as work up to the 1k needed followers to start going live cooking again

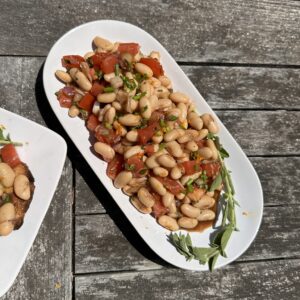
White Beans and Tomato Salad

This White Beans and Tomato Salad is so flavorful and herbaceous that it’s strong enough to serve on a crusty bread as a bruschetta as it is as a side dish or salad. It can be served room temperature or even slightly warm but don’t serve it cold. Play a dish for fresh oregano lovers and very forward with the fresh herbs however you could use a lot less you could use dried or you could amp it up with other herbs in season. When I make this often times I don’t have fresh oregano so I’ll use dry but I’ll Amp it up with fresh rosemary fresh cilantro or parsley use what you have.

This is one of the dishes  I made recently on a @foodtoktv live along with some spicy sweet peanuts and retro Cocktail Potatoes . You can see that live on the @Foodtoktv Youtube channel

Follow me tiktok under @KitchenBearSF (in addition to my original profile Frank_Mentorsf) as work up to the 1k needed followers to start going live cooking again

Ingredients

  • 1/4 cup finely chopped red onion
  • 2 cans (15 oz.) low-sodium cannelloni or other white beans
  • 2 ripe tomatoes 1 1/2 cups
  • 2 tbs. balsamic vinegar
  • 1 tbs. extra-virgin olive oil
  • 1-2 tbs. fresh oregano leaves
  • 1/4 tsp. sea salt
  • 1/2 tbs fresh chopped mint
  • 1/2 tbs fresh chopped parseley
  • Freshly ground pepper, to taste

Directions

  • Put the onion in a fine-mesh strainer and rinse under cold running water. Drain well.
  • Put the beans in a colander, drain, rinse well and drain again.
  • Dice and drain your tomatoes, remove any seeds, using your fingertip to scoop them out if necessary.
  • In a bowl, mix the beans, tomatoes, vinegar, olive oil, herbs, onion, salt and pepper to taste.
  • Serve immediately, or cover and refrigerate for up to 4 hours. Bring to room temperature before serving.

    Adapted from Williams-Sonoma Healthy in a Hurry, by Karen Ansel, MS, RD, and Charity Ferreira (Weldon Owen, 2012).

Cocktail Potatoes

Perfect for a cocktail party, a tapas night or simply a side dish – this retro inspired remake for Cocktail Potatoes is a standard favorite which is why I did this recipe for @foodtoktv as @Frank_MentorSF before shifting over to my new food account  @KitchenBearSF  

Cocktail Potatoes

Ingredients

  • 1lb bag of tiny new potatoes, scrubbed clean (don’t peel)

  • 1 heaping tbsp kosher salt

  • 1 heaping tbsp sugar

  • 1 clove of garlic

  • For coating

    • 1/4 tsp crushed red pepper

    • 1/4 ground black pepper

    • 1/4 tspn Garlic powder

    • 1 tbsp Roasted sesame seeds or crushed nuts

    • Zest of 1/2 lemon

    • 2 tbsp melted butter, olive oil or roasted sesame oil

    • Salt to taste

    • Minced Scallions or chives

Directions

  1. To a pot of cool water; add potatoes, salt, sugar (Yes that is correct “sugar”) and garlic

  2. Boil until fork tender 10-15 min

  3. While the potatoes boil, melt butter and combine red pepper flakes, sesame seeds, ground pepper, lemon zest, black pepper, garlic powder. Stir and let flavor the oil.

  4. Drain the potatoes, add back to the pan with the heat turned off

  5. Immediately add the seasoned butter, lemon zest

  6. Mix well to coat

  7. Add additional salt and black pepper, to taste.

  8. Serve in a warm bowl with toothpicks or skewer two potatoes to a stick and serve cocktail style

  9. Sprinkle with minced chives before serving

  10. Serve alongside a herbed sour cream dipping sauce or your favorite dressing or cheese sauce.

    Notes: you can use your favorite season mix, z’tar or what ever fresh herbs you like.  Recipe can be doubled or tripled easily for a party. Keep warm in a low oven or crock pot.

    Adapted from the Blueberry Hill Kitchen, notebook by Elsie Masterton 1964

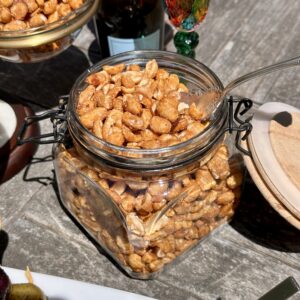
Spicy Honey Roasted Peanuts

These quick and addictive spiced sweet Spicy Honey Roasted Peanuts, keep well but rarely last long. Perfect for a treat or a cocktail hour

Ingredients

  • 16 ounces peanuts, dry roasted or roasted and salted, either is fine

  • ⅓ cup honey

  • ½ cup granulated sugar, divided

  • ½ teaspoon salt (plus an addition 1/4 tsp as a garnish at the end optional)

  • ½ teaspoon cayenne pepper

  • 1/2 teaspoon sweet smoked Paprika

  • 1/4 red pepper flakes

Directions

  1. Preheat oven to 300 degrees F.

  2. Line a rimmed baking sheet with parchment paper or a silicone mat

  3. Place the peanuts in a large bowl.

  4. Microwave the honey in a medium bowl for 30 seconds (it will begin to bubble).

  5. Remove from the microwave and stir in ¼ cup of the sugar, the salt, paprika and cayenne pepper.

  6. Immediately pour the mixture over the peanuts and stir with a wooden spoon until they are all coated with the honey mixture.

  7. Transfer the peanuts to the prepared baking sheet and spread into a single layer.

  8. Bake for 20 to 30 minutes, stirring every 5 minutes, until they begin to turn a golden brown.

  9. Remove from the oven and allow to sit for 2 minutes

  10. Then stir to loosen the peanuts and sprinkle 2 tablespoons of the sugar and crushed red pepper flakes over the peanuts and stir to coat evenly.

  11. Return the peanuts to the pan in a single layer and sprinkle with the remaining 2 tablespoons of sugar and 1/4 tsp of salt (optional) and allow to cool completely.

  12. Once cool, break apart any peanuts that have stuck together and toss with any loose sugar. Store in an airtight container at room temperature for up to 2 months.

    Adapted from

    https://www.browneyedbaker.com/spicy-honey-roasted-peanuts/