Vintage recipes and closing out my time on @Foodtoktv

For the last few years I was participating with a Tiktok channel called Foodtoktv as well s running its website and blog as some of you are aware. But with Spring around the corner and starting up my more food focus channel on TT under @KitchenBearSF ( in addition to my original profile Frank_Mentorsf) as a way to come back to BiteTheRoad.com more.

I choose to step back from the collab activity recently, and  did my last “Live” for them last Thursday, wanting to keep at my retro inspired theme with several dishes I could knock out in an hour.

During my Lunchtime Live that week I did several recipes:

The first two you confined on the blog for FoodtokTV (you can still many of the previous lives on the Foodtoktv Youtube channel here)

and two others I will be sharing here this week for

  • Vintage 1960’s Grandmother’s Potatoes
  • Italian inspired White Beans & Tomato with fresh oregano salad/Bruschetta

Here is a quick peak at the all and stay tune for more of the recipes soon.


Benefits of fermented Garlic and Honey

Every wonder what some food you can eat that may help you feel better? Well some fermented foods can help many aches and pains. Sherry recent Garlic & Honey Journey is a great example. Checkout her latest tiktok below on the benefits of fermented Garlic and Honey or visit her story on Garlic and Honey Fermentation.

@sherry_skinner @sherry_skinner Dont Run Out Of Fermented Garlic and Honey #cookingwithbamaw #foodtoktv ♬ original sound – Bamaw Sherry

My Latest version of the traditional Easter Pizza Rustica or Ham Pie

As some of you know I am on Tiktok these days on my original account @Frank_MentorSF, and my newly launched, more food focused @KithchenBearSF. While I work to get @KitchenBearSF up to its minimum followers to go live, I go live from my original one and weekly noon 12:00 noon PST on @foodtoktv collaborative account.

On Saturday I took a rare few hours and went live on my account to make my annual “Ham Pie” that I do most easter weeks. I have blogged about this in the past, but sharing below the latest version of the recipe. See this post for more step by step https://bitetheroad.com/easter-ham-pie-aka-pizza-gaina/ .

Full Recipe for the Filling- (enough for 4-6 pies depending on size)

1/2 lb whole milk insalada (or Insalata) ricotta, aka Ricotta Salata  (Firm salty ricotta cheese. – you can substitute any of your favorites or what you can find locally)

◦ 1/2 lb Pepperoni (Use the traditional sticks or the larger slicing one.)

◦ 1/2 lb Prosciutto (optional)

◦ 1/2 lb HOT Capicola or Hot Soppressata,

◦ 1/2 lb hard salami

◦ 1/2 lb Genoa salami

◦ 1/2 lb Procuittini (You can substitute this with any other pepper coated ham they have)

◦ 1/2 lb Abbruzese

◦ 1 lb Basket Cheese if available or use fresh Mozzarella cubed

◦ 1/2 lb Provolone (Other recipes use ricotta Salato etc.) or both

6 – 12 Large Eggs ((see notes for quantities))

For The Dough – 3 – 8” pies

• 1 tsp Ground Pepper (or more to taste for dough)

• 6 large Eggs

• 3/4 cup (or 12 tbsp) Shortening

• 4 1/2 cups All purpose flour

• 1 tsp Salt

• 1 tsp Grated cheese (Parmesan) (for dough)

• 2 tbsp ice water (as needed)


Read these Notes first

  • Depending on where you live – some of these meats won’t be as available. Its totally fine to switch them out for your favorites or use more of one than the others.
  • When buying your meats and cheese – you will save time by asking the deli to slice it in 1/4’ slices for you.
  • The filling for the full recipe will make 1- 9 inch pie- (in a springform pan) and 1 foil or 3 –  8’ in foil round pans. depending on how much you fill them. I also like to use foil loaf pans.
  • I often make the first batch of dough, knowing I will have leftover filling. Then a few days later make another batch for the freezer. When freezing, cool, wrap in plastic, then foil then place in a ziplock bag
  • By volume, the foil pans take about 6-7 eggs worth of the whisked eggs and the springform will take up to 12 – 13 eggs depending on the size eggs you use. (Lessons Learned – have extra eggs handy just in case)
  • If you use a springform pan – be sure and give it a foil “condom”  around the bottoms and bake on a sheet pan in case it leaks

Pre-preparation

  • Cut all the meats and cheeses into small cubes. 1/4 to a 1/2 inch mix. You can do this several days before in resealable bags or containers.

Making the Dough

    • You can make the dough several ways.
      1. My usual method is in a large flat bowl (or on your counter if you have the room)- sift together flour and salt. Add eggs, ground pepper and grated cheese. This also works in a stand mixer with the dough attachment.
      2. If you use a food processor – its super fast and the dough will be softer. A few tips  include dice up the shortening and don’t over mix. If you make the full version, you’ll likely have to finish mixing it by hand, but if you use the half batch,  you will be able to process it right in the food processor
    • Add in the shortening and work in quickly. Use a pastry cutter if you have one.
    • Crack and break up the eggs. Add the eggs to the flour mixture and mix, adding up to 2 tablespoons of iced water as needed to bring the dough together.
    • Dump it on the counter and knead it until it comes together and form into a ball. DO NOT OVER WORK. Wrap in plastic or cover until ready to use.
    • You have two options now:
      1. You can divide the dough in 4, shape into discs and wrap and chill for 30 min or overnight  or
      2. Divide the dough and roll out and fit into your pans, pressing up the sides. Cut off at any extra to save as decoration on the top.

For the filling (wet mix first)

    1. Crack and whisk the remaining eggs
    2. Add pepper, grated cheese
    3. You can add 1-2 tablespoons of the Basket cheese (if using) and gentle loosen it into the batter. This will add some moisture when cooking.

Assembling the Pie

    1. Preheat your oven*
    2. Roll out the dough, large enough to extend beyond your pan several inches as you will want the sides to hang over. You want it thin enough to be flexible
    3. Using either a 9in spring form pan (or an 8 inch one will do – but use less of everything) or simple foil cake or loaf pans
    4. Lay the dough in the pan and gently press into place and make sure all the corners and sides and flattened smooth.
    5. Sprinkle some grated cheese ( about a tablespoon) on the dough at the bottom of the pan.
    6. Place 2 cups (for foil pans) or 3 1/2 – 4 cups (for spring form pan) of meat and cheese mix in each prepared pan and spread it out. It should be no more than 3/4 of the way up the sides.
    7. Pour the wet batter over the meat and cheese. Using the back of a wooden spoon gently mix in. Essentially you want to barely cover the meat mixture. (If you run short of eggs, whisk up a few more and top off)
    8. Take the leftover dough and add any decorative topping you want (i.e. a cross hatch or cut out shapes), flute the edges.
    9. Brush with an egg or cream wash
    10. Sprinkle with more grated cheese
    11. Bake in a preheated oven* 350 degrees for 60 – 75 minutes
    12. When they are a golden brown and a toothpick comes out clean. Take them out of the over and let them cool on a rack, in the pan until cool to the touch
    13. Once cooled some, remove them from the pan  and let finish cooling on the rack (remember they will still be hot inside)
    14. You can serve these warm, room temp or cold.
    15. Once fully cooked ns cool – wrap in plastic wrap, then foil to keep. They freeze great!

*Baking Temperature & Times

  • My mom prefers to use 350 degrees for 60 – 75 minutes or until the toothpick comes out dry for the foil pans (my oven was dead on at 60 minutes. (For the larger springform – plan for another 20 min).
  • My original version https://bitetheroad.com/easter-ham-pie-aka-pizza-gaina/
  • Several other versions I have tried and liked include
    • https://cookingwithmamalombardo.wordpress.com/2011/04/23/another-easter-classic-pizza-gaina/
    • http://www.afamilyfeast.com/easter-pie/
    • http://www.food.com/recipe/pizza-gain-aka-pizzagaina-pizza-rustica-italian-easter-ham-pie-293899#top


How to Practice Principles of Food Safety in the Kitchen

Cooking is a wonderful hobby that anyone can learn how to do well, and safely. Cooking is fun, creative, and allows you to explore your palate and different cuisines. Cooking can also help you save money on food by eating out less and cooking delicious, restaurant-quality meals at home.

With two years of COVID19 behind us, many took to the kitchens with a new interest. Some of you, like myself, even got on Tiktok and started to follow food content creators or “gasp” become one. I know I joined minds with a TikTok channel called FoodTokTV and took to the kitchen to share our recipes, created a new website www.FoodTokTV.com, going Live on TikTok every Sunday night, and now host our own Cooking Club every Wednesday night.


But the most important thing about cooking is safety since there are a lot of things that can cause injury or harm in the kitchen. Here are a few tips to practice principles of food safety in the kitchen to prevent food-borne illness and keep everyone safe.

Wash Everything After Use

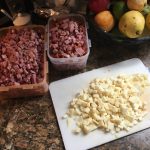
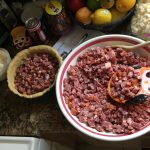
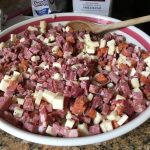
The first thing that you should do to practice food safety in your kitchen is to wash everything after each use. Once you have used a cutting board for meat or a bowl to scramble eggs, you must wash it to clean it and keep it germ-free. Otherwise, you are allowing food to cross-contaminate, which can lead to the growth of bacteria and germs that are unsafe for consumption. Wash everything with warm water and soap for thirty seconds and rinse it completely before allowing it to dry or towel drying and putting away.

Make Sure Your Meat Cooks Properly

The next crucial food safety principle you need to practice in the kitchen is making sure your meats are cooked properly. Raw or undercooked fish and meat can potentially cause food-borne illness, as the bacteria in the meat hasn’t reached a high enough temperature to be killed off completely. Sous vide cooking makes it much easier to get a precise temperature. A sous vide heats water to a particular temperature and keeps it circulating to keep the temperature constant. That way you can know exactly at what temperature your meat was cooked and for how long.

Use Proper Thawing Technique

The final crucial principle of food safety to practice in your kitchen is the use of proper thawing techniques. If you freeze your meat or fish, then you need to know how to thaw it safely, without letting it develop bacteria that can cause illness. You can thaw your meat and fish slowly in the fridge over the course of several hours or days. You can also place your frozen meat or fish in a bowl of cool water for a time for a speedier, safe thaw.

Food safety is the most important thing to remember when cooking. Without the proper steps in place, you could risk food-borne illness. Make sure that you are practicing these three principles of food safety in your kitchen every day.

Check out this article on the signs you need to make changes in your diet!