Travel Tips to Make the Most of Your Trip to Mexico

Mexico, a vibrant and diverse country, offers a plethora of experiences for the enthusiastic traveler. From its stunning landscapes to its rich cultural heritage and culinary delights, a trip to Mexico can be an unforgettable adventure. To ensure a fulfilling experience, here are some travel tips to help make the most of your journey.

Check Currency Exchange Rates

One of the first steps in planning a trip to Mexico is figuring out the current currency exchange rates. The Mexican Peso (MXN) is the local currency, and understanding its value against your home currency is crucial for budgeting. It’s advisable to check the rates through reliable sources. Such as trusted online services or at local banks so you can compare them to get the best deal. Carrying some local currency is essential for small expenses where credit cards might not be accepted, such as in local markets or with street vendors. However, be cautious about exchanging money at the airport or tourist spots as they may have higher rates. Also, notifying your bank about your travel plans can prevent any surprise freezes on your card, ensuring a smooth financial experience during your trip.

Find Local Food

Exploring local food is an integral part of the travel experience in Mexico. The country is renowned for its diverse and flavorful cuisine, offering a culinary journey that extends far beyond the usual tacos and burritos. Coastal towns in Mexico are full of great restaurants, including ones that serve fresh seafood. These local eateries provide a chance to taste authentic dishes like ceviche, fish tacos, and various seafood stews. Inland, the cuisine varies significantly, with each region showcasing its unique flavors and ingredients. Street food is a must-try in Mexico, offering delicious and affordable options. Look out for local markets and food tours, which can guide you to some hidden culinary gems. Remember, trying local food is not just about eating; it’s about experiencing the culture and history of the place.

Learn How to Get Around

Navigating transportation in Mexico is key to exploring its diverse regions. Renting a car can be a good option if you’re comfortable with local driving conditions and want the freedom to explore at your own pace. However, Mexico also has an extensive bus network that connects most towns and cities, offering a reliable and affordable way to travel. For longer distances, domestic flights can save time. In cities, taxis and rideshare apps like Uber are convenient, though it’s important to be aware of the rates and the routes to avoid overcharges. When traveling by public transport, be mindful of safety and keep your belongings secure. Learning a few basic phrases in Spanish or carrying a translation app can significantly enhance your travel experience, making it easier to navigate and interact with locals.

Embarking on a trip to Mexico is an adventure filled with potential discoveries and experiences. By being financially savvy, indulging in the local culinary scene, and understanding the transportation options, you can immerse yourself fully in what Mexico has to offer. Each moment spent exploring the rich tapestry of its landscapes, flavors, and people is an opportunity to create lasting memories.

Did you enjoy reading this article? Here’s more to read: Where to Travel for the Best Food in Latin America
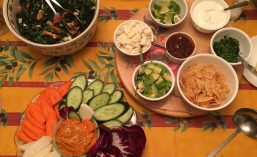
Harvest Squash Salad

Harvest Squash Salad

This delicious fall and winter squash salad takes two of my favorites; butternut and acorn, and pairs them with bacon, pomegranates, cranberry goat cheese, dates, pecans, arugula greens, basil and a spiced cumin-date dressing. Back in my days on the old format of Foodtoktv I went live to shared and older version.  Since then, I have made a few revisions to amp it up further.

It’s hearty enough to be a meal on its own over arugula but it’s also  a wonderful harvest side dish. You can easily adapt this and use your favorite squash, take it vegan or meat free as you prefer.

Ingredients

  • 1 small butternut squash, peeled, seeded, and cubed
  • 1 small butternut acorn, peeled, seeded, and cubed
  • ½ to 1 teaspoon extra-virgin olive oil
  • ¼ teaspoon freeze dried or fresh herbs
  • 4 slices of pre-cooked bacon (optional)
  • ¼ teaspoon ground cumin
  • ¼ teaspoon ground coriander
  • ¼ teaspoon cinnamon
  • ¼ teaspoon cayenne, less if sensitive to spice
  • 6 cups loose-packed spring mix greens (optional)
  • 1 diced sweet red or green pepper
  • 1/2 cup diced onion
  • 2 ounces goat cheese, torn into smaller pieces
  • 6 Medjool dates, pitted and diced (2 for the dressing and 4 to top the salad)
  • ¼ cup pomegranate seeds
  • ¼ cup pistachios or pecans, crushed and toasted
  • sea salt and freshly ground black pepper
  • Red pepper flakes
  • Fresh Basil

Cider Date Dressing (makes extra)

  • 5 tablespoons extra-virgin olive oil
  • 2 tablespoons apple cider vinegar
  • 1 tablespoon fresh lemon juice
  • 2 of the 6 Medjool dates, pitted
  • ½ garlic clove (optional-dried is fine)
  • ⅛ teaspoon ground cumin
  • sea salt
  • black pepper, to taste
  • 3 to 5 tablespoons water, as needed to blend

Instructions

  1. Preheat the oven to 425°F and line a large baking sheet with parchment paper.
  2. Place the squash cubes, chopped bacon, diced pepper and onions on the sheet and drizzle with olive oil and pinches of sea salt and pepper and red pepper flakes to taste.
  3. Toss to coat and spread evenly on the baking sheet.
  4. Roast for 30 to 35 minutes, or until tender and browned around the edges.
  5. In a small bowl, stir together the cumin, coriander, cinnamon, herbs and cayenne. Set aside.

Make the Cider Date Dressing:

  1. In a blender, combine olive oil, vinegar, lemon juice, 2 dates, garlic (optional- powder is fine), cumin, salt, pepper, and 3 tablespoons of water.
  2. Add 1 to 2 more tablespoons of water as needed to blend.
  3. Add more vinegar or lemon to taste
  4. You want this to be just thick enough to coat the warm veg.
  5. Remove the butternut squash from the oven, scrap and add to a bowl
  6. Add the remaining 4 chopped dates
  7. While warm, toss with the spice mixture.

Serving as a side dish:

  1. Drizzle 1/3-1/4 of the dressing and gently toss
  2. Top with pomegranates, fresh basil, goat cheese and nuts. (Check out my gluten free and carb friendly recipe for homemade granola and use that as a crunchy spiced garnish)
  3. Add another drizzle of the dressing
  4. Serve warm to room temp.

Serving as a salad

  1. Layer the arugula on a platter or plate and top with some of the roasted squash.
  2. Drizzle with ⅓ of the dressing,
  3. add the goat cheese, dates, basil, pomegranates, and nuts.
  4. Drizzle with more dressing as desired and serve on the side.  Add a spritz of lemon
  5. Hint: warm the dressing up a bit.

Serve immediately.

Low carb, high fiber, oat and nut homemade granola

When Paul asked me to start shifting away from processed foods, and refined sugars and add more plant-based meals into our diet to help with his recently diagnosed sugar issues. I took to the challenge of trying new recipes and creating others that would appeal to me and him. This recipe for a homemade granola is one of them I found. Based on a version by Nigella Lawson, I amped up the flavors a bit for our tastes. My next version is to go for a savory version.

INGREDIENTS

Makes: enough to fill 6 cup jar or air-tight container. It should keep for a good few months if it lasts that long which it won’t. It’s oddly addictive.

  • 3 cups quick-cooking oats  (not instant)
  • 2-3 heaping teaspoons ground ginger
  • 3 heaping teaspoons ground cinnamon
  • 1 teaspoon kosher salt
  • ¾ cup natural skin-on almonds
  • ½ cup sunflower seeds
  • ½ cup pumpkin seeds
  • ⅓ cup brown flaxseed
  • ½ cup sliced almonds (optionally here you can add a different nut of your preference)
  • 3 tablespoons sesame seeds
  • 3 Tablespoons of chia seeds
  • ½ cup extra virgin olive oil (I also will use coconut or walnut oil)
  • ½ cup maple syrup. (I use keto syrup from Birch Benders brand)

You can use other nuts or spices as is your preference or what you have on hand as well (for instance clove, nutmeg, cardamon, pecans, walnuts, flaked coconut etc

Making it

You will need a large baking/cookie sheet pan with an edge. 

  1. Preheat the oven to 300 degrees and line your baking sheet with baking parchment.
  2. In a large bowl, toss together the oats, spices and salt.
  3. Add in the nuts and seeds, and mix well again.
  4. In a measuring cup, combine the oil and maple syrup, then pour the mixture into the oats, nuts and seeds and, with a fork, mix to combine. 
  5. Pour onto a parchment-lined baking sheet pan, and move it around so that it covers the tray evenly. You may want to split this into two pans depending on the size of yours.
  6. Place it in the oven, on the center rack, and bake for 30 minutes and then, stir the granola to mix and toast the underside as well. Place it back in the oven for another 30 minutes. 
  7. When done, remove from the oven and let the pan sit on a wire rack until the granola’s cold.
  8. Once cool you can add dried fruit (optional – you do not want to cook the dried fruit with the nuts and seeds as they will get too hard)

I even used this as a base for a dairy free, sugar-free oatmeal, sugar-free chocolate chip cookies the other days to rave reviews from Paul


What You Need to Know to Make Bone Broth at Home

What You Need to Know to Make Bone Broth at Home

In the realm of culinary trends, bone broth has carved a niche as a nutritious and flavorful elixir. Whether you’re a seasoned cook or an adventurous food enthusiast, mastering the art of making bone broth at home can be a rewarding endeavor. Here’s what you need.

Basic Ingredients Required

The foundation of a rich and flavorful bone broth lies in its basic ingredients. To get started, you’ll need a combination of bones, water, and aromatic vegetables. Beef bones, chicken carcasses, or even fish bones can serve as the base for your broth. Adding herbs and spices like bay leaves, peppercorns, and thyme can enhance the complexity of your broth. The quality of your ingredients plays a significant role in the final outcome, so opt for fresh and high-quality bones and vegetables. Once the basic ingredients are prepared, it’s time to start cooking. Place the pot on the stove and bring it to a boil. Then reduce the heat until the contents simmer gently, allowing the flavors to develop fully. Cooking times vary depending on your broth’s base. After cooking, you’ll be left with a fragrant and nutrient-packed broth that can be used to make soups or sauces or simply enjoyed on its own.

Tools You Need

While making bone broth is a straightforward process, having the right tools can make it more efficient and safe. Strong butcher knives are essential for cutting and preparing bones and vegetables. Using cut-resistant gloves can help prevent injuries if you mishandle sharp knives. A large stockpot or slow cooker is crucial for simmering the ingredients over an extended period. A fine-mesh strainer or cheesecloth will come in handy when you strain the broth to remove solids before serving. A long-handled spoon is ideal for stirring and tasting the broth. With these tools in your arsenal, you’ll be able to make delicious bone broth quickly and safely. These tools not only make the process smoother but also contribute to a safe and enjoyable cooking experience.

The Process

Making bone broth is a gradual and patient process that involves simmering the ingredients over an extended period. Start by roasting the bones in the oven to enhance their flavor and color. Transfer the roasted bones to a stockpot or slow cooker and cover them with water. Add the aromatic vegetables and herbs, and bring the mixture to a gentle simmer. Throughout the cooking process, regularly skim off any impurities that rise to the surface. After the simmering time, strain the broth to remove bones, vegetables, and solids. The resulting liquid is your homemade bone broth, rich in nutrients and flavor. You can enjoy the broth on its own, use it as a base for soups and stews, or even sip it as a warming beverage. For longer storage, consider vacuum sealing the broth in portioned bags. Vacuum-sealing food can help preserve its freshness and extend its shelf life, making it convenient to enjoy your homemade bone broth whenever you please.

Whether you’re sipping it on a cozy evening at home or incorporating it into your favorite recipes, your homemade bone broth is a testament to the rewarding journey of culinary exploration.

Did You Enjoy Reading This Article? Here’s More to Read: How to Get a Better Grasp of a Country’s Culture

Where to Travel for the Best Food in Latin America
When it comes to exploring new cultures and savoring unique flavors, Latin America stands out as a paradise for food enthusiasts. Whether you’re a dedicated foodie or simply someone who enjoys a good meal, here are some top destinations in Latin America that offer the best in food and more.

Peru

Peru is a culinary gem that has gained global recognition for its diverse and flavorful cuisine. The country’s flagship dish, ceviche, is a tangy and refreshing delight made from fresh seafood marinated in citrus juices. Another iconic dish is lomo saltado, a savory stir-fry of marinated beef, tomatoes, and onions, served with rice and crispy fries. Don’t miss out on trying anticuchos, skewers of marinated and grilled beef hearts, often served with a spicy peanut sauce. Apart from its incredible food scene, Peru offers a treasure trove of activities. Explore the historic Machu Picchu, hike through the Andes, or take a boat ride on Lake Titicaca. The country’s rich history and stunning landscapes provide the perfect backdrop to a culinary adventure you won’t forget. Whether you are a foodie or an adventurer, Peru has something to offer for everyone. Be sure to explore the many flavors of this amazing country.

Mexico

When it comes to bold and vibrant flavors, Mexico reigns supreme. From street tacos bursting with fresh ingredients to rich and complex moles, Mexican cuisine is a celebration of spices and traditions. Indulge in dishes like chiles en nogada, which features poblano peppers stuffed with a mix of meat and dried fruits, topped with a creamy walnut sauce and pomegranate seeds. There are also plenty of great spots for surfing along the coast of Mexico. Soak up the sun, catch some waves, and refuel with mouthwatering seafood and refreshing beverages. Mexico is sure to offer something for everyone. Whether you’re exploring the vibrant cities or relaxing on a beach.

If you’re looking to capture the essence of Mexican culture, don’t miss out on all the amazing festivals and celebrations that take place throughout the year. From the Day of the Dead (Día de los Muertos) in November to Las Posadas – a nine-day Christmas celebration with processions reenacting Mary and Joseph’s journey to Bethlehem – Mexico is a vibrant place to explore and create unforgettable memories.

Argentina

If you’re a fan of succulent meats, Argentina should be at the top of your travel list. This country is renowned for its exceptional beef, cooked to perfection on open-flame grills called parrillas. Sink your teeth into a juicy and flavorful steak, accompanied by chimichurri sauce — a zesty blend of herbs, garlic, and vinegar. Beyond its culinary offerings, Argentina boasts stunning natural beauty and cultural attractions. Argentina has no shortage of natural wonders. From the spectacular Iguazu Falls in the north to the awe-inspiring glaciers of Patagonia in the south. There is something for everyone: Explore ancient ruins, soak up local culture at colorful tango shows and folk music performances, or take a tranquil stroll through Buenos Aires’ cobblestone streets. Argentina is a vibrant country with something for every traveler

Embarking on a culinary journey through Latin America promises an adventure for your taste buds and beyond. Latin America has something to offer for everyone with a passion for food and travel.Whether you’re a dedicated foodie or simply looking to explore new horizons.

Did You Enjoy Reading This Article? Here’s More to Read: My Latest version of the traditional Easter Pizza Rustica or Ham Pie

How to Find Balance When You Eat a Lot of Meat

A rich, succulent steak on your plate, a rack of aromatic ribs, or perhaps a delicious burger – who can resist the charm of meat? As an avid meat eater, it might be hard to consider incorporating more balance into your diet. However, just like any other food, the mantra here is moderation. Here are some easy strategies to find balance in your diet when meat is your mainstay.

Add More Vegetables to Your Plate

The first step towards achieving a balanced diet while keeping your love for meat intact is by adding more vegetables to your plate. Vibrant, nutritious, and incredibly versatile, vegetables are your perfect ally to counterbalance the high protein content of meat. Vegetables are packed with vitamins, minerals, and antioxidants, which help in boosting immunity and preventing a range of diseases. Moreover, the additional color and texture they bring to your plate not only make the dish visually appealing but also enhances the flavor profile of your meal. When planning a meat-heavy meal, consider having a large salad as a side, or roasting a variety of veggies to accompany your protein. You could also try stir-frying vegetables in a bit of olive oil with garlic and herbs for a mouthwatering side dish. Not only will this give you a variety of tastes and textures, but it also provides the added benefit of increased nutrient intake.

Eat More Fiber

Transitioning to the second section, another effective way to balance out your meat consumption is to increase your fiber intake. Your body relies on fiber for easier digestion. The importance of fiber in the diet cannot be overstated. It helps in the efficient processing of food, aids in maintaining a healthy weight, and reduces the risk of developing chronic conditions like diabetes and heart disease. Whole grains, fruits, vegetables, legumes, nuts, and seeds are rich in fiber. Consider starting your day with a high-fiber cereal or adding some chia seeds to your yogurt. Swapping white rice for brown or wild rice, choosing whole-grain bread over white, and adding lentils or beans to your soups and salads are also easy ways to up your fiber game. The slow digestion of these fiber-rich foods ensures that you feel full for longer, which can help in managing the portion size of meat in your meals and prevent overeating.

Eat Leaner Meats

Lastly, it’s worth considering the type of meat you consume. All meat is not created equal – the nutritional profile varies vastly between different types and cuts of meat. To strike a balance in your diet, try opting for leaner meats. Lean meats are lower in fat, particularly saturated fat, which can contribute to heart disease if consumed in large amounts. They still provide high-quality protein, essential for maintaining muscle mass and keeping you satiated, but with fewer calories. Chicken breast, turkey, lean cuts of beef such as sirloin or tenderloin, and fish like salmon or tuna, are all excellent choices.

Finding balance in your diet when you’re a meat lover isn’t about drastic changes or deprivation. It’s about making small, smart choices that add up over time. Incorporating more vegetables, boosting fiber intake, and choosing leaner meats are straightforward strategies that can help you achieve this balance without compromising on taste or satisfaction. So, savor your meat dishes, explore new tastes with veggies, and embrace the whole spectrum of foods for a balanced, healthful diet. Safe travels and happy eating!

Did you enjoy reading this article? Here’s more to read. How to Avoid Injuries and Accidents in the Kitchen

Sweet and Savory Cherry Tomato Jam

Jimmy’s Hideaway Version

I’m a fan of blending savory and sweet notes in dishes.  and when visiting restaurants I often select dishes based on the potential combination of textures and flavors.  I came across this dish for a vegetarian Tofu Napoleon at Jimmy’s Hideaway in Provincetown, One of my favorite places to eat. The Jimmy’s version is a layered dish is gluten free with layers of marinated & grilled  Asparagus, Crimini Mushrooms, Gruyere Cheese Topped with Roasted Tomato Basil Pesto. It’s a huge portion and tasted as good the next day!

My version!

Now when I take a something and decide I want to recreate it – I will often amp it up a bit and in this case the idea of marrying it with some kind of compote or jam struck a chord. So I dug into my recipes and “re-lived” this version for Savory Sweet Cherry Tomato “Jam”. On my version I also swapped out the gruyere and added a layer of seared brie and  polenta along with the grilled vegetables.


Savory Sweet Cherry Tomato “Jam”

Ingredients

  • 1 ½ -2 pounds cherry tomatoes, quartered
  • 1/2 medium thin  sliced red onion
  • 1/4 cup sugar (or sugar substitute)
  • 3 tablespoons apple cider vinegar
  • 1/4 cut diced dates or dried cherries (optional)
  • 1/4 cup water
  • 4 cloves garlic peeled and left whole
  • 1 -2 tsp crushed red pepper flakes
  • 1-2 teaspoons Herbs De Provence (you can substitute crushed rosemary or thyme)
  • 1 teaspoon salt
  • Black pepper
  • Olive oil or Bacon fat

Instructions

  • To a cold saucepan add some olive oil or bacon fat
  • Add the red pepper flakes, sliced onions and turn on medium heat and saute 3 min
  • Add the tomatoes, sugar, apple cider vinegar, water, garlic and herbs, salt and pepper ( if using the dried fruit add it here too).
  • Bring  to a simmer.
  • Cover and reduce heat to low. The mixture will be very liquidy for about 10-15 minutes, but stir occasionally
  • Continue simmering the jam, stirring every few minutes,  until it has reduced down to a thick, slightly sticky, and sweet consistency.  depending on your pan this could take 20 – 40 minutes
  • Once it resembles a chunky loose jam. Remove the garlic. Taste.
  • Add any more herbs, salt or pepper. You can also add some honey if you want it more sweet. (Remember as this cools the flavor will be more muted so you want to plan for this)
  • Allow the mixture to cool before storing it in an airtight container in the fridge for up to 1 week.

CURRIED CAULIFLOWER SOUP

My take on a plant-based Curried Cauliflower soup

Paul recently became alarmed over some labs and asked if we could incorporate more vegan and plant-based recipes while we worked to get weight down.

Last year he had ordered the How Not To Die Book and the companion Cookbook. So it was a perfect chance to try one of the recipes.

I changed up the recipe a bit but overall its very similar to the original. The author creates his own savory spice seasoning blend used in several of the books recipes and I’m a fan of that alone! But make it the day prior as it needs a day to meld the flavors. I’ve included them both below.

Ingredients

  • 4 cups Vegetable Broth
  • 1 red onion, chopped
  • 1 garlic clove, minced
  • 1½ teaspoons grated fresh ginger
  • 1½ tablespoons curry powder (start with 1 tablespoon- you can add more later depending on how warm you like it)
  • 2 teaspoons date sugar syrup
  • 1 teaspoon Savory Spice Blend (see below)
  • 1 head cauliflower, trimmed and coarsely chopped
  • 2 teaspoons lemon zest. Reserve the juice for the end –  (original version used a blended peeled lemon but it wasn’t worth the effort in my opinion)

For garnish

  • 1 plum tomato, finely chopped, for garnish or
  • 1 medium diced apple

Directions

  1. In a large pot, heat 1 cup of the broth over medium-high heat.
  2. Add the onion and cook until softened, about 5 minutes.
  3. Add the juice of 1/2 lemon
  4. Purée the soup in a food processor or with an immersion blender, working in batches if necessary.
  5. Stir in the lemon zest
  6. taste and adjust; more curry? Add some now, more lemon juice? Or other seasonings as desired.
  7. Ladle into bowls and serve hot, garnished with chopped tomato or apples. Sprinkle fresh herbs or additional nutritional yeast.

If it is too “spiced” add a dollop of greek yogurt or dairy free sour cream to help balance the heat.


“How Not To Die” Savory Spice Blend

MAKES: ABOUT ½ cup for your cabinet

Great replacement for salt!

  • 2 tablespoons nutritional yeast*
  • 1 tablespoon onion powder
  • 1 tablespoon dried parsley
  • 1 tablespoon dried basil
  • 2 teaspoons dried thyme
  • 2 teaspoons garlic powder
  • 2 teaspoons dry mustard (mustard powder)
  • 2 teaspoons paprika
  • ½ teaspoon ground turmeric
  • ½ teaspoon celery seeds

Combine all the ingredients in a spice grinder or blender to mix well and pulverize the dried herbs and spices. Transfer the blend to a shaker bottle or jar with a tight-fitting lid. Store in a cool, dry place.


Adapted From: How Not to Die CookbookHow Not to Die Cookbook

Ricotta Glazed Cookies

This cookie is very similar to one I loved growing up in an Italian -American household called Anginettes, but different. The base of this recipe for Ricotta Glazed Cookies is as the title implies, based on Ricotta Cheese. It fit perfect for this week’s spring fresh live as it’s easy to adjust the glaze colors for any time of year and is a quick bake time and pairs great with the Tomato, Bacon & Cheese Shortcake I made during an old TIKTOK live

Ricotta Glazed Cookies 

Ingredients:

Cookie batter

  • One cup of unsalted butter or margarine or 1/2 and 1/2)

  • 2 cups of sugar

  • 16 ounces of ricotta cheese

  • 3 tsp of vanilla extract

  • 1 teaspoon of lemon extract

  • 1 teaspoon of salt

  • 1 teaspoon of baking soda**

  • 4 cups of flour

  • Zest of one lemon

For the glaze

  • Confectioners Sugar

  • Lemon juice or milk

  • almond extract

  • anise extract

  • A few drops of gel food coloring will bring these seasonal

Directions:

  1. Using an electric mixer combine butter sugar and ricotta cheese

  2. Combine lemon zest, extract and vanilla extract with the cheese mix

  3. In a separate bowl combine baking powder flour and salt

  4. Add flour to the cheese mixture, mix until just combined

  5. It should be thick enough that you can make walnut size balls if it’s too loose add some more flour

  6. Scoop and roll onto your sheet pan

  7. Bake on parchment lined pants, in the oven 8 to 10 minutes

  8. When done, remove from the oven and let rest a few minutes in the pan, then place on a rack to cool

    Prepare a glaze;

    Blend confectioners sugar, lemon juice or milk, a pinch of salt.

    Optional for the glaze could be several drops of almond extract or anise extract.

    Combined until the consistency of a glaze you prefer, dip cookies upside down into the glaze then place right side up on the rack to drip dry

** When I made these on the live I left out teh baking soda and found I liked them that way.. will have to try it with next time


This is another of those handwritten treasures I found in an old recipe box while thrifting.

Tomato, Bacon and Cheese Shortcake

Yes. thats rights. I said it; Tomato, Bacon and Cheese Shortcake.

A savory take on a spring and summer classic. As many of you know I came across a early 60’s Bisquick cookbook (note: it’s been around since the 30’s) and have been having fun adapting some of the recipes. This particular one was in the book, but I add a few extras to bring it forward without damaging the classic feel.  I’ve  “super sized” it with a piece of fried chicken breast.

Bisquick was a staple for many of us growing up as a baking mix that allowed the home cook to come up with biscuit/cake/muffin products quickly, not needing to have leaveners etc. There are lots of recipes out there that can provide you with instructions to make your own version or you can still buy it commercially. In fact you can buy a variety of versions of it these days. In my house growing up it was a staple for pancakes waffles muffins occasionally it would get added to a cake. Enjoy!

Note – this isn’t an “everyday” treat.. but it sure is fun on a cheat day

Tomato, Bacon and Cheese Shortcake

Ingredients:

  • 4-6 Shortcakes or Biscuits

  • 6-12 slices of Bacon

  • 3 large or 5 medium ripen tomatoes

  • Cheese Sauce

    • ¼ cup butter or margarine

    • ¼ cup Bisquick

    • ½ tsp. salt

    • ¼ tsp. pepper

    • ¼ tsp. dried mustard, if desired

    • 2 cups milk

    • 2 cups grated sharp cheese

    • 3-4 minced chives or scallions

Directions:

  1. Make 6 individual Shortcakes or drop biscuits using your favorite recipe

  2. Broil bacon, remove to paper towel to drain

  3. Make the cheese sauce while shortcakes are baking

    1. Melt butter over low heat.

    2. Blend in Bisquick and seasonings.

    3. Cook over low heat, stirring until smooth and bubbly.

    4. Take off heat. Stir in milk.

    5. Add back to heat, bring to boil; boil 1 min., stirring constantly.

    6. Stir in cheese until melted

Assemble

  1. Slice ripe, medium-sized tomatoes.*

  2. Split and butter ( or mayonnaise) both the top and bottom of the shortcakes.

  3. Place 1-2 tomato slices on the bottom layer of the shortcake

  4. Sprinkle with salt and pepper to taste. Layer on 1-2 bacon slices

  5. Spoon the cheese sauce over the bacon and tomato. Be generous! It should drip down over the bottom shortcake.

  6. Sprinkle with minced scallions

  7. Add the top shortcake or biscuit

Note: You can also substitute mayonnaise for butter on the shortcake or biscuit under the tomato layer.  This also works with adding other proteins like leftover ham or fried chicken pieces

*the original recipe wanted peeled and sliced tomatoes, I no longer peel them. 

Recipe adapted from the 1964 The Bisquick Cookbook Recipes from Betty Crocker in answer to your requests