Having to change gears for a 3-day trip to present in Traverse City Mn on IPS Monday after my routine week in DC for my work on the commission usually results an excuse to step away.
Facing my computer and desk this morning I am faced with the eternal travelors dilemma; how do I reframe all I have to do to prepare the next week, debrief my last DC trip and get my capstone grades in for students?
Headphones on, refridgerator open; engage..
First is a quick ham, feta, broccoli and cheddar quiche for brunch when someone ( Paul) gets up. 
Then whip up another variation on those Black Pepper & Orange peel biscotti by special request from the pals who gave us our “Charlie Brown Tomato Plants”.
Since it’s rare I get a special request, when I got asked to remake my adapted version of the Black Pepper, Vanilla & Orange peel I wrote about on “the battle rages on” which is actually yet its own adapted recipe Valerie Bertinelli’s Helen’s Black Pepper Biscotti I agreed too on my return this week.
Below is the my revised version with notations where I made changes
Ingredients
- 2 3/4 cups all-purpose flour
- 1/2 teaspoon baking soda*
- 1/2 teaspoon baking powder*
- 1 tablespoon freshly ground black pepper ( I use a mixed of fine ground and course grind for taste and texture.)**
- Pinch kosher salt
- 1/2 cup (1 stick) unsalted butter, softened
- 1 cup sugar
- 3 large eggs, at room temperature
- 2 teaspoons grated orange zest (I tend to get the organic ones or ones I pick from my pals garden- depending on size of orange this may be 1 -oranges )
- The zest of one lemon
- 1 1/2 teaspoons vanilla extract
- 1/4 teaspoon almond extract
- 1 1/2 cups chopped walnuts, lightly toasted (In reality the nuts are option, or use another sturdy nut that can take a bake and have a bite to them; Almonds, Pecans, Pistachios all work to my taste.)
Sift together the flour, baking soda and baking powder over a piece of wax parchment paper ( I find this works bette and makes it easier to pour into the mixer). Stir in the pepper and salt. Set aside.
With the mixer on low, slowly pour in the flour mixture, and then the walnuts. Mix a few minutes till the dough texture is formed a sticky mess 😉 .
(You can also do this by hand and fold them in then work the dough by hand till smooth).
Pour the dough out on to a lightly floured plastic wrap covered surface or clean counter top. Gently knead the dough to shape with your hands to form a thick round ball shape. The dough is super easy to handle at this piont. Cover the dough with plastic wrap and refrigerate for 30 minutes. (For this batch I omitted nuts). 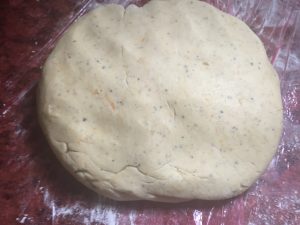
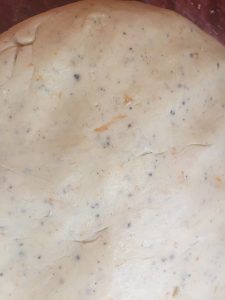
Preheat the oven to 350 degrees F. Line 2 baking sheets with parchment paper ( nonstick silicone liners also work).
Remove from the refrigerator, unwrap and divide the dough in half, place 1 piece on each sheet and shape each piece into a 12-inch log, about 2 inches across and 1 inch tall. (note you can make these as wide or thick as you like – I find because of the texture and taste of these, I tend to like a finished bake that is about 3inch long and 1.5 inch high you may have to play with it a few times). But they don’t need to be preferfect. In fact any uniform shape will work. ( I am planning to try shaping it as a round log and slice into discs next time). Bake until the logs are cooked through and lightly browned on the bottom, about between 20- 35 minutes, depending on your oven and pans. Watch them the last 5- 10 minutes as this could differ based on your pan and stove temp.
Let the logs cool for about 5-7 minutes on the baking sheets (leave the oven on), then transfer them carefully to racks (remove the parchment paper) to cool 10-15 minutes more.
Using a serrated knife, slice each log either on the diagonal (to give you a fancy shape) or straight across into 3/4-inch-thick slices. Arrange the slices cut-side down on the baking sheets and return to the oven until well toasted, 10 to 15 minutes more. I general flip mine over about half way to get even color. 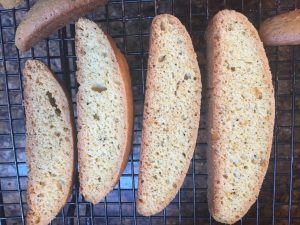
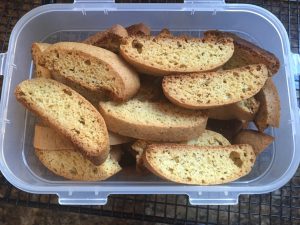
Note: These biscotti have a great golden color to them which will darker to as you “second bake”. If you want to keep them less brown; adjust time or instead of laying them on the cut sides, leave the standing cooked side down.
Transfer the biscotti to cooling racks to cool completely. The longer they bake the harder they become. Note: they will continue to harden as they cool. Store in tins or air tight containers (QVC favorite Lock & Lock rock for this). They will keep, tightly covered, up to 1 week.
This Cook’s Note came from the recipe website and I though worth sharing: To toast the walnuts or most nuts on the stove top, put them in a dry skillet over medium heat and cook, stirring, until golden and fragrant. To toast them in the oven, spread in a single layer on a baking sheet and roast at 350 degrees F until golden and fragrant. In either case- the minute you smell them – get them off the heat.
Adapted from “One Dish at a Time: Delicious Recipes from My Italian-American Childhood and Beyond” by Valerie Bertinelli © Rodale 2012. Provided courtesy of Valerie Bertinelli. All rights reserved.
